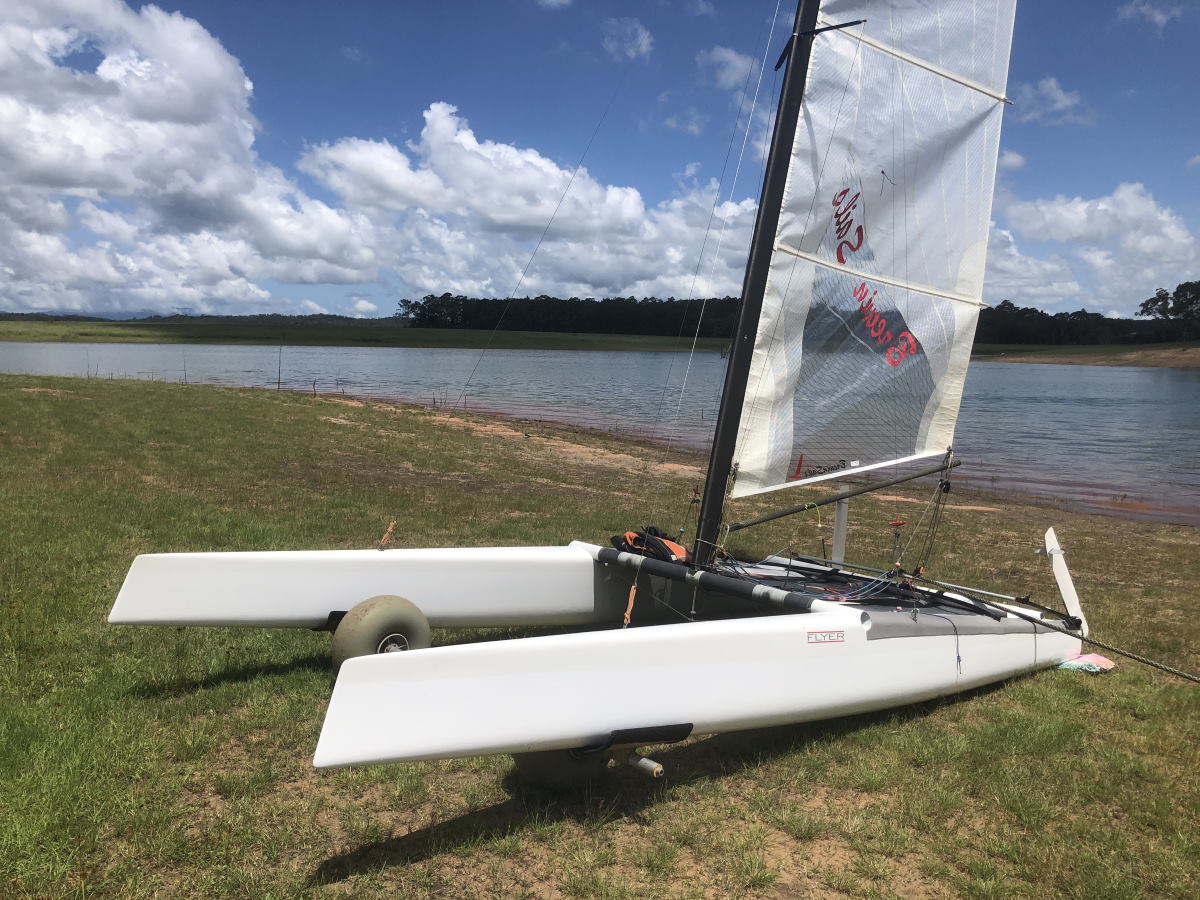
A Class catamaran – rigging
An A class catamaran has:
- Mast rotation
- Outhaul
- Downhaul
- Mainsheet
Mast rotation
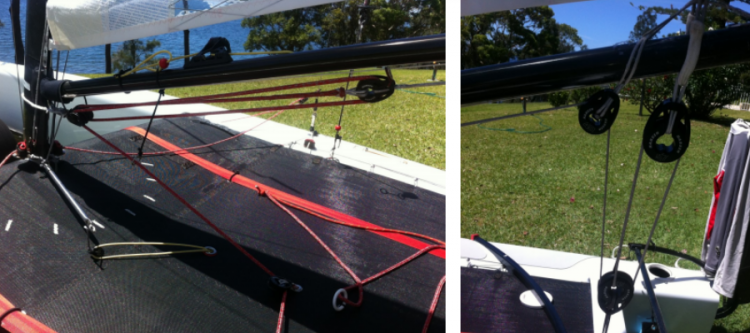
There is a 30cm long horizontal stainless steel ‘arm’ on the bottom of the mast that has a rope connected underneath the trampoline cleated on top of each hull. The idea is to restrict the mast from over rotating when sailing upwind.
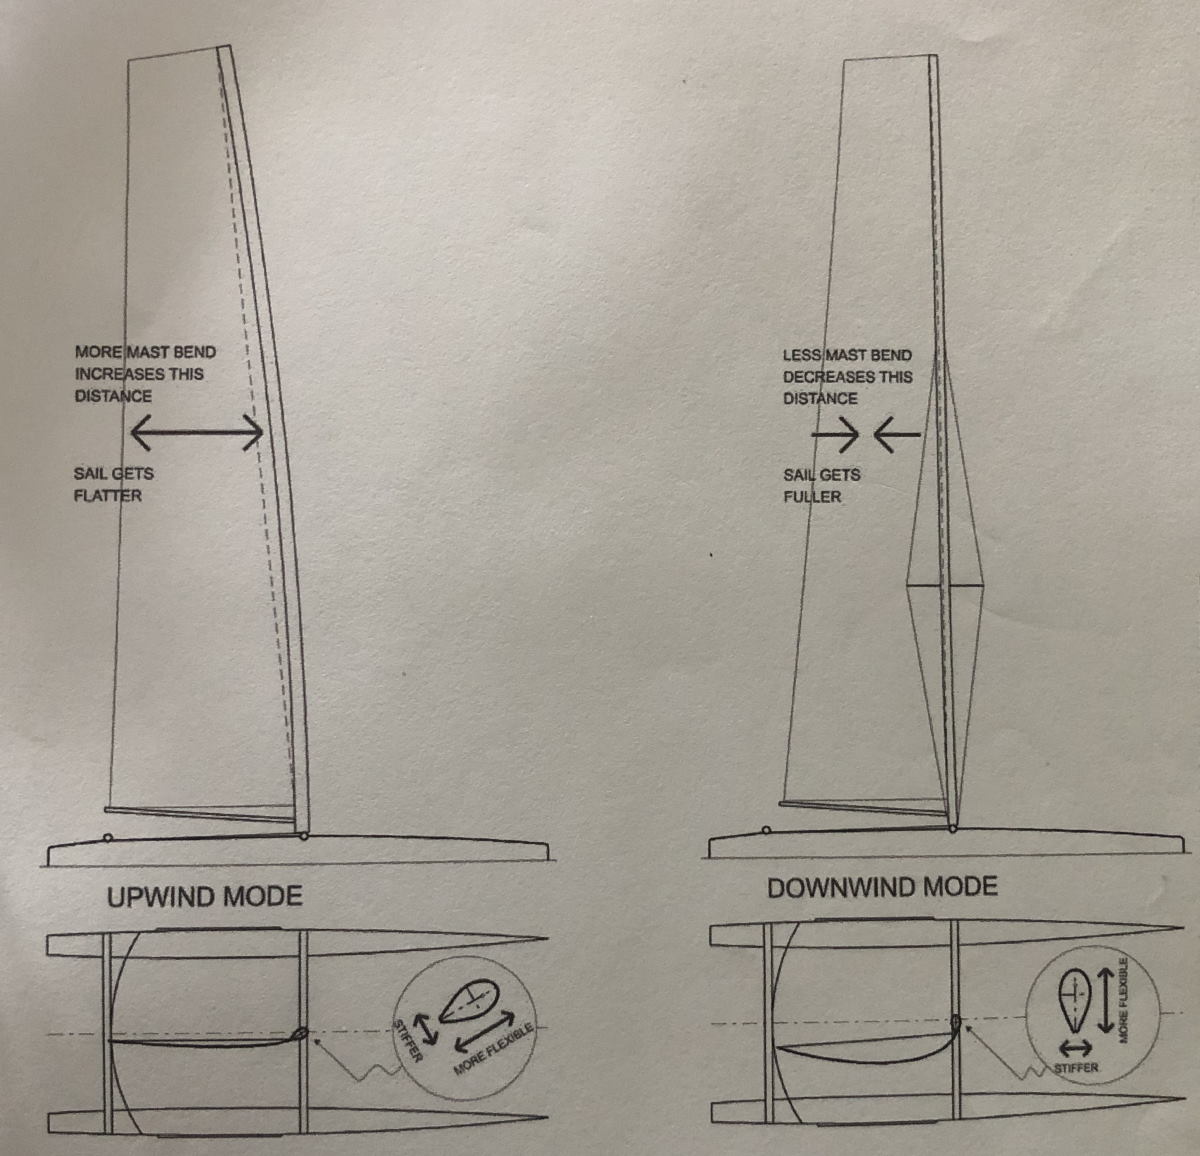
When sailing downwind you leave the rope that restricts mast rotation uncleated as you want the mast over rotated to create more belly in the sail:
Outhaul
Harken outhaul system: https://www.harken.com.au/content.aspx?id=3910
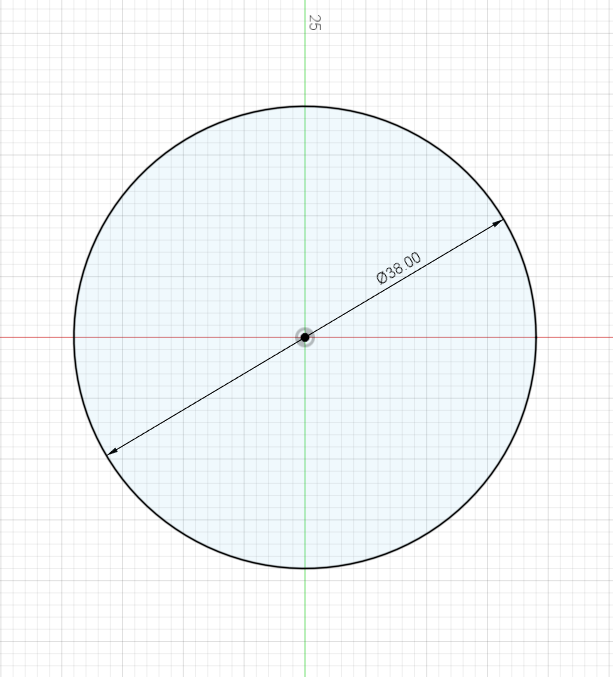
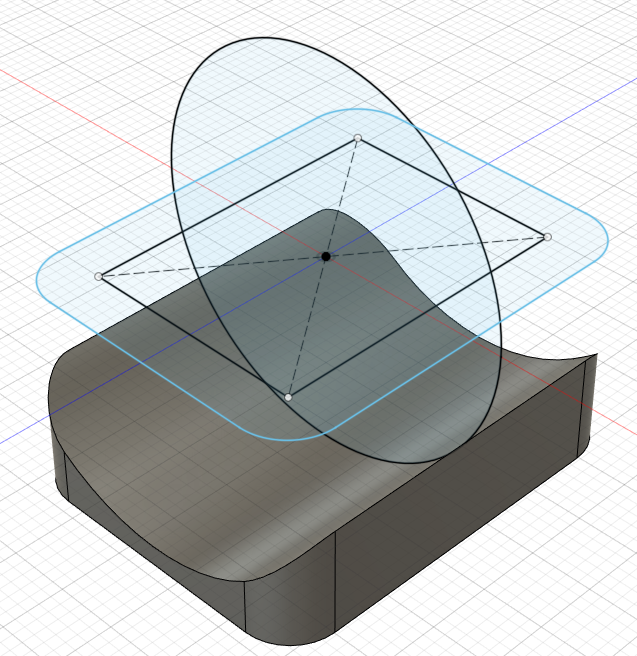
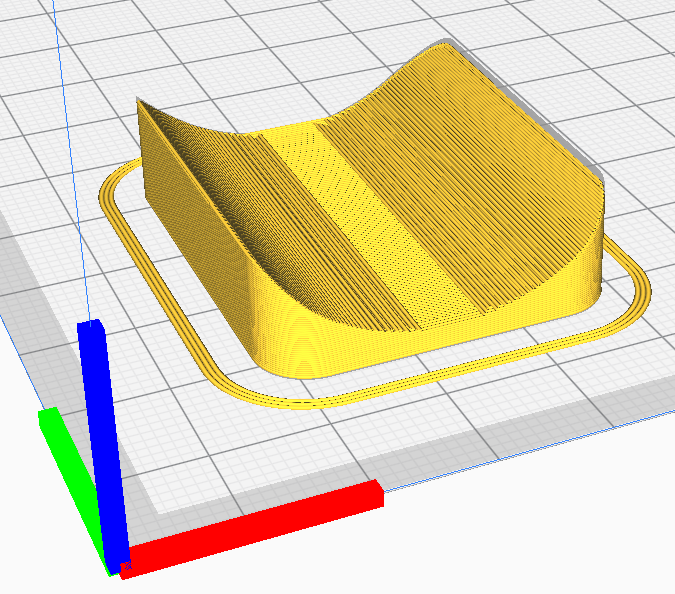
My 38mm diameter boom needed a mounting plate for a small block. I decided to design and 3D print one:
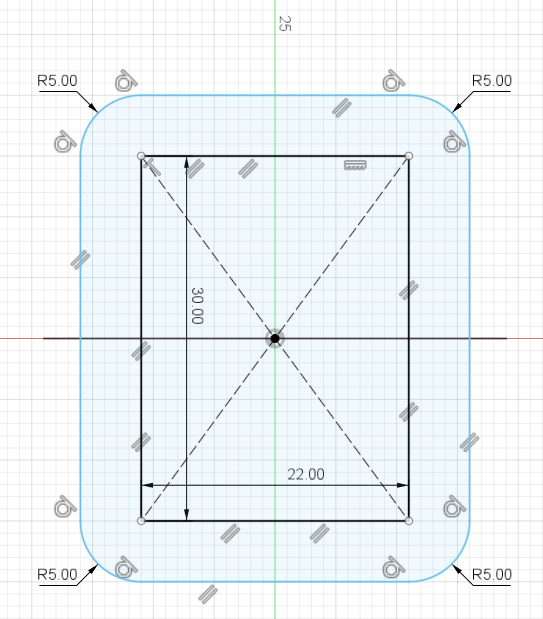
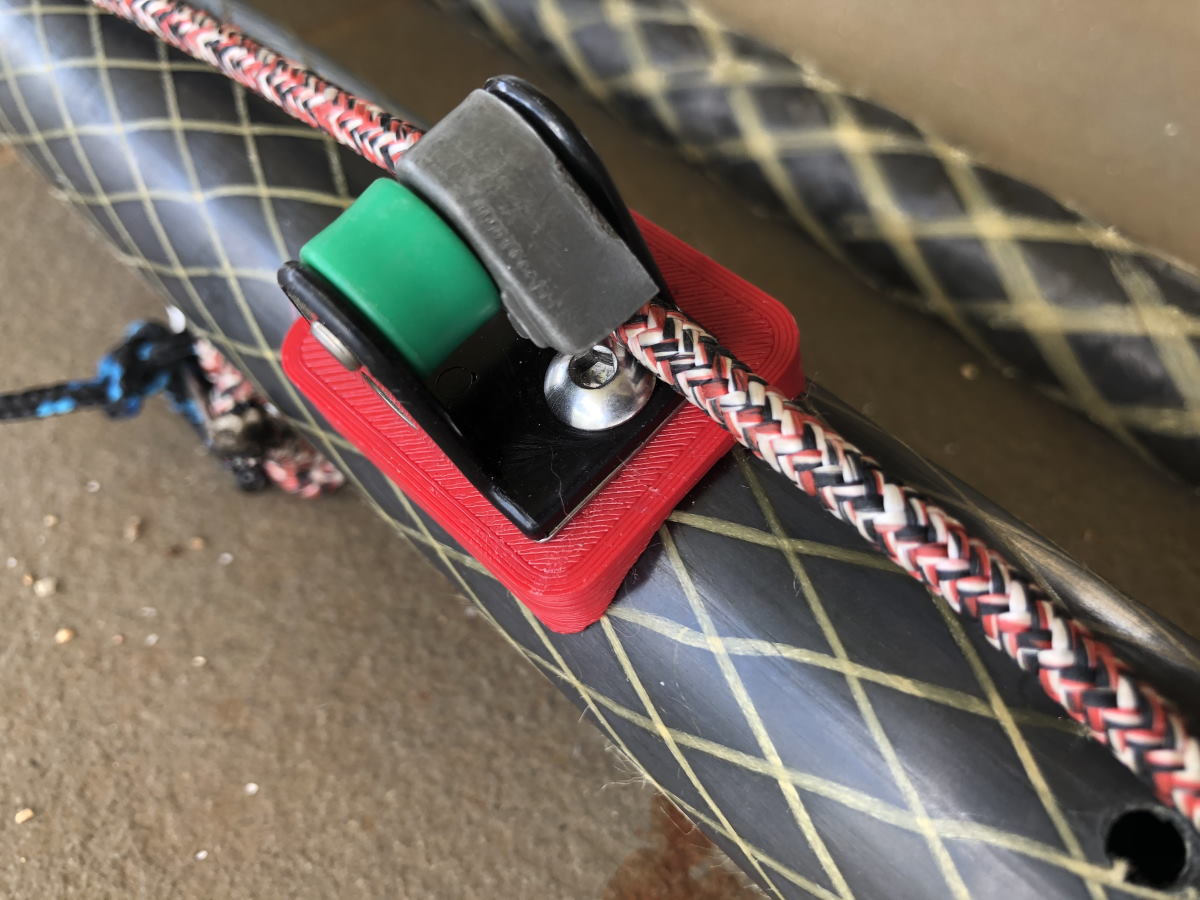
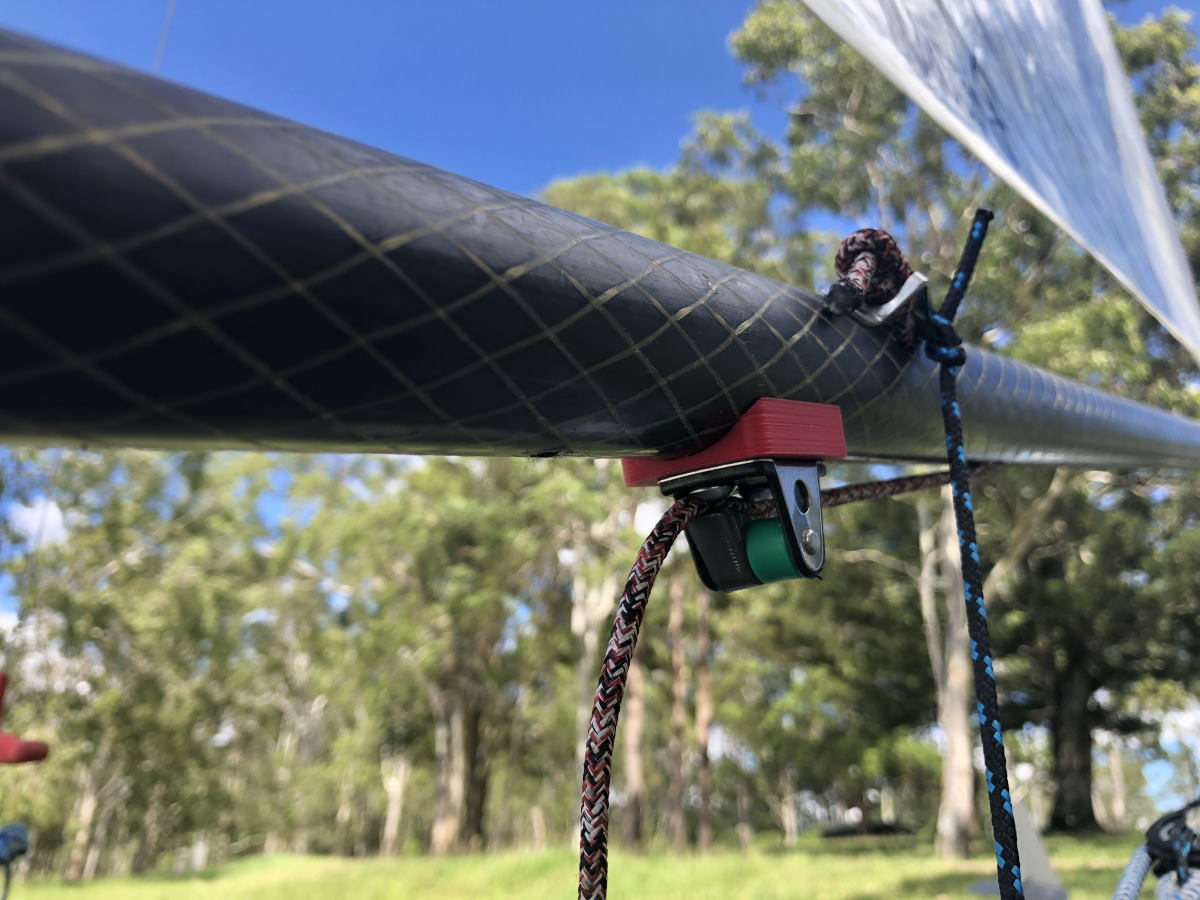
There is a small block inside the boom for a 2:1 ratio on the outhaul.
Downhaul
No changes were needed. A single continuous rope comes out of each side of the mast and is secured using a pivot cam cleat on either side. The downhaul connects to the bottom of the sail through a small block and then hooks onto the bottom of the mast for a 2:1 ratio force lever.
Mainsheet
We are using the Harken – A Class – 2015 Cascade mainsheet system. Compared to a traditional 6:1 ratio mainsheet system with two 3 pulley blocks the cascade mainsheet system has a 3:1 ratio horizontal mainsheet section coupled with a 3:1 ratio vertical mainsheet section at the end of the boom.
Traditional 6:1 ratio mainsheet
Tip: it is always a good idea to purchase blocks with a becket (anchor point), even if not directly needed.
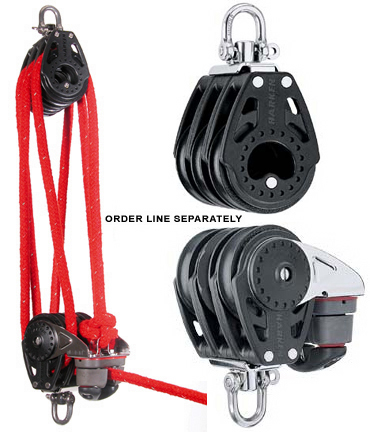
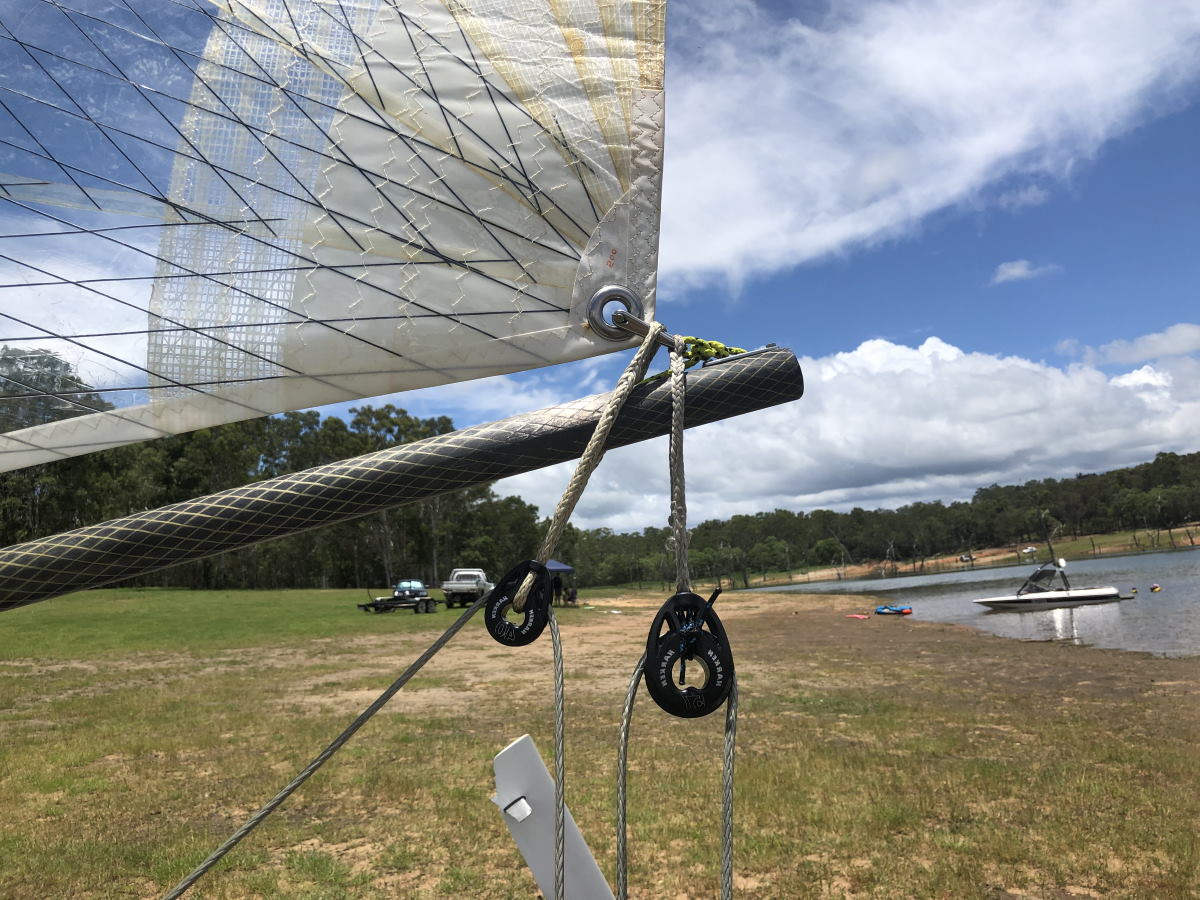
Harken – A Class – 2015 Cascade mainsheet system.
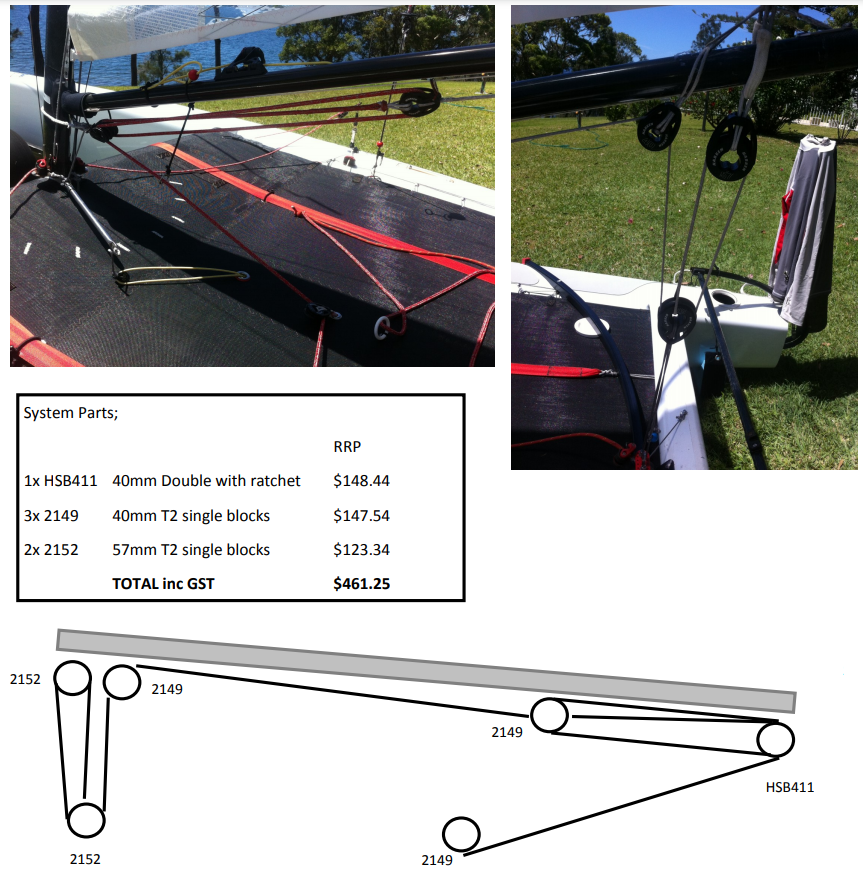
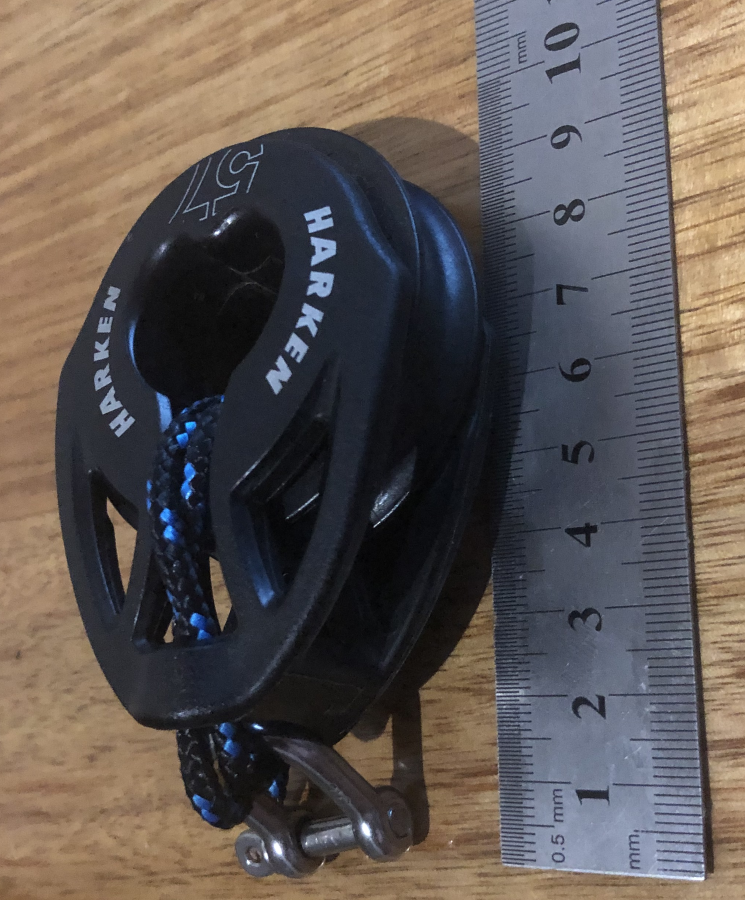
This is the 2152 at the end of the boom. It contains the shackle connecting the outhaul to the clew of the sail. The boom moves freely in between the dyneema rope:
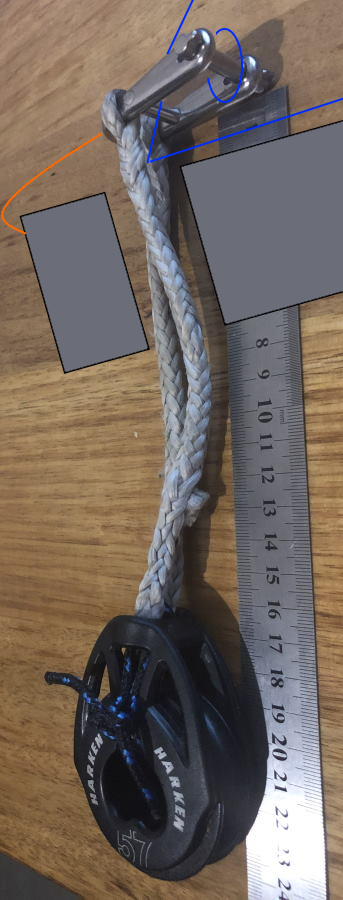
This is the second 2152 that bolts onto the metal hoop bracket of the traveller:
This is the 2149 closest to the two 2152 blocks. It connects to the same outhaul shackle as mentioned previously. Again, the boom slides freely in between the dyneema rope:
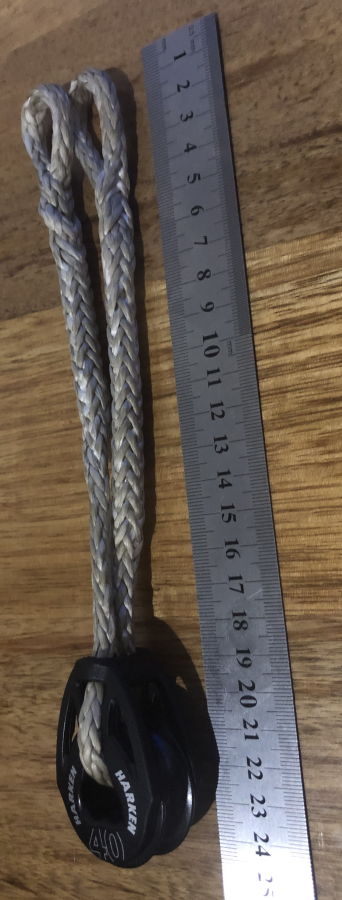
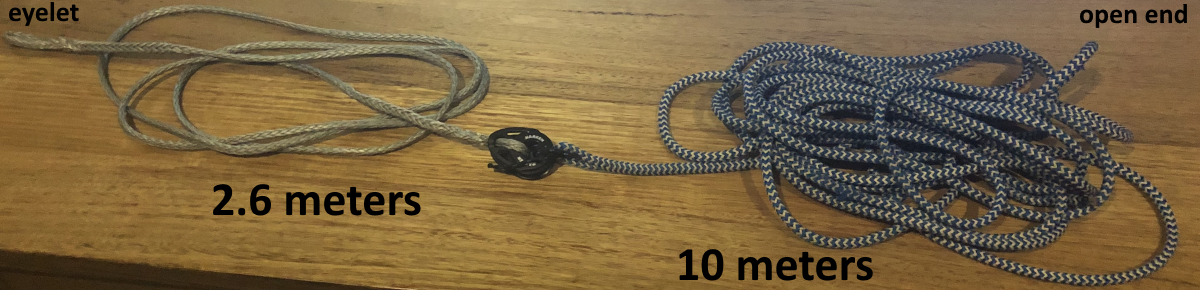
This is the mainsheet itself including the 2149 that slides along the middle of the boom. The 6mm diameter 2.6 meters dyneema ending in a small eye feeds through the blocks mentioned earlier. The 8mm diameter 10 meters of blue/white rope goes forward to the mast. The roller of the 2149 block should face forward towards the mast:
Note: buy 3 meters of 6mm dyneema to allow for eye splicing.
This is the HSB411 at the gooseneck of the mast. One rope around the mast, one rope around the boom (and a short bit of rope to pull it down – not shown):

The blue/white rope feeds through the HSB411, goes back to where it came from, feeds through again and then goes to the trampoline.
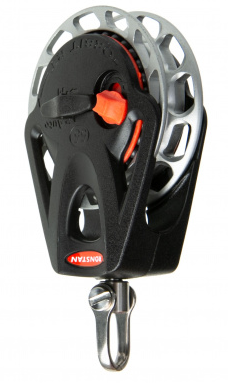
And finally the 2149 located on the trampoline. Ignore the metal ring – not used.

UPDATE: I have since replaced this 2149 block with a ratcheting block (Ronstan Orbit ratchet block). Also, the ring has been replaced with a small block.
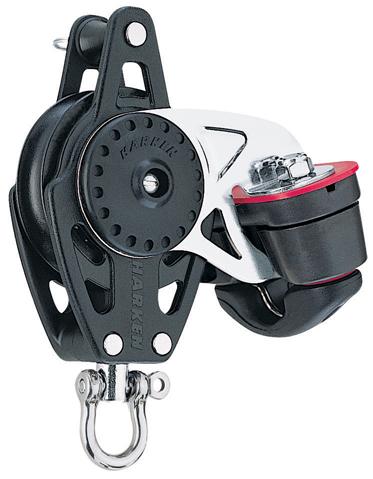
UPDATE: I am getting better at sailing my A class catamaran and a 6:1 ratio mainsheet cuts into my hand a lot. The ratio is not really a problem, but I would really like to be able to cleat / uncleat the mainsheet when sailing upwind. So I upgraded to a single Harken 40mm Carbo Block with Cam Cleat & Becket HK2646:

I use the surplus tail from the downhaul rope to keep the double block pulled down.
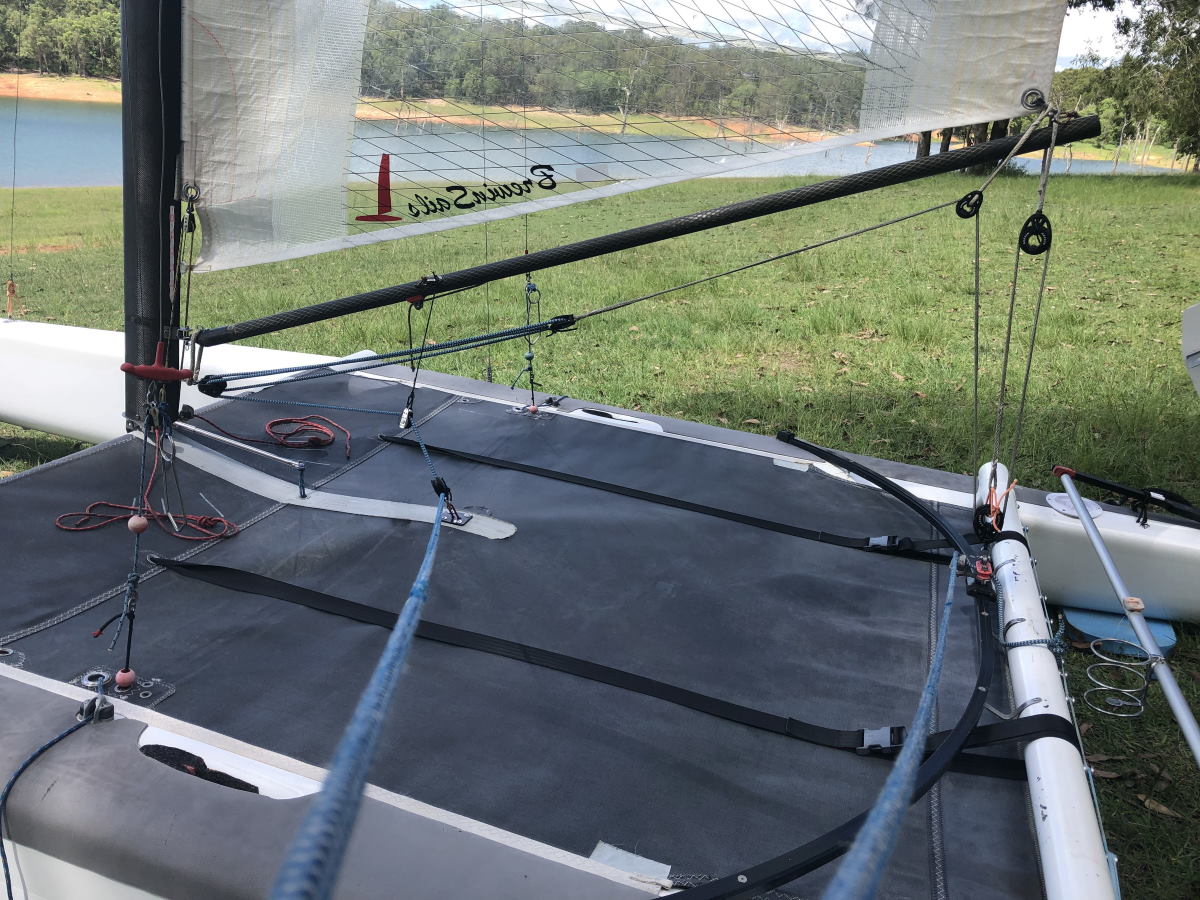
The mainsheet feeds into the traveller and is tied around the center of the rear beam in between two stainless steel ‘Tonneau Cover’ buttons for a continuous loop.
Note also the small block hanging from the boom to help keep mainsheet better aligned with blocks.
Carrick knot
These Harken blocks do not use metal pivots / shackles but instead have rope spliced directly onto the block or use short bits of tie-off rope instead. I use two loops of 3mm diameter polyester rope (black/blue) for this purpose (comes on a 20m mini spool). The knot I use to tie the ends together is a Carrick knot.
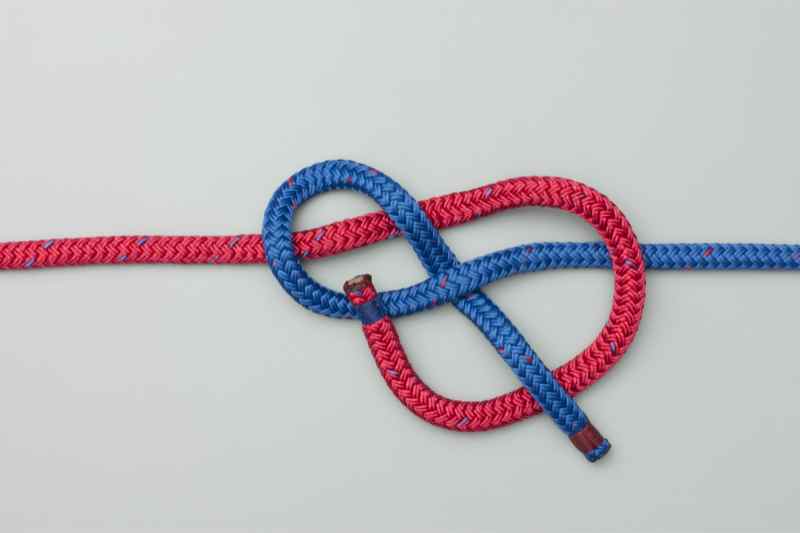
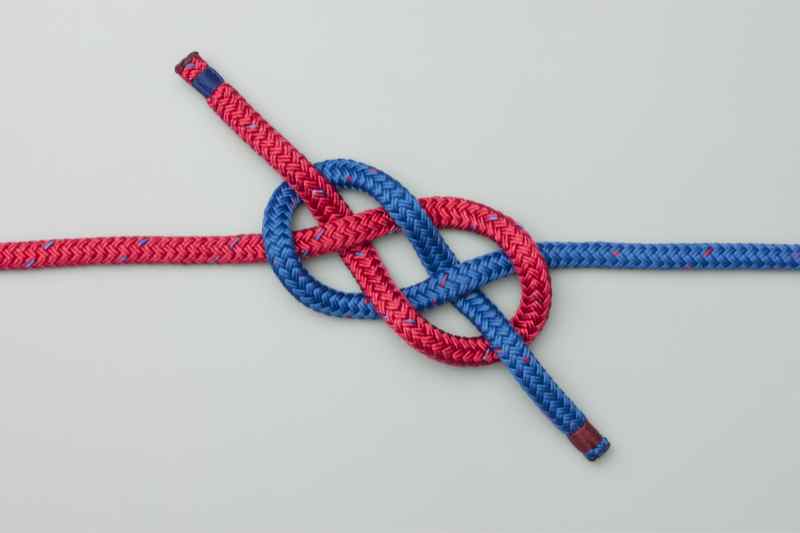
Update: you can also just use a double knot (not granny knot).
Splicing dyneema
This is how a basic Brummel eye splice is constructed:
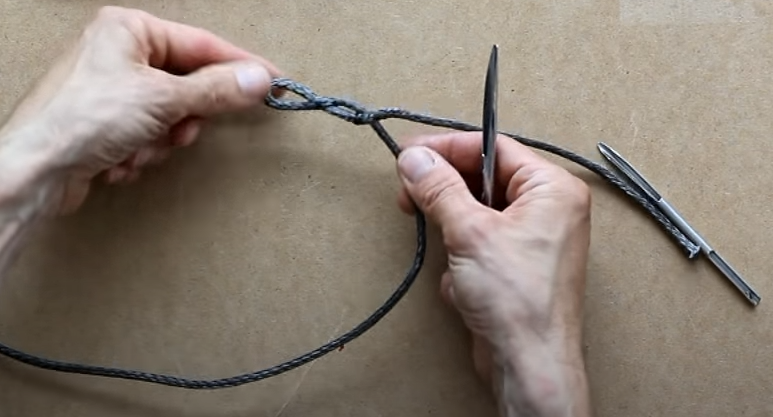
This is the easy part; feeding / hiding the tail inside the core is the difficult part.
Brand new Dyneema rope is coated in wax which makes it stiff and smooth, This helps with splicing. Instead of “splicing fids” and a “D splicer tool” I simply use a ballpoint pen. Just keep the clear plastic outside and cut it in half.
I use some heatshrink tape to connect the rope to the end of the ballpoint pen and after some practise I was able to perform proper Brummel eye splices using this instruction video:
If I have to feed the eye loop through the rope I use a cable-tie tied to the eye loop to make life easier. If the other end of the rope is open still, you can perform a Brummel splice without having to feed the eye loop through the rope. This also allows you to braid the rope directly onto a block.
Feeding the tail through the core of the rope is a bit difficult if you have not done this before. Using new waxed rope is best for a first attempt. A ballpoint pen cut in half, some heatshrink tubing and bunching up the outer rope is all it takes. Try to get a clean pass through the outer rope without catching any loose fine fibers of rope. It is best to push rather than pull when feeding the tail through the core.
Trapeze
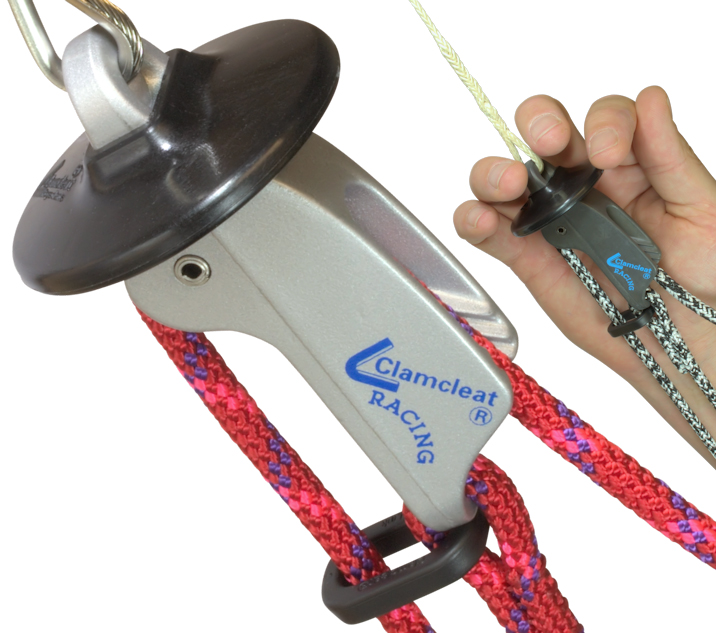
The popular Hobie16 trapeze setup:
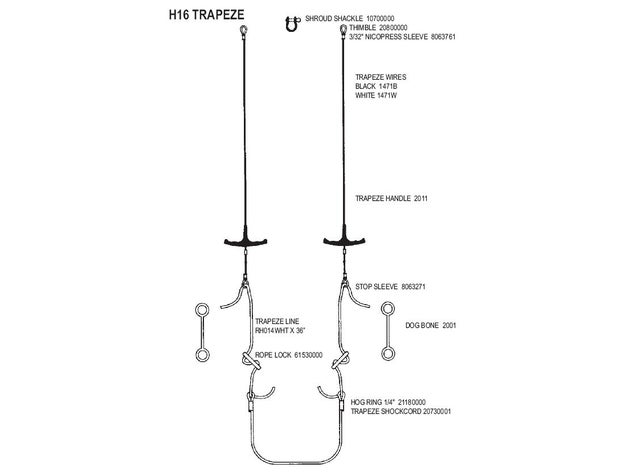
Stainless steel cable from the mast to a handle and pulley. A rope is connected to a dogbone on one end. On the other side of the pulley we find an adjustable nylon rope lock as stopper to adjust the height of the trapeze. The tail of the rope is then semi permanently attached to a shock cord using two sister clips.
The shock cord is often zig-zagged underneath the trampoline.
The adjustable Nacra trapeze setup:
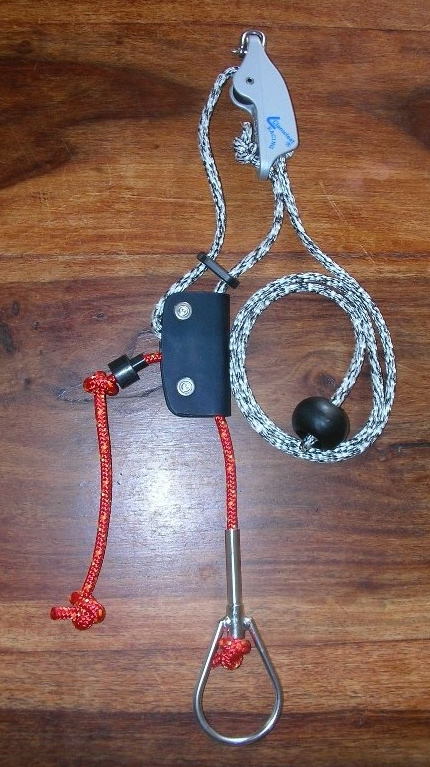
Sleeved dogbone. Nacra trapeze block. Cam cleat. Barrel bead end stopper. The small black clip on the rope is to ensure the cam cleat stays vertical when you pull the cord: The tail of the red rope would normally be connected to the shock cord running underneath the trampoline.
On my A class I want something that is simple, reliable and (on beforehand) adjustable.
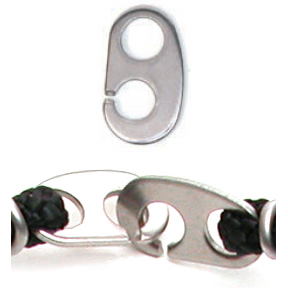
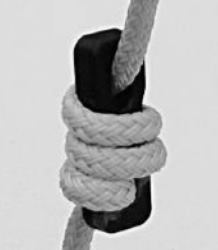
Let’s have a look at the nylon rope lock:
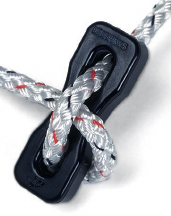
This can be adjusted on shore and even on the water when sailing, just not on-the-fly, which is fine.
I would however use a different knot:
If I wanted I could even use a Ronstan barrel bead and a stopper knot (not adjustable):

There is a stopper knot that you are supposed to use with barrel beads called the barrel knot:
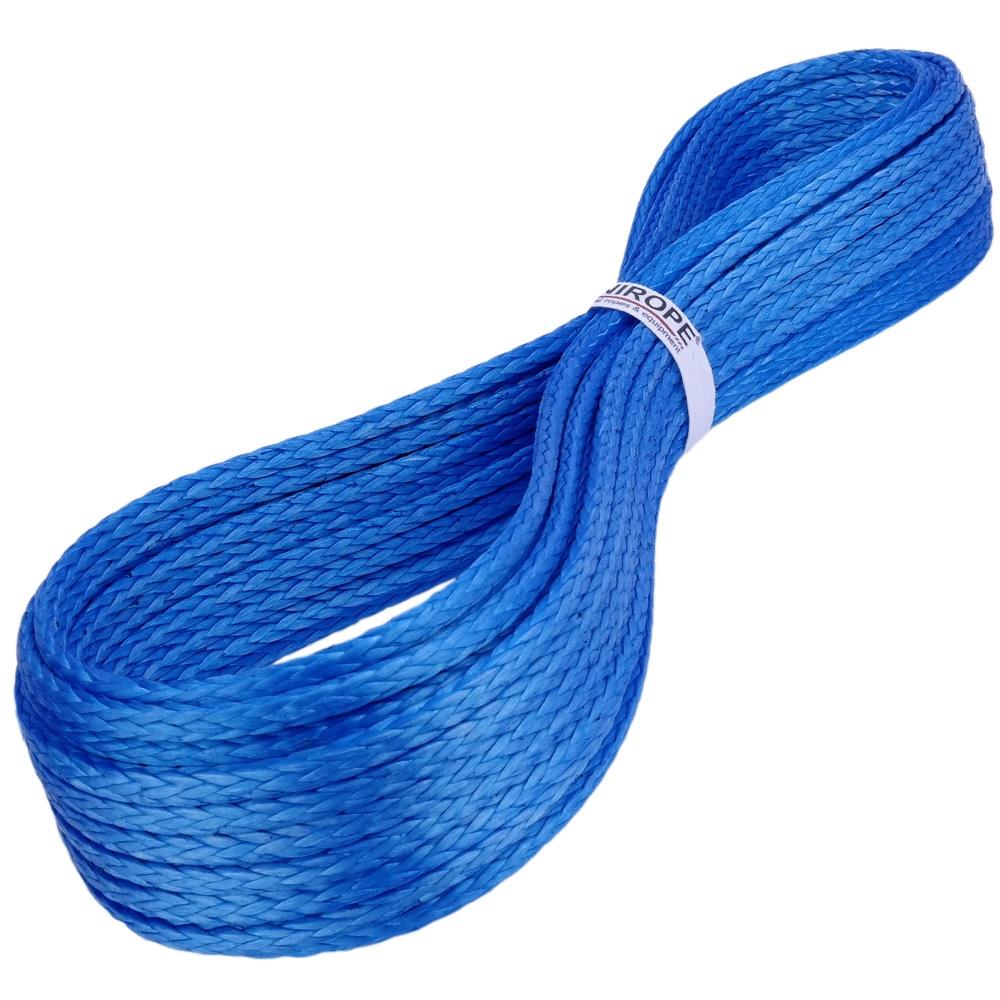
I have ordered 10 meters of 3MM Dyneema (blue). SK75 can hold 200kg+ and SK 78 even more. I could replace the stainless wire going up the mast with dyneema, but what I have currently suits me just fine.
I will tie one end to a Ronstan sister clip using an Anchor knot. The other end is tied to the dogbone. Do not use a Bowline or Half hitches. Use an Anchor knot for this. There is no need to splice here but you can if you want. 3mm Dyneema has a small diameter – I was hesitant to put in an eye splice.