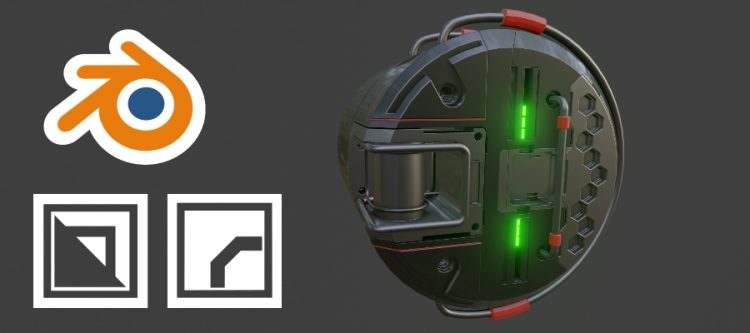
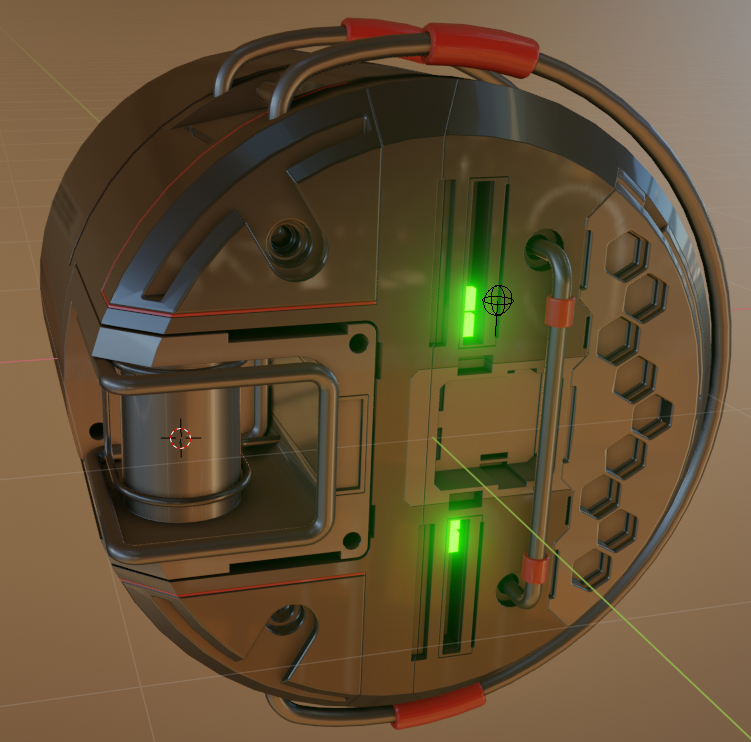
Cylinoid V2
HardOps (HOps)
https://blendermarket.com/products/hardopsofficial
HardOps Documentation
https://hardops-manual.readthedocs.io/en/latest/getstarted/
Thank you masterxeon1001
https://www.youtube.com/user/masterxeon1001/videos
Cylinoid V2
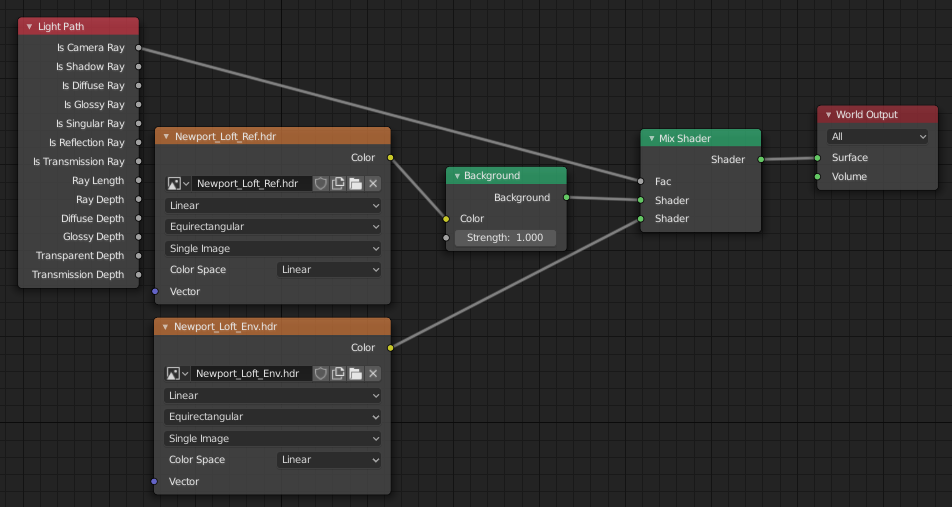
HDR images courtesy HDRlabs
http://www.hdrlabs.com/sibl/archive/

1920x1080p 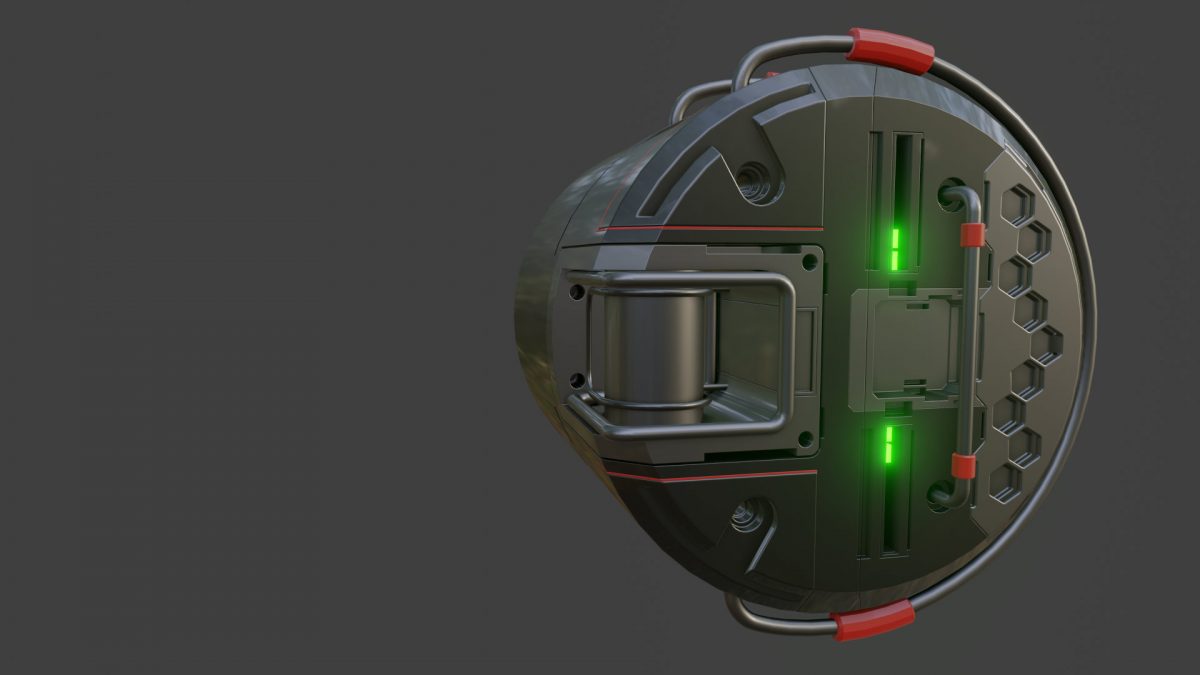

Hotkeys
[CTRL-~] – HardOps helper
[Q] – HardOps
[ALT-W] – Boxcutter / HardOps toggle
[CTRL-RMB] – Adjust HardOps boolean operation
Hold [CTRL] to see light blue control dots appear.
Hold [CTRL] and select a control dot using [RMB].
Repeat until you find the HardOps modifier you want to edit.
[CTRL][SHIFT][B] Hops Bevel Helper
Edits last HardOps Bevel modifier on the modifier stack
Needs a [Q] > Add Modifier > Bevel
[ALT-X] – Hops mirror (modifier)
Tip: Shift clicking bisect will turn the symbol yellow and will change the tool to bisect only.
If you use this on a cube, you end up with a ‘shoe box’.
If you use this on 3 axis you end up with a ‘corner bracket’.
Tip: Hover over a spinner and change its value using [CTRL-MOUSESCROLL]
Cylinoid V2 quick help notes
Add a plane
[ALT-X] Shift click bisect and click on negative X axis to keep that half.
[Q] > Add Modifier > Screw
[CTRL-RMB] Axis: Y
[TAB]
Select single vertex
[Q] > Add Modifier > Bevel
[1]
[MOUSESCROLL DOWN] to set Segments to 1
Width = .280
Profile = .50
[ALT-V] Viewport Options > Tick Wireframe to see edges overlay in viewport.
[Q] > Add Modifier > Decimate
[CTRL][SHIFT][B] HardOps Bevel Helper
Click ‘/’ button to divide Bevel by 2.
[SHIFT-A] Add a cube
Make it slightly larger
[TAB] Add a horizontal loop cut
Select cube. Shift select cylinoid last.
[Q] > Difference.
Hide the cube [H].
The loop cut should be imprinted on the circular face of the cylinoid.
This is a clever way to add supporting loop cuts onto the face of the cylinoid non-destructively.
You can add edges early or late in the process through this helper boolean operation.
[!] If you are having problems:
– move the cube closer.
– make sure the decimate operation sits above all boolean operations.
– disable the decimate operations to see if this is causing the problem.
[Q] > Add Modifier > [CTRL] + Bevel
This will add a 30 degrees small bevel to round sharp edges.
This operations will sit as the last operation in the stack and will affect ll Boxcutter booleans above.
Add your first Boxcutter cut (big bevelled opening on left hand side)
[ALT-X] Bisect vertical mirror so top and bottom half are always symmetrical.
This operation will be kept as one of the last operations (before the Bevel) in the stack and will affect all Boxcutter booleans above.
Now you can simply create all the cuts using Boxcutter. The only cutters used are these:
Cutting [X] – Cut into object (“difference”). X toggles between cutting and slicing.
Slicing [X] – Similar to Cut, however the cut part will be removed as a separate object (“intersect”).
This is useful if you want to assign certain parts a different material.
Joining [J] – Join cutter to object. Grows the object.
[T] Solidify – Instead of cutting the ‘fill’, this will only cut the ‘stroke’. Move mouse to adjust thickness.
Keep an eye on normals. Flip if necessary.
Handles
Plane
[Q] Bevel
[Q] Operations > Smart Apply [CTRL+LMB] (Convert to curve and expand)
[SHIF-D] Duplicate
Delete all vertices except for 1 cylinder where you want red hand grip.
Select end cap edges only.
Extrude along normals (outward).
Select 1 outer ring end cap.
Extrude and slide sideways.
Merge vertices to 2nd outer ring end cap to close the shape.
Add a bevel to outer ring end caps in edit mode.
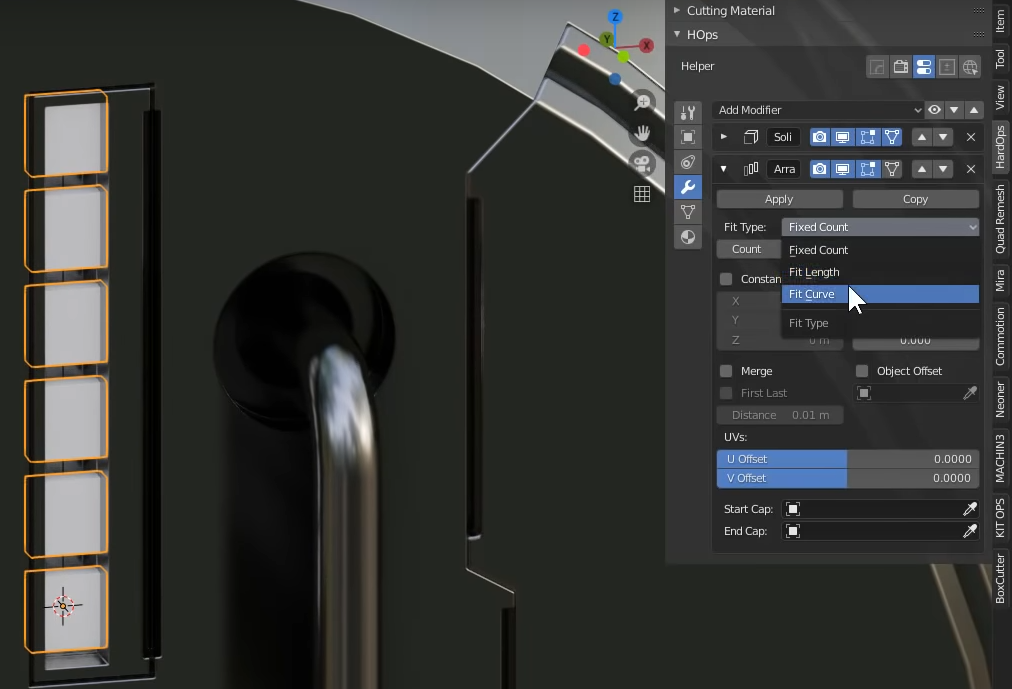
Audio gauge
Small cube
Emitter material. Enable Bloom. Bright green. Amp up the intensity.
Use Array in Z direction with ‘Count = number’ changed to ‘Fit curve’.
To animate the curve:
[CTRL-H] to add a hook to a new object.
Change empty to a sphere.
Move sphere in Z direction to see sphere affect curve and array count.
Set 2 keyframes for Z position at random time positions.
Graph Editor > Add Noise modifier
Graph Editor > Limits
Hexagon pattern
Boxcutter circle cut
[TAB]
[CTRL-D] for Boxcutter helper
Press ‘6’ to change circle into hexagon
Hold SHIFT when finalizing cut to keep cutter visible (or make visible in Outliner)
[TAB] to enter edit mode.
[A] to select all.
[SHIFT-D] to duplicate.
[G] + [SHIFT-Y] to move in XZ plane.
Tip: Use [SHIFT-L] to quick select all hexagons if you want to move multiple in one go (shift select linked verts/edges/poly)
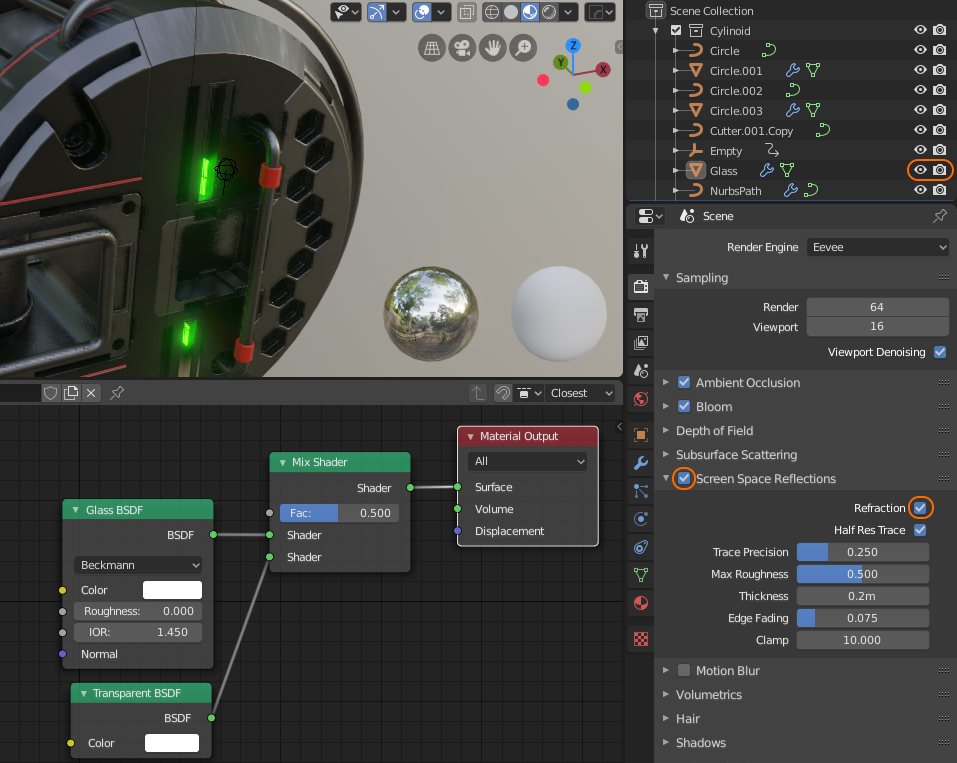
Glass
Add a cube
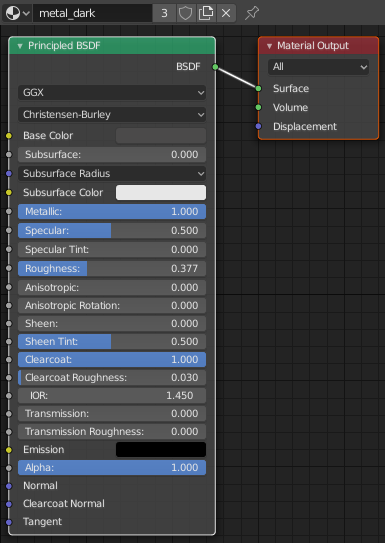
Assign Glass material
For transparency to work, you need to enable Refraction (and unhide the cube if hidden).
Modifier stack sort order
HardOps Screw
Bevel (to taper the cylinder: width:0.14m segments:1 profile:0.50 VertexGroup: HardOps)
Decimate
Booleans (Boxcutter)
Bevel (to round sharp edges: width:0.002m segments:3 profile:-0.70)
HardOps Mirror
Weighted Normals
Tip: It works best to model with the object origin in [0,0,0]. When you create slices you end up with separate objects. If you bisect mirror acros its own axis you will need to set the object origin to volume (center). If you then want to mirror these objects across another object (with its origin in [0,0,0] make sure a ‘Mirror Object’ is selected. This will result in Mirror using the Mirror Object’s origin rather than the origin of the object itself.