
Blender textures and materials + FBX export for Unity
Blender comes with a built in Blender Render engine and a Cycles Render engine. In this example the selected render engine is irrelevant.
Blender comes with an optional Nodes material editor.
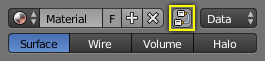
Select this material as the main node in the Nodes editor.
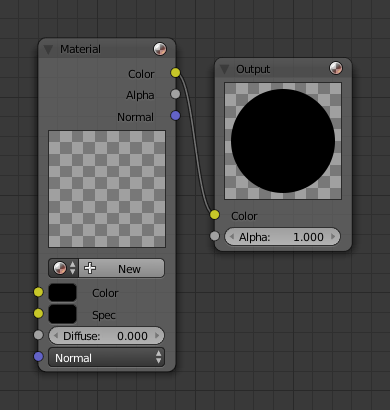
Nodes editor
In this example we will not use the optional Nodes editor.
Lighting
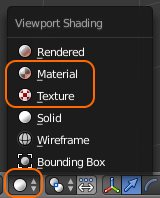
In Blender you can select 3D view Materials display mode to see the effects of materials (diffuse, specularity, opacity, etc,). You can use Texture mode to simply slap a picture on a set of polygons.
For materials to be visible you will need to have lights in your scene i.e. Hemi light or at the very least have basic Environment Lighting enabled.
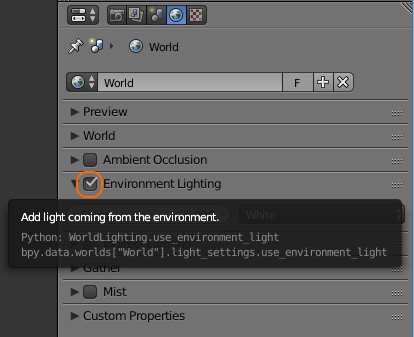
To avoid any unpleasant surprises, please ensure all lights in your scene are deleted and Environment Lighting is active.
Common Problem #1
If you do have lights in your scene make sure to disable Specular when in 3D view Materials display mode. This is because imported materials only contain image texture and no specular highlight information (default material = all white specular map = specular highlights on your entire model).
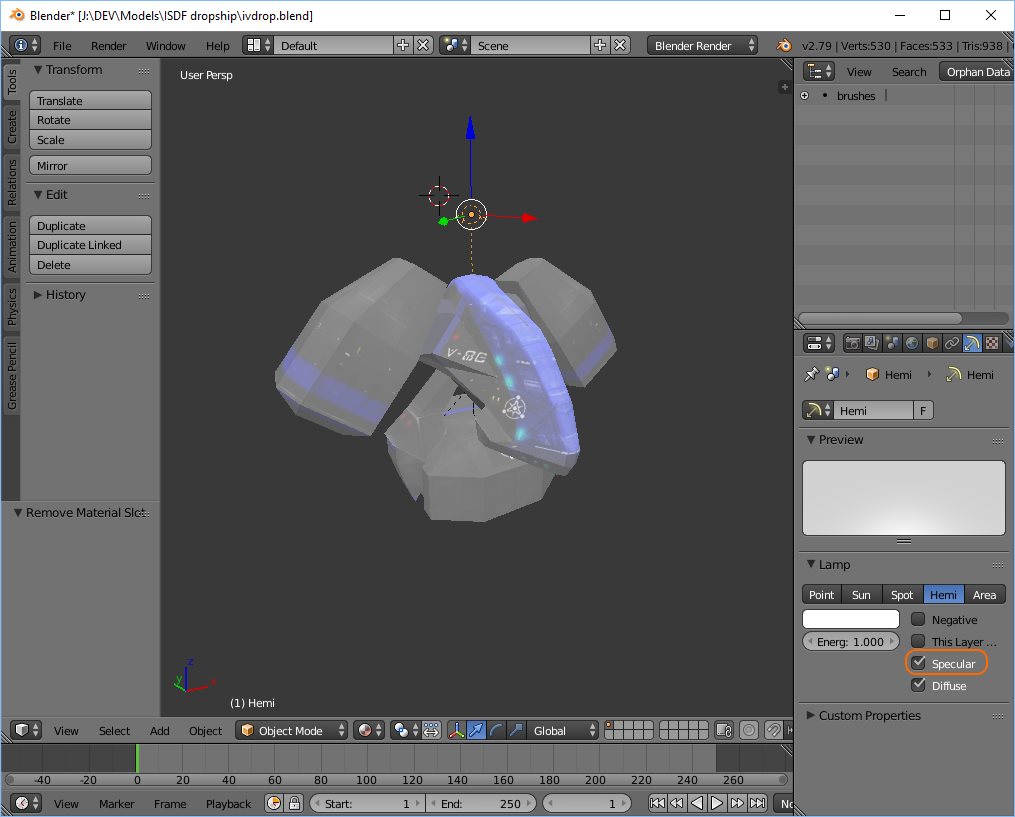
Common Problem #2
When in 3D view Texture display mode, lights will affect the viewport. For some reason, when you untick Render in Outliner the light will still affect your viewport. You cannot disable lights. Odd.
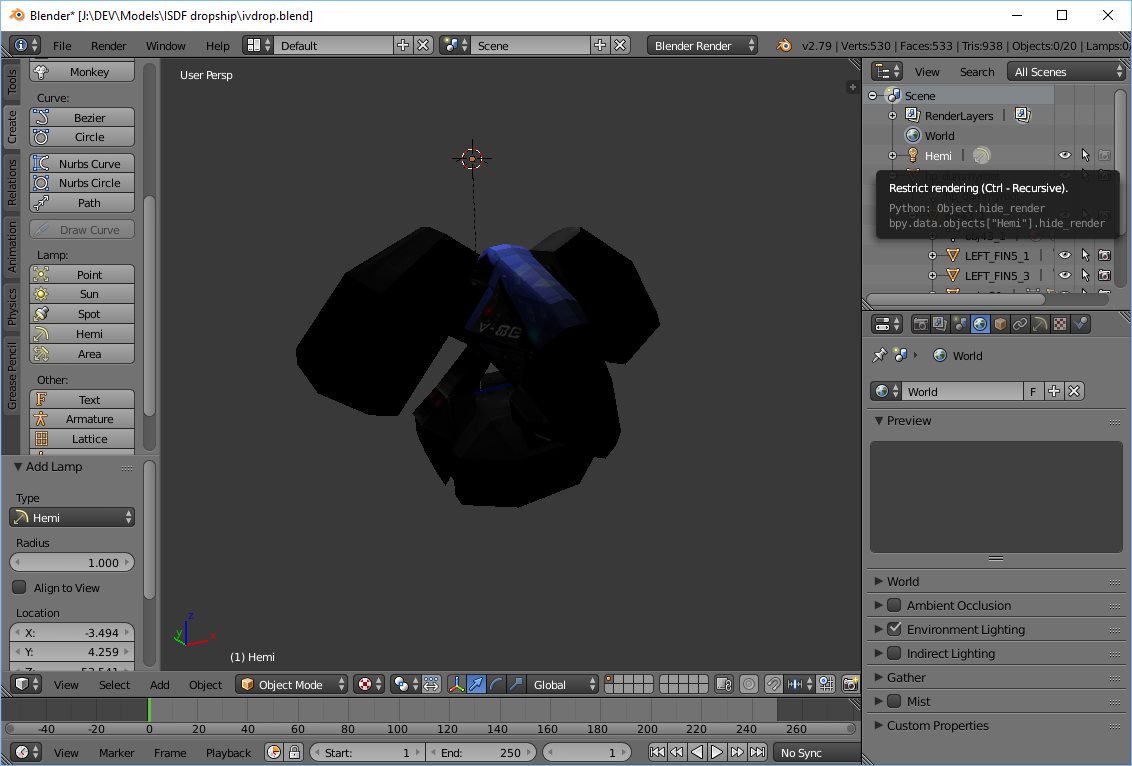
Solution
As said before, to avoid any unpleasant surprises, simply ensure all lights in your scene are deleted and Environment Lighting is active.
Blender UV/Image editor
UV editing is where you gift wrap an object and then unwrap the paper to lay it flat. It is about unwrapping a 3D object onto a 2D surface. For an imported model this has already been done – we simply need to inspect it. One of the first things to do when importing a model is inspect if the image textures map correctly to the mesh.
3D view Texture display mode
In the pictures below you can see how the UV/image editor works.
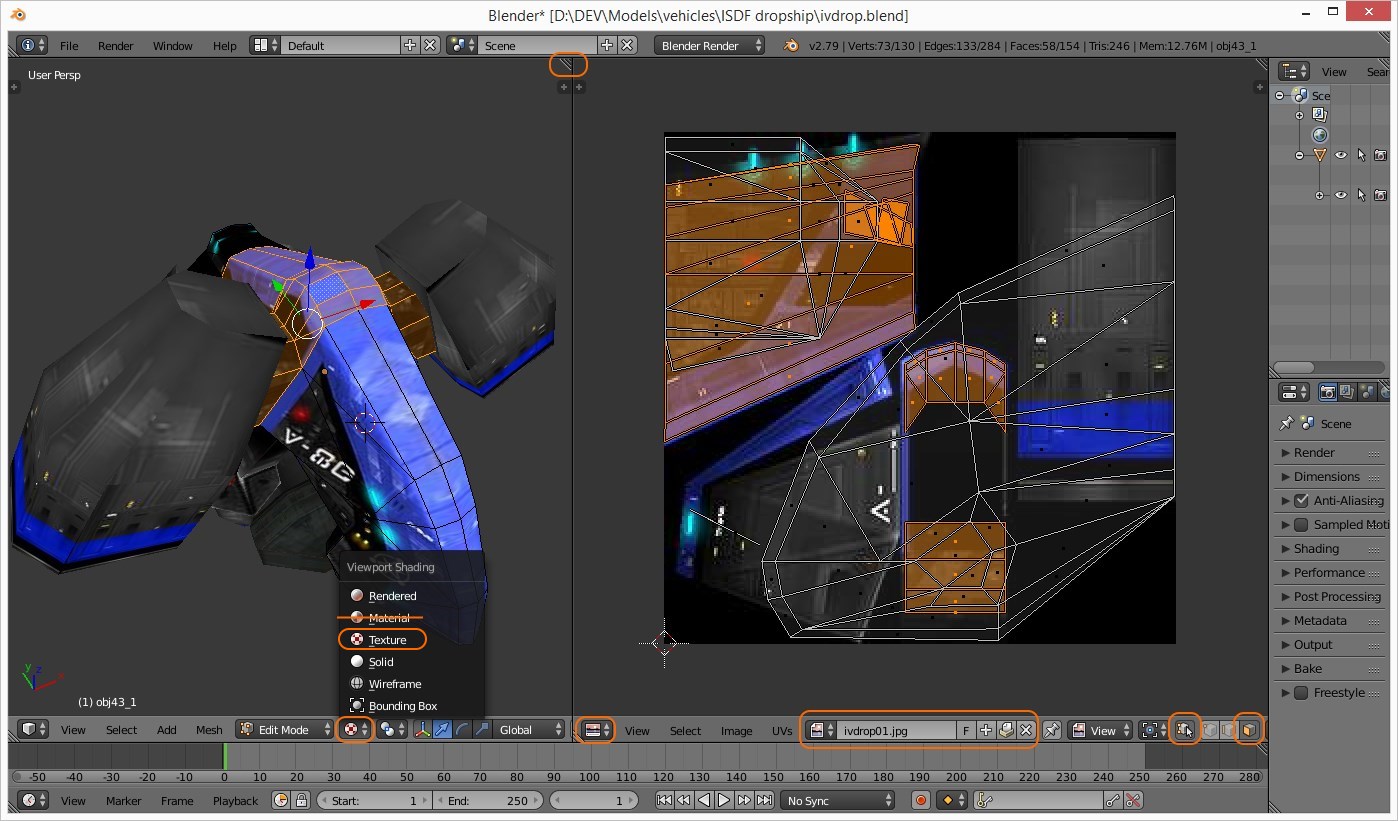
In a nutshell:
- Grab the top right corner of the 3D view and drag to the left to split the screen.
- You can grab the same corner and drag it slightly to the right to remove the split.
- You can grab and drag the divider line to move the split.
- For each screen, press T to toggle the Tool shelf and press N to toggle the Properties (= numeric control) shelf.
- In the lower left corner of the right hand side frame, select UV/image editor.
- In the UV/image editor, select polygon mode and make sure ‘keep 3D and UV layout in sync’ is ticked.
- In the 3D view you will need to select an object and press TAB to enter edit (also known as sub-object) mode.
You can now select polygons on your object in 3D view and they will show as selected in the UV/image editor.
Vice versa, you can now select polygons in the UV/Image editor and they will show as selected on your object in 3D view.
This is how the UV/Image editor works. To load images use the image new/open/delete buttons at the bottom of the UV/Image editor. Use the drop down list to select an image from the list.
Selection methods
There are a number of ways to select polygons in Blender:
Basic selection methods
- To select polygons you can use:
- RMB (select)
- SHIFT RMB (add to selection)
- B (box selection)
- UV editor > Select a polygon followed by CTRL-L (select linked polygons)
- 3D view > Select > Similar > Material
- Use Show All / Hide Unselected
Advanced selection methods
On a side note, in 3D view the following selection method is very useful for selecting connected edges, for example:
- RMB followed by CTRL-RMB (shortest path between two points)
- RMB followed by SHIFT-CTRL-RMB (grow existing selection with shortest path between two points)
Advanced selection methods are described in detail here:
https://docs.blender.org/manual/en/dev/modeling/meshes/selecting/advanced.html
Inspecting UV layout using UV/Image editor
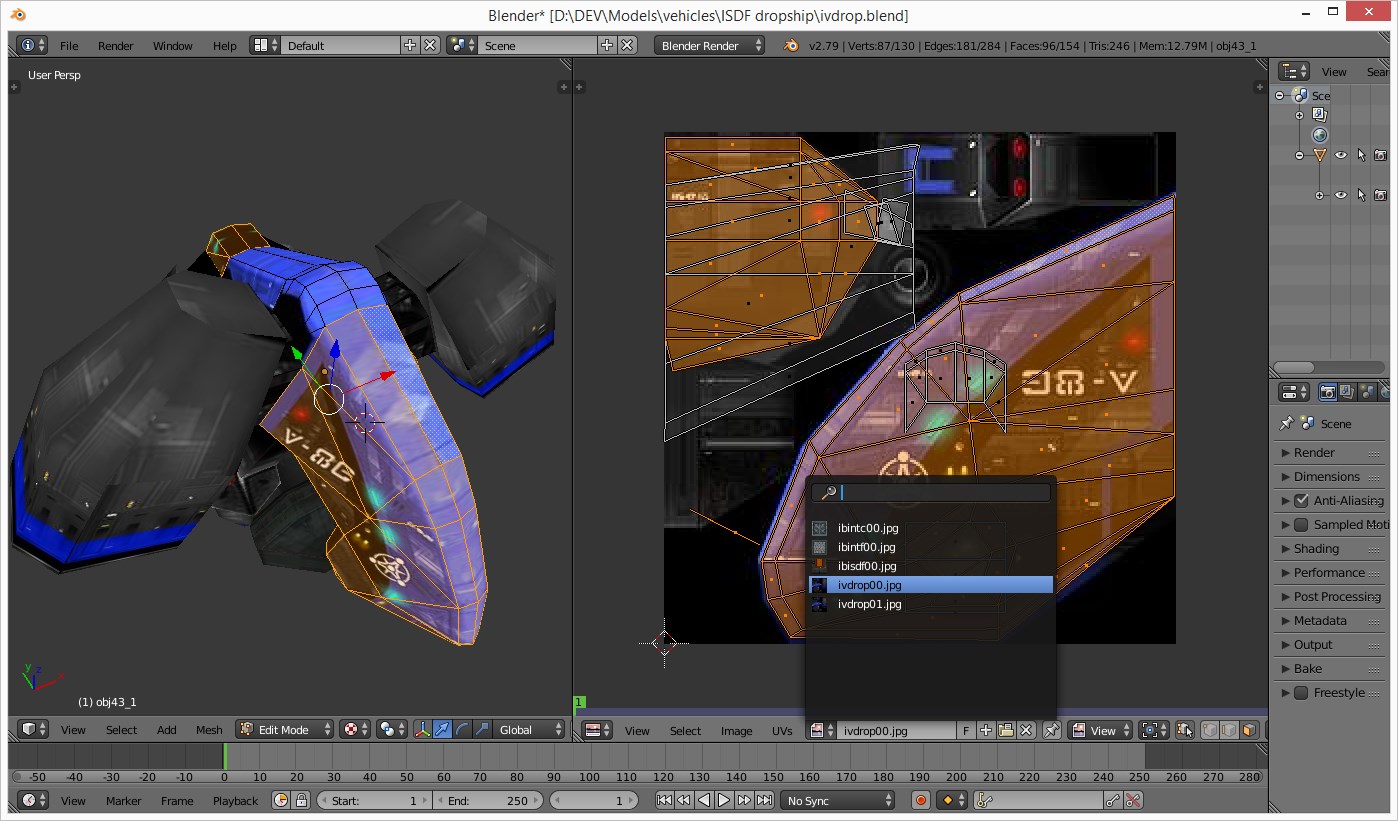
If we look at the pictures again, you can see that the polygons of the selected object are unwrapped using two different images. If you have a complex model and the texture image size is restricted i.e. 1024×1024 pixels this is not uncommon.
UVWunwrapping
You can redo the UVWunwrapping and use Blender algorithms to unwrap the 3D object to 2D space, but this is not recommended for imported models as the image textures match with the current UV layout.
If you are going to edit the UV layout and make minor changes, make sure ‘keep 3D and UV layout in sync’ is ticked. You can use G (move), R (rotate) and S (scale) to manipulate individual vertices, edges and polygons in 2D and 3D space simultaneously using a synced UV/image editor and 3D view side-by-side. Again, for imported models you generally do not want to edit the UV layout.
Using images in the UV/Image editor
[!] The image you have selected in the UV/image editor in edit mode is displayed in the UV/image editor as well as in 3D view when in Texture display mode.
To select a different image for part of your object shown in 3D view in Texture display mode, you will need to do the following:
- Select the object.
- TAB to enter edit mode [!]
- Select a polygon in 3D view and use Select > Similar > Material, or
- Select a polygon in the UV/image editor and press CTRL-L to expand the selection to all linked polygons.
- In the UV editor, select a different image from the pick list. The 3D view will now update and display the currently selected texture.
- TAB to exit edit mode.
You can completely and quickly texture an imported model in 3D View in Texture display mode without using Blender materials. However, to export objects successfully to a game engine, we will need to add materials.
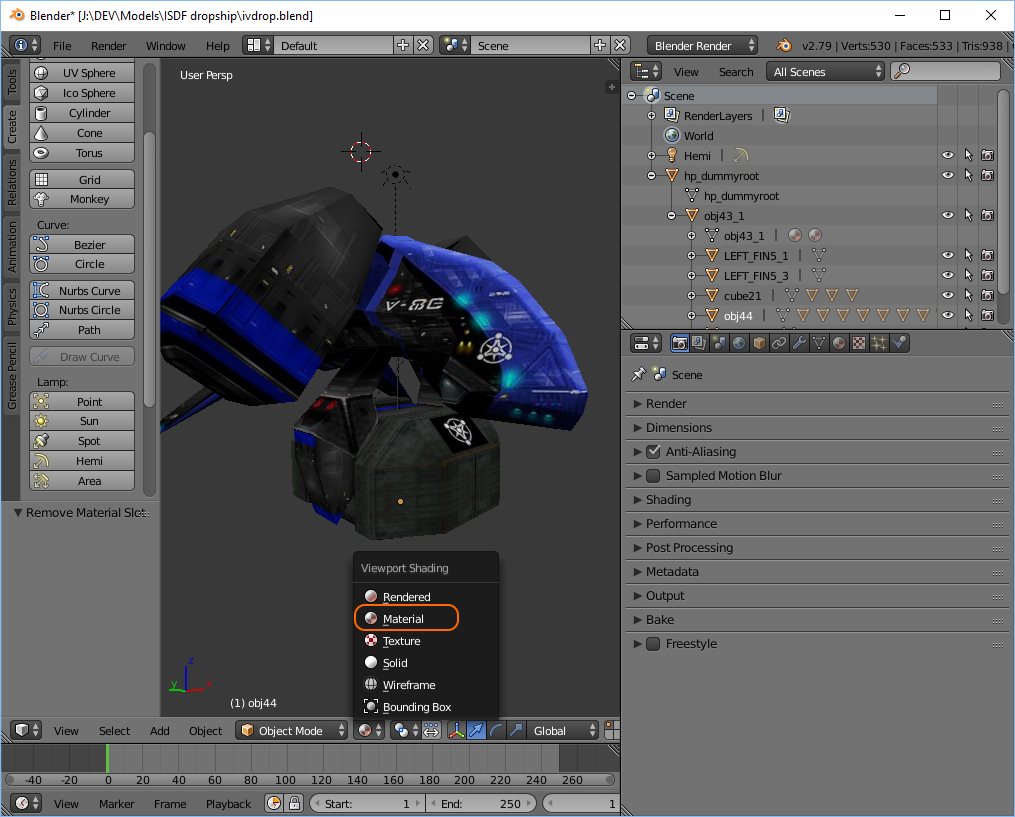
3D view Materials display mode
First we need to switch to 3D View Material display mode:
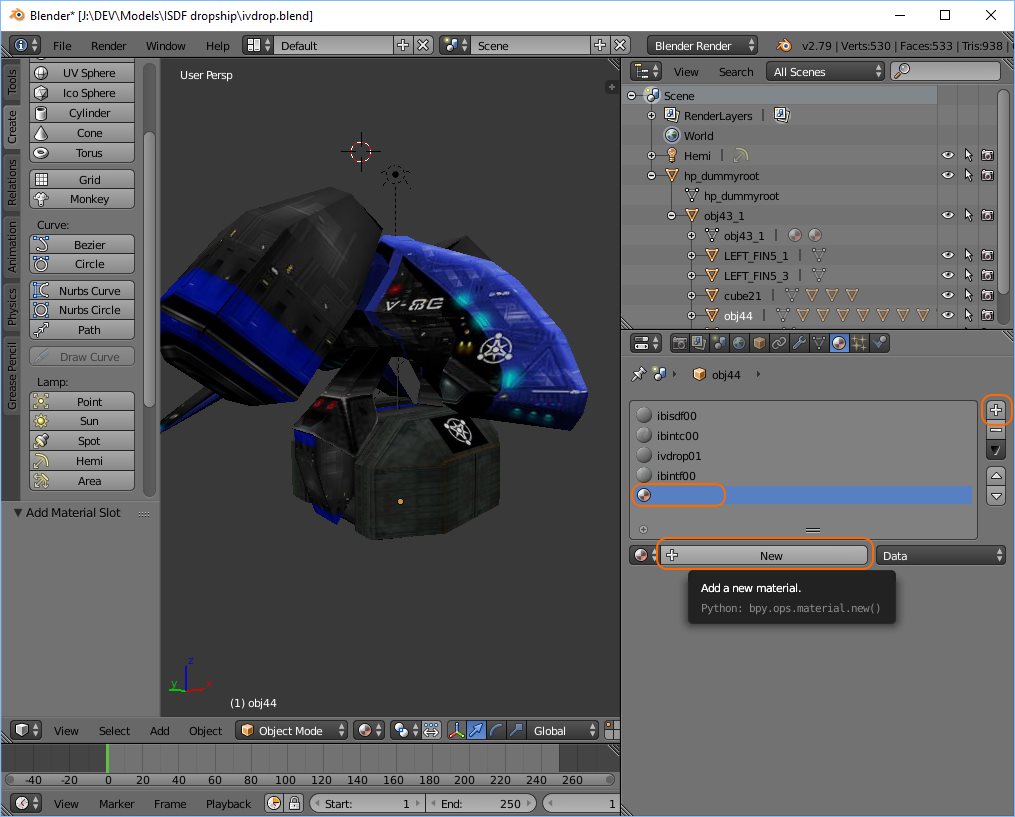
Add a new material to your object
When you select an object in your scene you can inspect the Material properties. The selected object uses four materials (ibisdf00, ibintc00, ivdrop01, ivdrop00). Click on the plus symbol to add a new material.
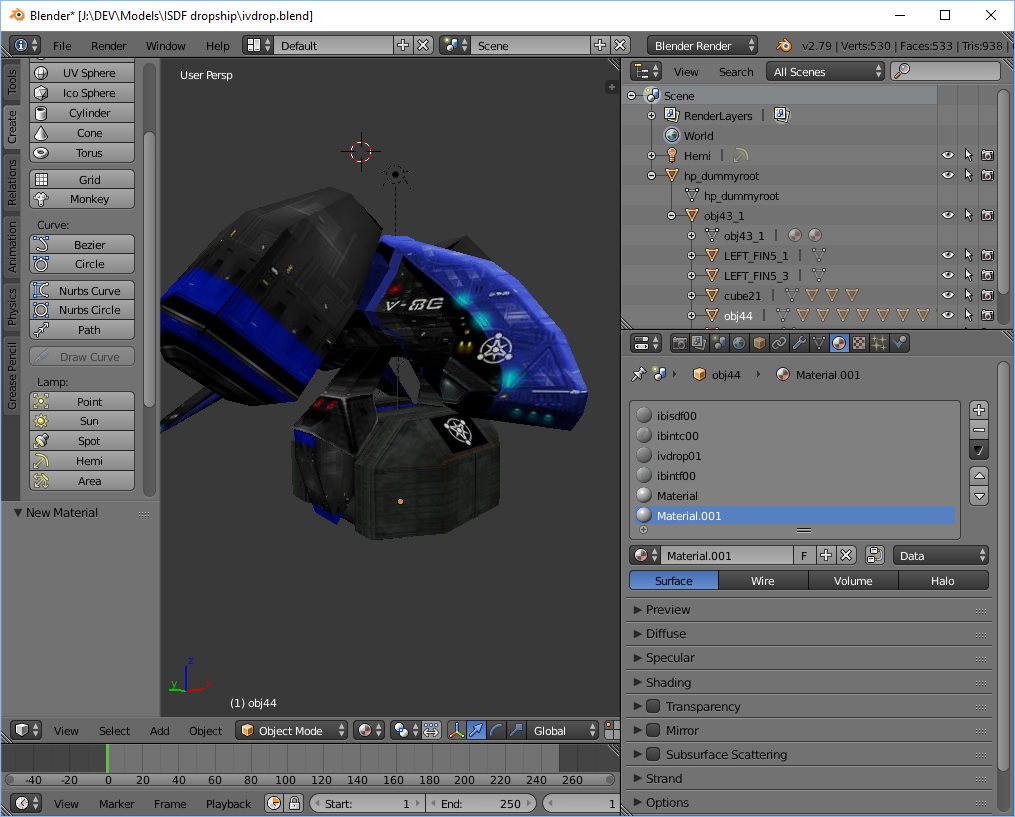
A new material named “Material” was added. If we repeat this step, the next material is named “Material.001”
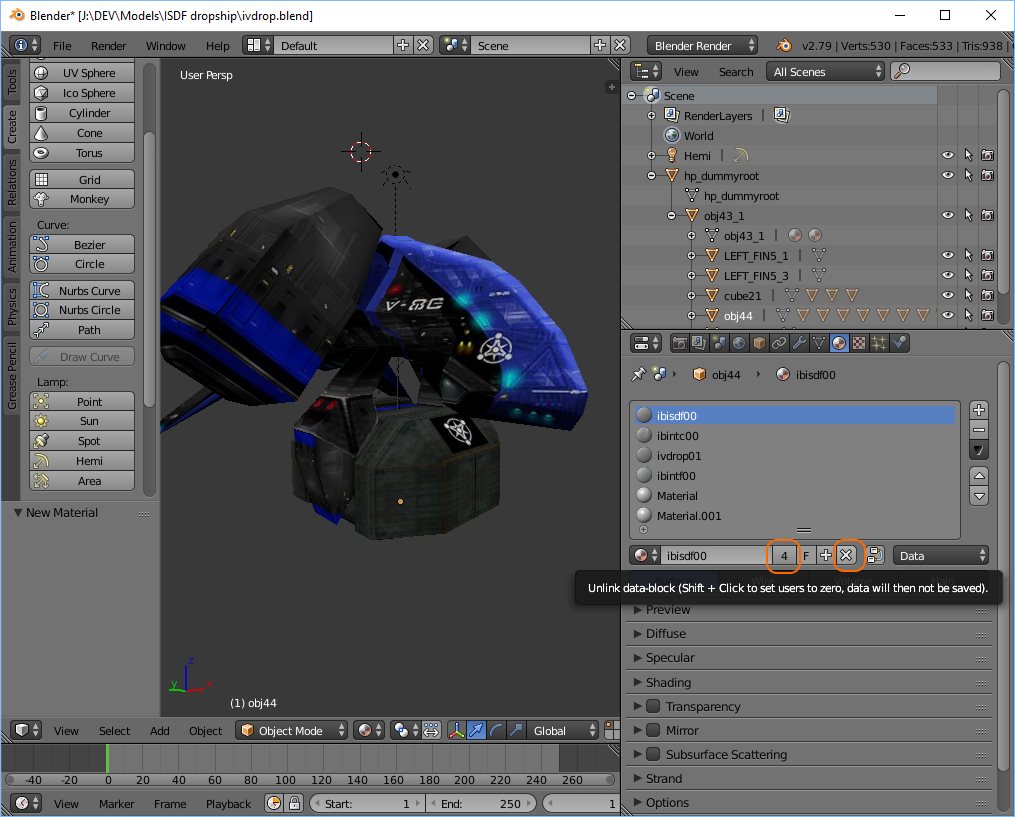
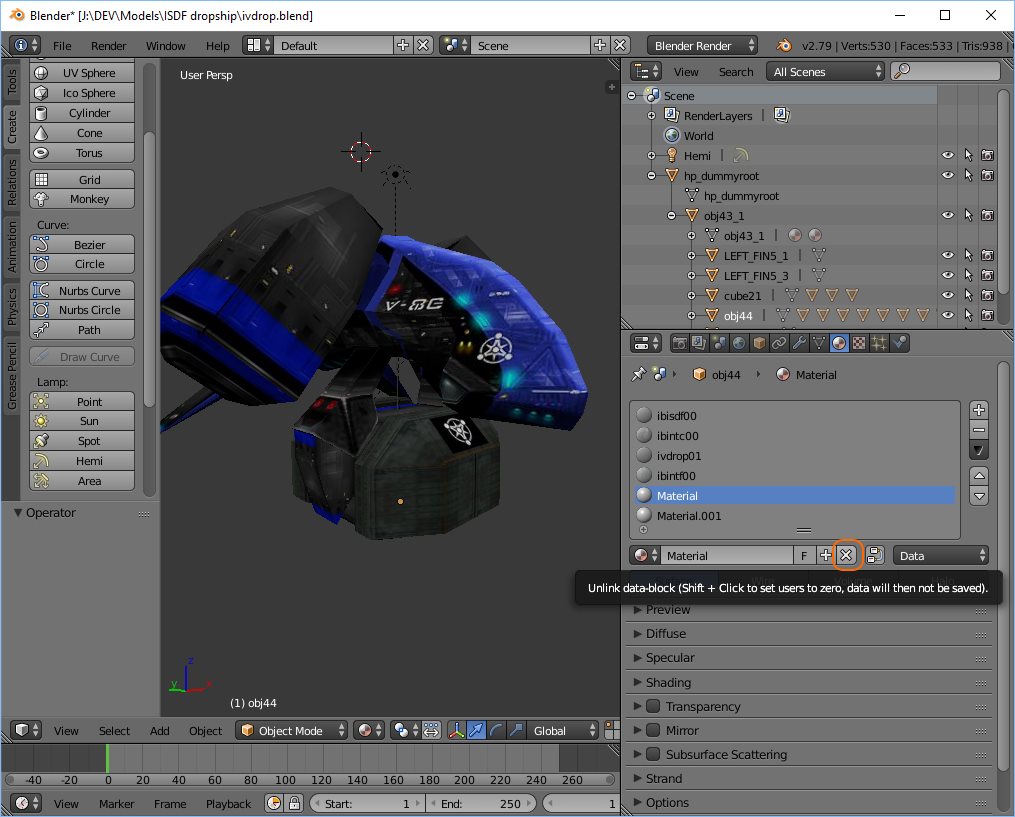
I have selected material “ibisdf00”. Note the number “4” indicating this material is in use by 4 objects in my scene. Note also the delete button.
Deleting (read: unlinking) a material from an object
I can click the delete button to no longer use this material with my object. Note that the material is not deleted; it is simply ‘unlinked’ and will disappear from the list of active materials for this object but remains available if I need it again. The number of uses indicator will say “3” instead of “4” when this material is viewed by selecting other objects in the scene.
If I hold SHIFT and press the delete button, the material is removed (read: unlinked) from every object in my scene.
So lets try and unlink materials “Material” and “Material.001”:
There are now two empty slots in the list. Click on the minus symbol to remove the slots.
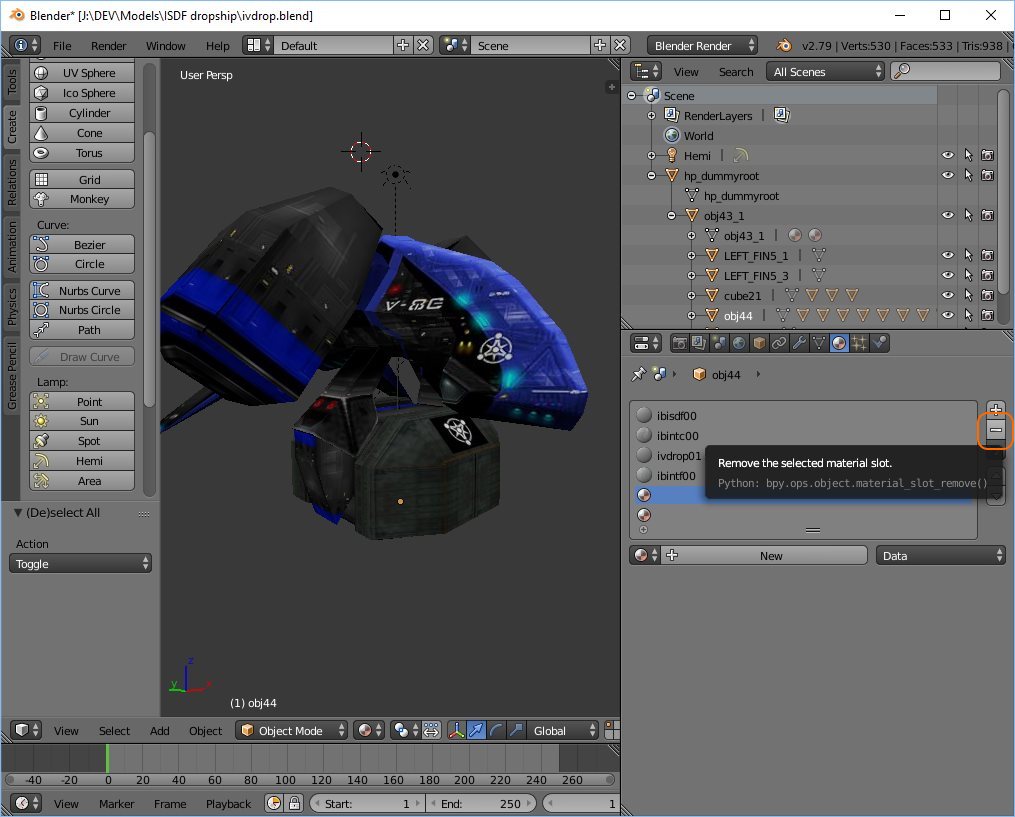
This is somewhat confusing at first: if I want to change a material and open the drop down list of available materials, the removed materials are still there.
This is because we simply unlinked the materials from our object; they were not deleted and remain available for use. Note that the number of uses indicator says “0”.
Permanently deleting a material
[!] You should only permanently remove materials if the number of uses indicator is “0”.

So how to permanently remove orphan materials that are no longer needed?
In the Outliner, switch to Orphan Data:
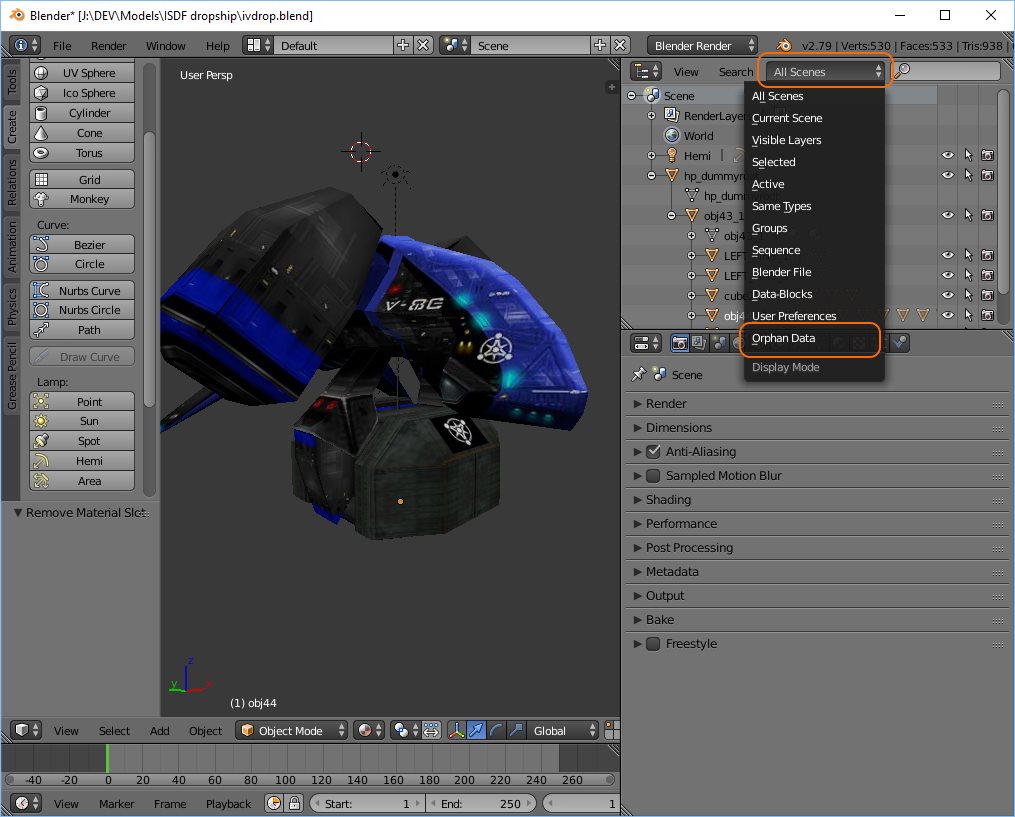
Right click and select Delete to permanently delete the orphan materials:

Congratulations, you have successfully permanently deleted a material.
Finding materials
If you ever wonder how you can see which object uses which material, or how to see a list of all materials, use the Outliner search function:
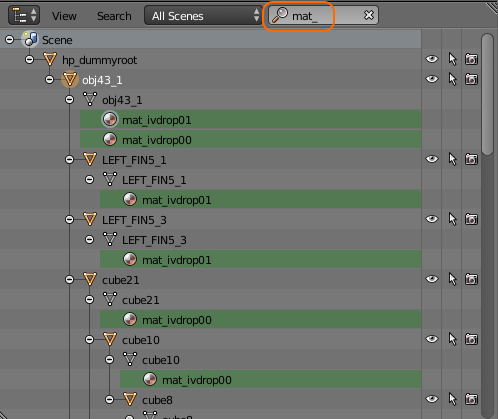
Tip: Use [NUMPAD -] and [NUMPAD +] to collapse and expand all entries in the Outliner. Try pressing [NUMPAD +] repeatedly. I had to manually collapse item “RenderLayers” at the top of the list as this contained lots of items.
Add a texture to your material
A material can contain one or more (layered) textures.
In the picture below we have selected an object, selected a material and then selected the texture properties. The breadbrumb navigation shows the hierarchy “obj44 > ibisf00 (material) > ibisdf00 (texture).
This material uses a single texture (ibisdf00) that consists of an image (ibisdf00.jpg).

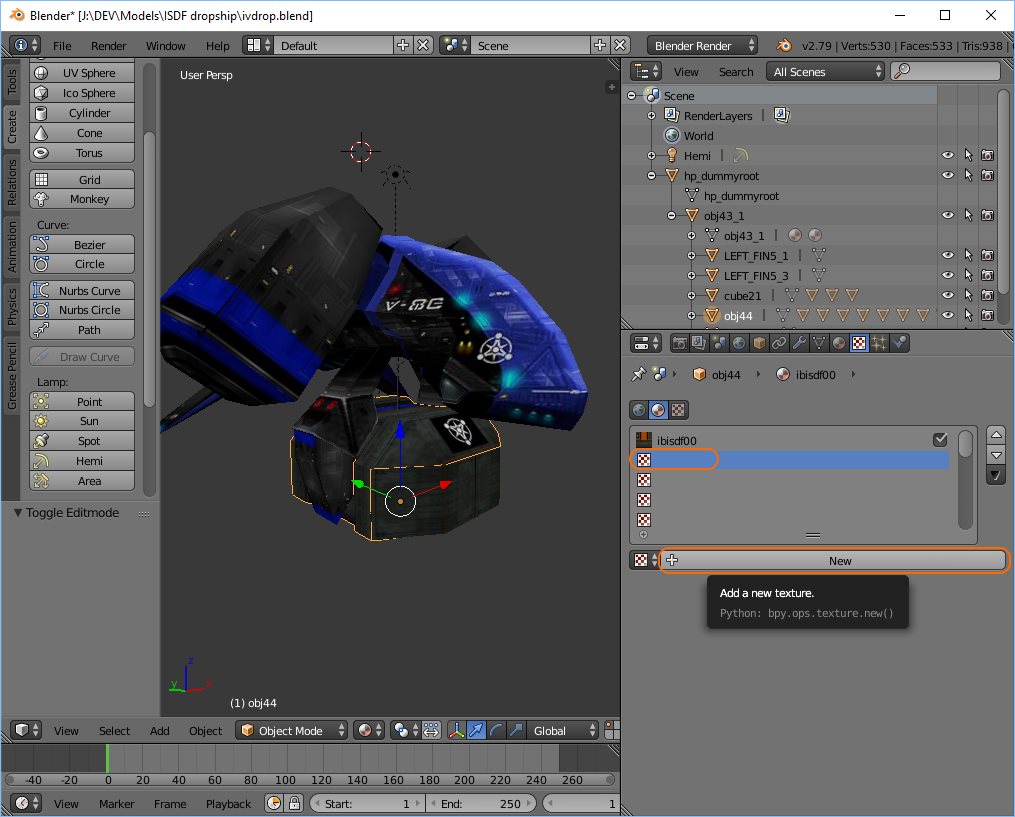
Select an empty texture slot and click New to add a new texture:
Deleting (read: unlinking) a texture from a material of an object
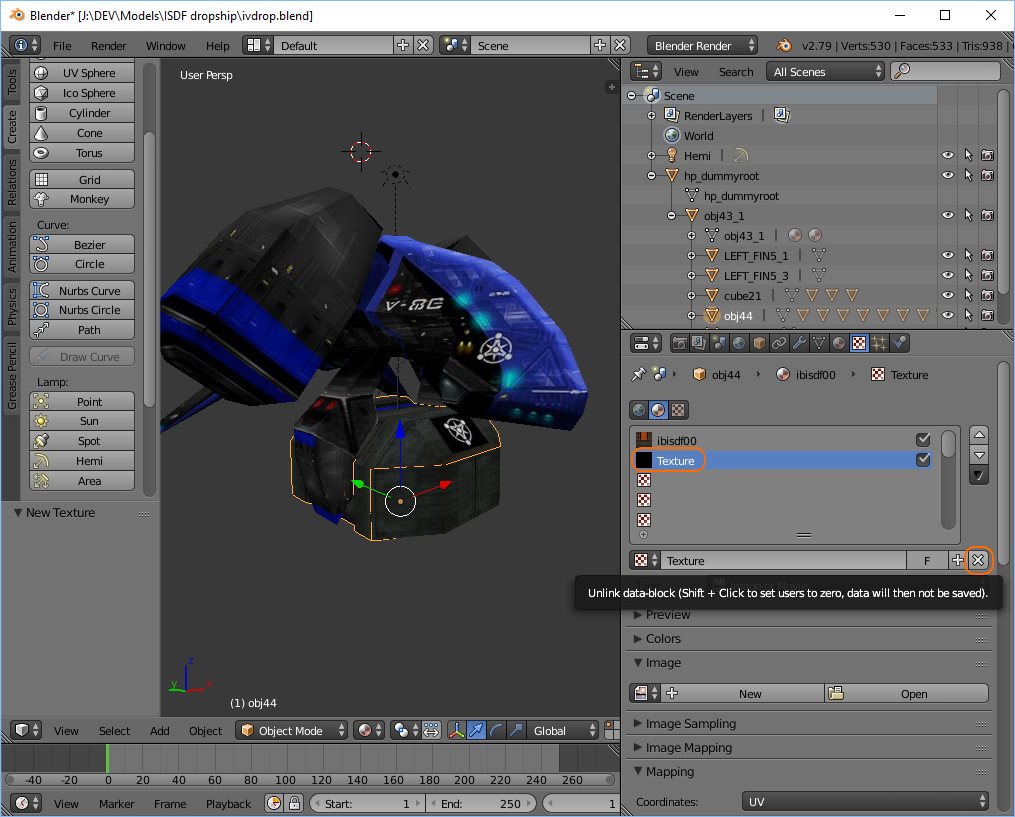
You can select the delete (read: unlink) button to unlink this image texture from your (layered) material.
If you press SHIFT, the texture will be unlinked in all materials in all objects in your scene.
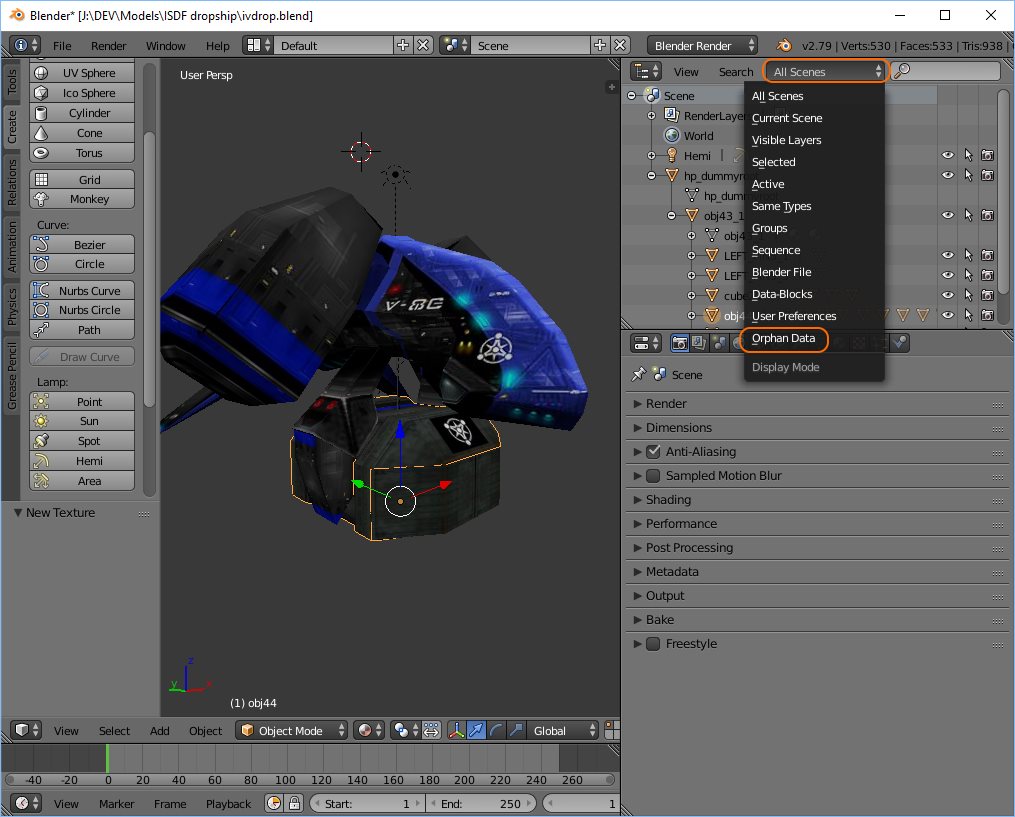
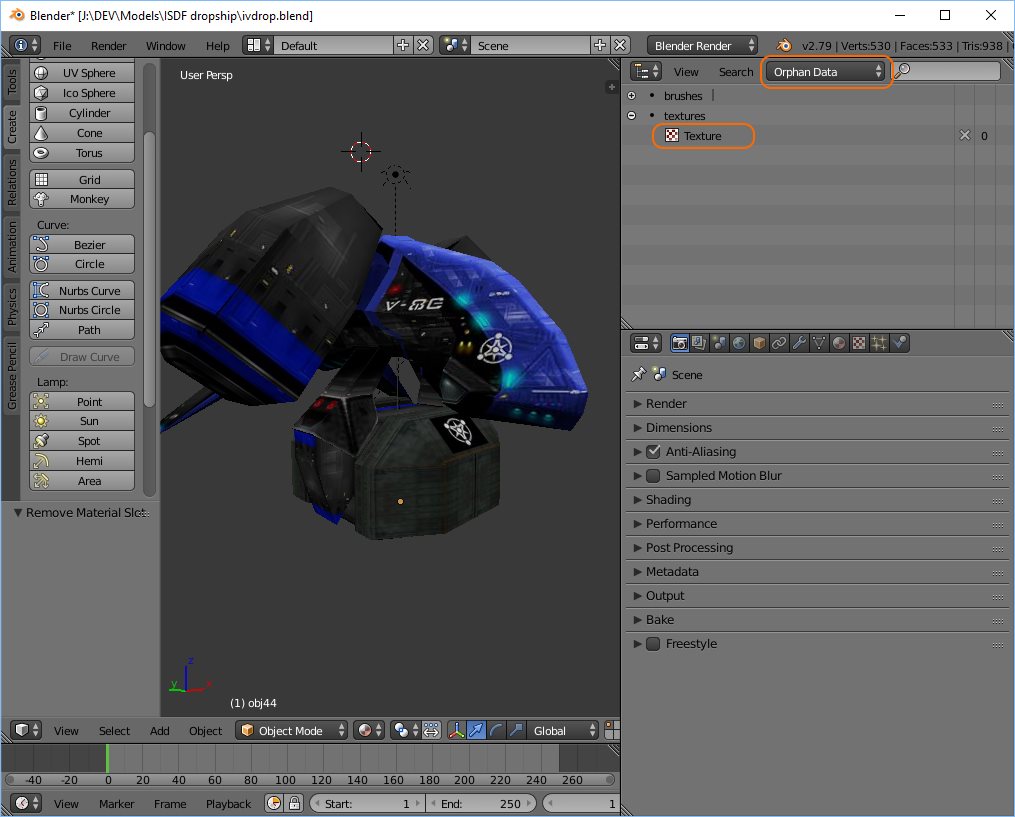
Note that the texture is still available from the pick list of available textures. If you want to permanently delete an orphan texture from the scene, you have to select Orphan Data from the Outliner:
Right click and select Delete to permanently delete the orphan texture:
Saving in Blender
I like to keep things simple. When working with image file textures I always keep the image files in the same directory as my *.blend file. If you have a library of image textures and you don’t want to have duplicates, by all means use directory paths. I like to avoid this headache and simply keep everything in one folder.
When saving your Blender file, you have a few options:
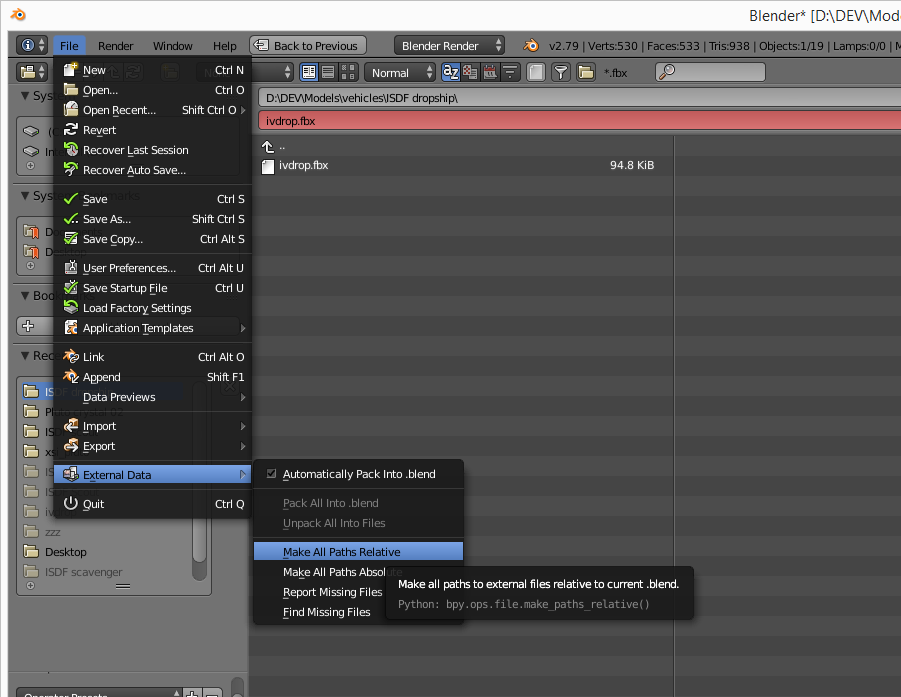
I always have “Automatically pack all external files into *.blend file” ticked for added portability. I also make sure to make all paths relative. As I use the current directory for all my files this will effectively strip off any path information and just show file names. This makes things very easy and is moderately fail safe. The size of my *.blend files does get larger but remains manageable.
Blender *.FBX export to Unity
When exporting to *.fbx format for import in Unity or Unreal Editor, there is one option that needs explaining – Path Mode:
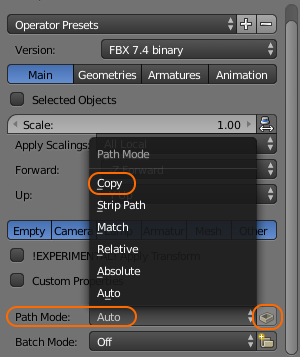
When you select [Path Mode: Copy] all texture image files are included with the *.FBX file.
There are two ways to export the texture image files with the *.FBX file:
1. In a separate folder “blenderfilename.fbm”:
![]()
2. Embedded in the actual *.FBX file:
![]()
By clicking on the little icon on the right hand side you can toggle between export to a separate folder and export by embedding modes.
If you are exporting to Unity and want to be able to extract textures from the *.FBX file, you need to use the second option and embed the texture image files inside the *.FBX file.
I have used this option for a while now and have learned it defeats the purpose because you need to click on “Extract textures…” in Unity as it cannot use the textures inside an *.FBX file natively, which sort of defeats the purpose. Also having to remember to use the correct Path Mode when I am making frequent changes to a mesh or texture is counterproductive. I just use the default option [Path Mode: Auto] and drag & drop the texture image files into Unity separately.
Importing Blender into Unity natively without exporting [ ! ]
Unity now natively imports Blender files. This works under the hood by using the Blender FBX exporter.
To get started, save your .blend file in your project’s Assets folder. When you switch back into Unity, the file is imported automatically and will show up in the Project View.
To see your model in Unity, drag it from the Project View into the Scene View.
If you modify your .blend file, Unity will automatically update whenever you save.
Unity currently imports:
- All nodes with position, rotation and scale. Pivot points and Names are also imported.
- Meshes with vertices, polygons, triangles, UVs, and normals.
- Bones
- Skinned Meshes
- Animations
See Using Blender and Rigify for more details of how to import animated, boned characters into Unity for use with Mecanim.
Requirements
You need to have Blender version 2.60 or later (in some earlier versions of Blender the FBX export was broken). Textures and diffuse color are not assigned automatically. Manually assign them by dragging the texture onto the mesh in the Scene View in Unity.
Problem #1
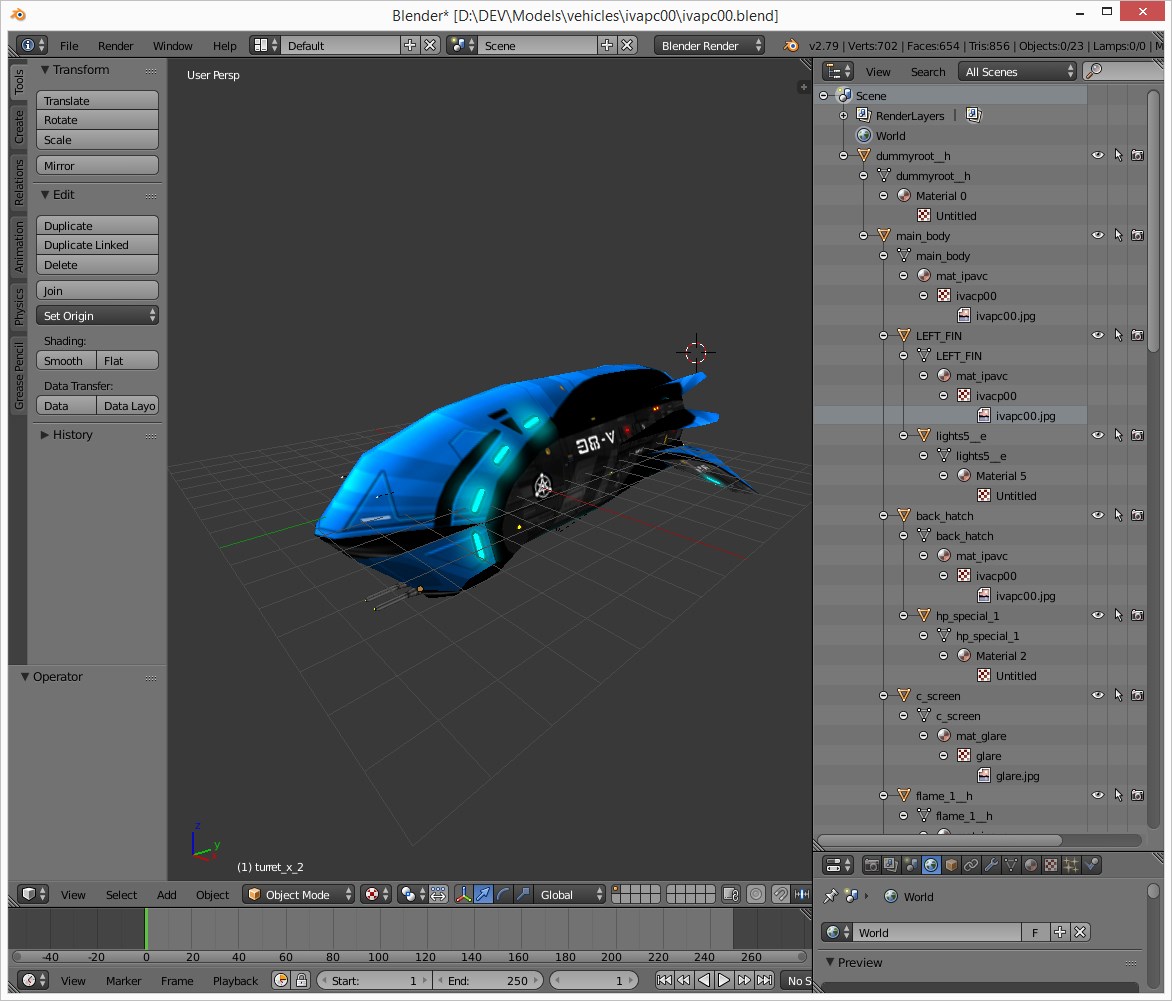
Have a look at this picture of a Blender model. There are several separate objects linked to the same material (mat_ivapc).
When I drag and drop the .blend file into Unity, I end up with the following material names:
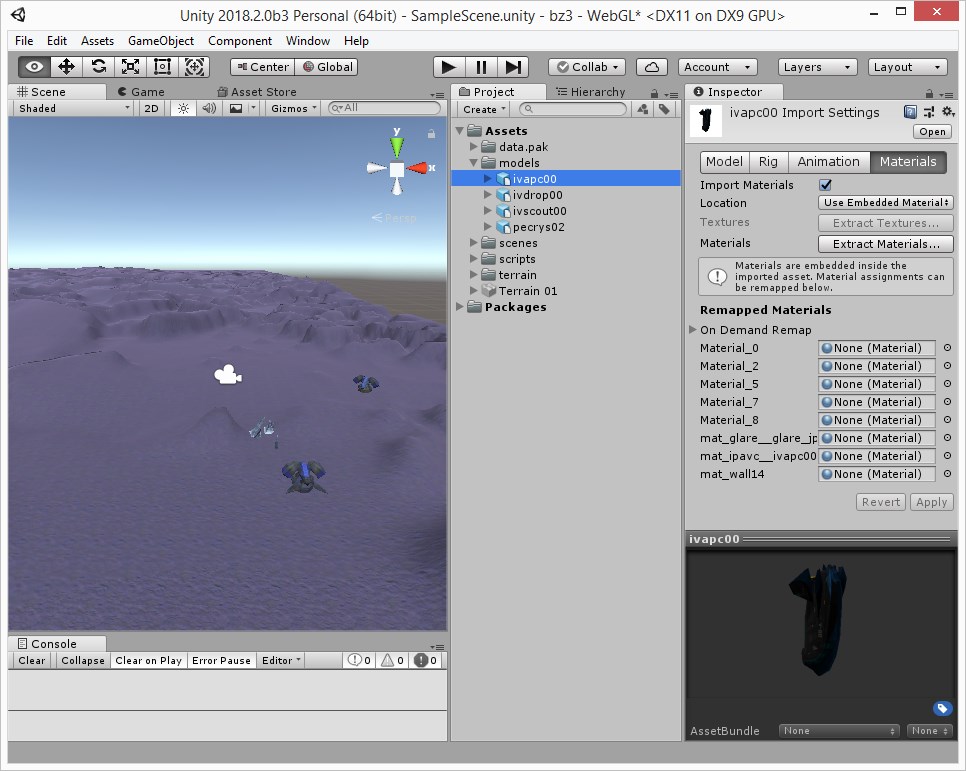
When I export to FBX in Blender and then import the FBX in Unity, I end up with the following material names:
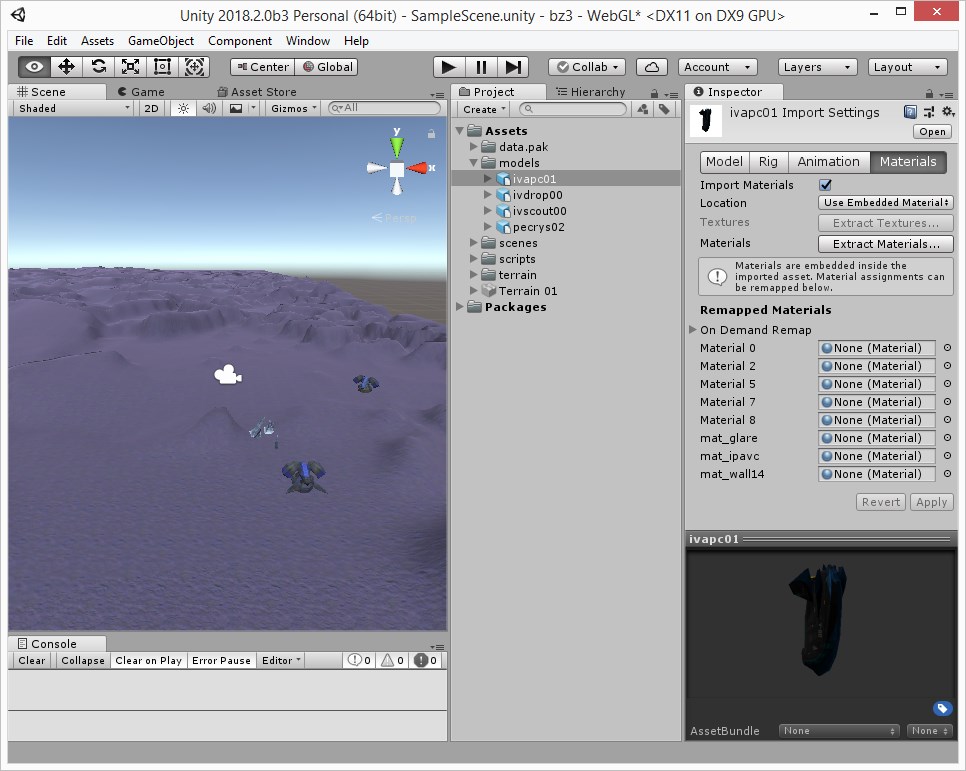
Cause
Dragging a .blend file into Unity causes Unity to perform the translation to an intermediate FBX format. Exporting to FBX format from inside Blender causes Blender to perform the export.
Solution
As the embedded material names cannot be edited afterwards, I will continue to use Blender to export to FBX and not drag Blender files into Unity. I would like my material names to remain identical to the source file. I do not understand why Unity .blend import changes the material names from the original .blend file.
Problem #2
The 3D preview of the asset shows a -90 degree rotation along the X axis. When inserted in the scene the object indeed shows rotation X = -90.
Cause
When you import a model in Blender there is often a dummy object in the top of the hierarchy in Outliner. If you only rotate the model and not the dummy object, this rotation will carry across in Unity.
Solution
Don’t just select a large visible 3D object in 3D view and rotate it. Instead, locate the dummy object at the top level in Outliner and rotate that instead. Alternatively delete everything before importing something into Blender followed by Select All when you rotate things. This will apply the rotation to the top level item in the hierarchy in Outliner.
Thank you for reading this article
I have put this information here as a reminder for myself how it all fits together rather than as a tutorial for others. If you find this information useful, please let me know.