
Blender 2.82 animated dissolve material
Source file
Quick tips
Add a cube or monkey.
First, we’ll explain using colors only:

Source file for this example: shader0007.blend
How this works:
Noise texture has gray colors from black (0.0) to white (1.0)
MixRGB with “Factor = 0.495” puts transition between blue and green at 49.5% gray (seam 2).
MixRGB with “Factor = 0.5” puts transition between {previous} and red at 50% gray of noise texture (seam 1).
This leaves a small band of blue sitting between the 49.5% and 50% seams.
Tip: Instead of MixRGB nodes you can switch to MixShader nodes and use Transparent BSDF to create an (animated) dissolving material.
Next, create the following material (click to enlarge image)
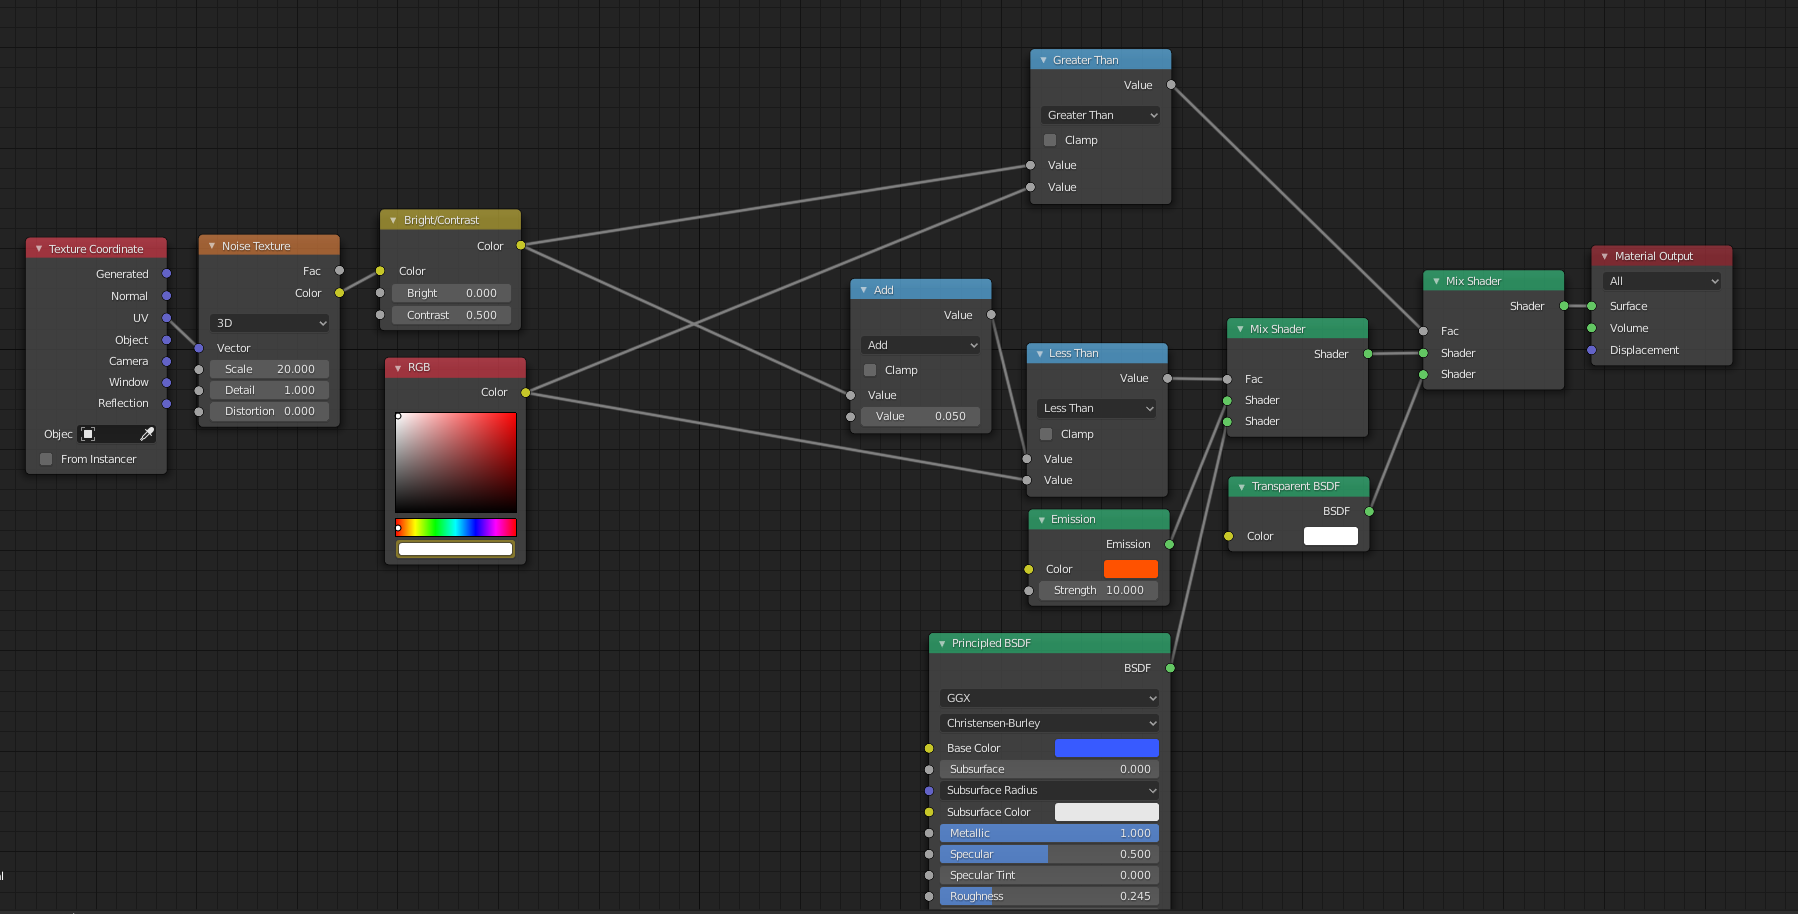
Material
We are using a Noise texture that we can adjust somewhat using a Brightness / Contrast node.
We have an RGB node with a single color value that we can animate and change from white to black to control the dissolve effect.
We use Greater Than and Less Than math nodes to mask either the gray-to black or gray-to-white portion of the Noise texture using the RGB node color value as the cut-off point.
We have a Greater Than math node to control the opacity mix factor.
We have a Less Than math node to control the orange and blue shader mix factor.
We use an Add math node to add 0.050 to the R, G and B color value of our noise texture. This is what creates the glowing edge.
The “Greater Than” mask determines solid versus transparent. The “Less Than” mask controls orange versus blue material. By adding 0.050 to the noise color value, the orange versus blue seam is slightly offset from the solid versus transparent seam.
Tip: You can a node and press [M] to mute it temporarily. You can mute multiple nodes.
If you mute the most right hand side Mix node the transparency component is disabled. The area ‘underneath’ shows as orange. This helps to explain why adding 0.050 to the noise color value gives us an orange seam. The transparent area is almost identical to the orange area except for a small exposed seam.
Animation
Set end frame: 120
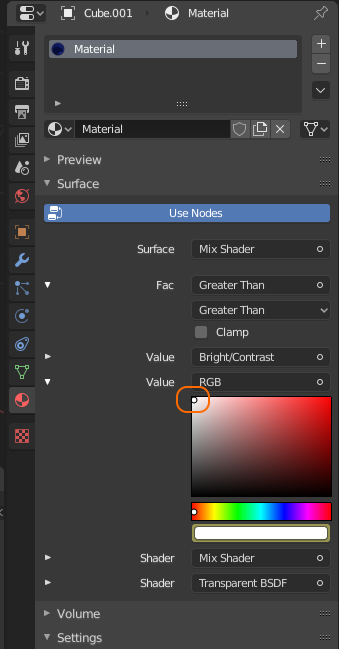
We want to animate the RGB node color value to go from black (0.0) to white (1.0).
For the desired animation frame, right mouse click on the color slider as seen in the picture below:
Note the “Insert Keyframe” option:
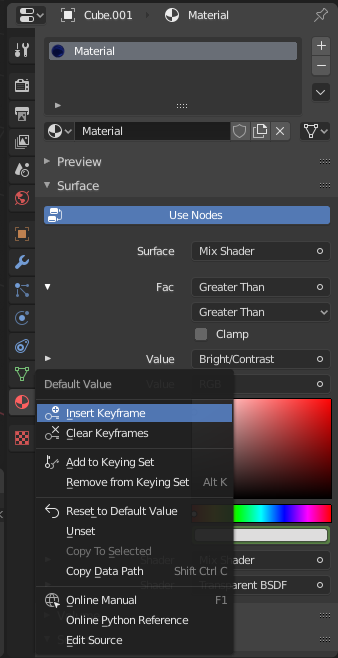
Go to frame 1, select a white color and insert a first keyframe.
Go to frame 60, select a 50% gray color and insert another keyframe.
Go to frame 120, select a white color and insert a final keyframe.
Tip: If the color value keyframes do not show up in the Timeline, switch to the Shading workspace, select the RGB node and then switch back to the Layout workspace. The keyframes will only appear if the RGB node is selected.
Note:
For transparency to work, you need to change the Blend Mode from Opacity to Alpha Blend for your material:

Electrify
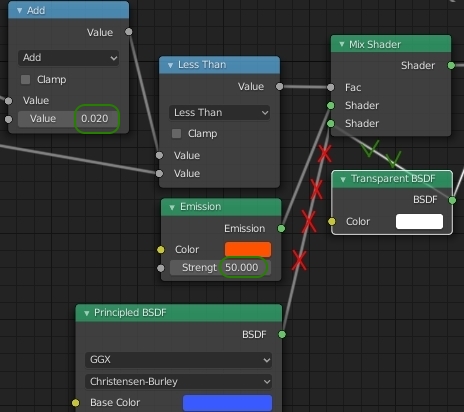
Tip: Change the orange emission material strength to 50 and enable Bloom in the Render settings for a fiery glowing orange seam.
Tip: Replace the blue material with a transparent shader, to only have the seam visible.
Tip: Reduce the “add” value from 0.05 to 0.02 for a smaller glowing edge.
Source File