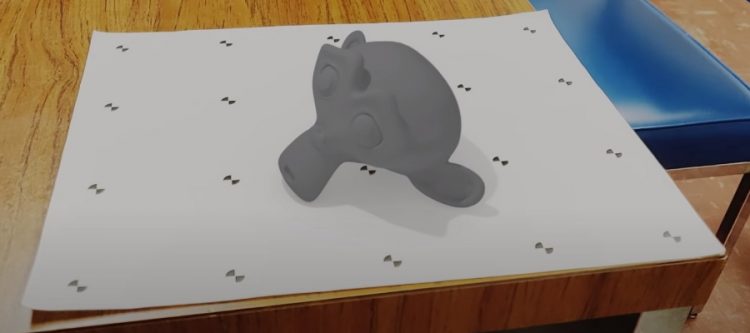
Blender camera tracking (video)
Some great tutorials for inspiration.
Note this is somewhat different from placing green/blue screen opacity masked real video footage into a rich 3D environment. Here we are simply adding single 3D elements to an existing video.
Having said that, both scenarios require camera tracking. Here is an example of green screen footage added to a 3D scene:
When using camera tracking, the 3D camera follows the real footage camera and is not to be moved manually as that would break the effect.
Shooting video
It helps if you know the focal length of the camera used and the frame rate of the video. Shoot in a non-interlaced video format where there is only 1 image per keyframe. Converting to image sequence allow for varying frame rates.
1. Source video
2. Camera tracking
Open Blender.
Add a cube.
Movie Clip Editor.
Click ‘Open’ in top of window (center).
[T] panel > Track tab
Press [P] to prefetch the movie into memory.
Press ‘Set Scene Frames’ to set the number of frames to match the video clip.
[N] panel > Footage tab shows resolution, fps and frames count.
[!] Set Blender Output to match video resolution and fps
Before we begin: Markers
The outer square is the search area.
The inner square is the pattern area.
Press [ALT+S] to show/hide the search perimeter.
Press [G] to move a marker.
Press [S] to scale a marker.
Press [R] to rotate the pattern area [!!!]
You can also use the handles of the marker to manipulate it.
[N] panel > Track tab to preview marker detection.
Press Marker > Add button and LMB to place a marker, or just use [CTRL+LMB], or
Detect Features for automatic marker placement.
Press [L] to automatically pan the 3D view to center on the selected marker (‘locked view’)
[T] panel
Motion Model: Perspective
Tick ‘Normalize’. This helps to compensate for rogue brightness/contrast deviating frames from the norm.
Tracking Settings Extra > Correlation > 0.900. This is basically a quality factor threshold the camera matching algorithm needs to meet.
Select a single marker in 3D view. You can select multiple markers but I would advise against it initially.
You may have to press [G+Enter] to select a marker properly.
Press [ALT+ARROW RIGHT] to start manual tracking or use the buttons under ‘Track’
Press [CTRL-T] button to continue tracking. Tracker will pause where it loses contact. Make sure the marker rotation handle matches the XY orientation of the pattern you are trying to detect.
Use Timeline playback to review results.
Press [CTRL-L] to lock the tracker when you are happy with the result (or [ALT-L] to unlock.
Source Files
Movie clip editor mini timeline colors:
- Blue line: Playhead
- Yellow: Motion track
- Yellow line: Keyframe
- Orange line: Shape keyframe
- Purple: Prefetched frames
- Light green line: Solve start/end keyframe
[T] panel > Solve tab
Keyframe A and Keyframe B can be used to limit camera solve to a specified range in which the motion is constant and extrapolate from there.
Tick ‘Keyframe’ to let Blender automatically detect a suitable keyframe range.
Refine: Focal length, K1, K2
Press ‘Solve camera motion’ button.
We want a Solve Error as close to zero as possible. 0-0.5 is good. 0.5-1 is acceptable. >1 is bad.
Click Clip Display > Info and select all markers to see the solve error of each individual marker.
Tips:
– Don’t track the center of a featureless object, try to track the edges that have contrast.
– Rotate the handle of the pattern to align X and Y with the pattern’s X and Y axis.
– Increase the search box if the tracker loses contact halfway during the timeline.
– Avoid repositioning a marker manually.
– If you have a large number of markers, delete some of the markers with a high average error to reduce solve error.
Source Files
[T] panel > Orientation
Click ‘Setup Tracking Scene’
Select 3 markers and click ‘Floor’. If you receive error ‘no object to apply orientation on’ you forgot to click ‘Setup Tracking Scene’ first.
Select 1 marker and select ‘Set Origin’.
Select 2 markers, enter a distance value i.e. ‘2’ and press ‘Set Scale’ to set a scale (in units). This does not matter much in this example.
Select a marker to the left of the origin and press ‘Set X Axis’
Select a marker below the origin and press ‘Set Y Axis’
Switch back to 3D Viewport editor to see the result.
3. Compositing
You need to use compositing to overlay the different render passes.
AlphaOver nodes can be used to stack layers.
The inputs are connected counterintuitive with the bottom layer at the top:![]()
This will give us:
Top layer: Foreground
Middle layer: Background
Bottom layer: Video
The most important things to setup correctly to get shadows to work correctly are:
– Light strength.
– World background color brightness.
– Film: transparent (foreground and background render passes are transparent overlay layers for the video bottom layer)
– Plane shadowcatcher material
Source Files
Render
Here is one using a proper 3D model: