Blender / fSpy camera matching (still image)
Thanks for a great tutorial!
Camera Matching adjusts a camera viewpoint so that the perspective in a background image matches the perspective of the 3D world. This allows you to place 3D objects as if they were part of the background image.
fSpy is an open source still image camera matching utility. Here’s an outline of the automated process it helps perform:
- Set the camera viewport to match the dimensions of the input image
- Use the input image as the camera background
- Set the camera field of view
- Set the camera position
- Set the camera orientation
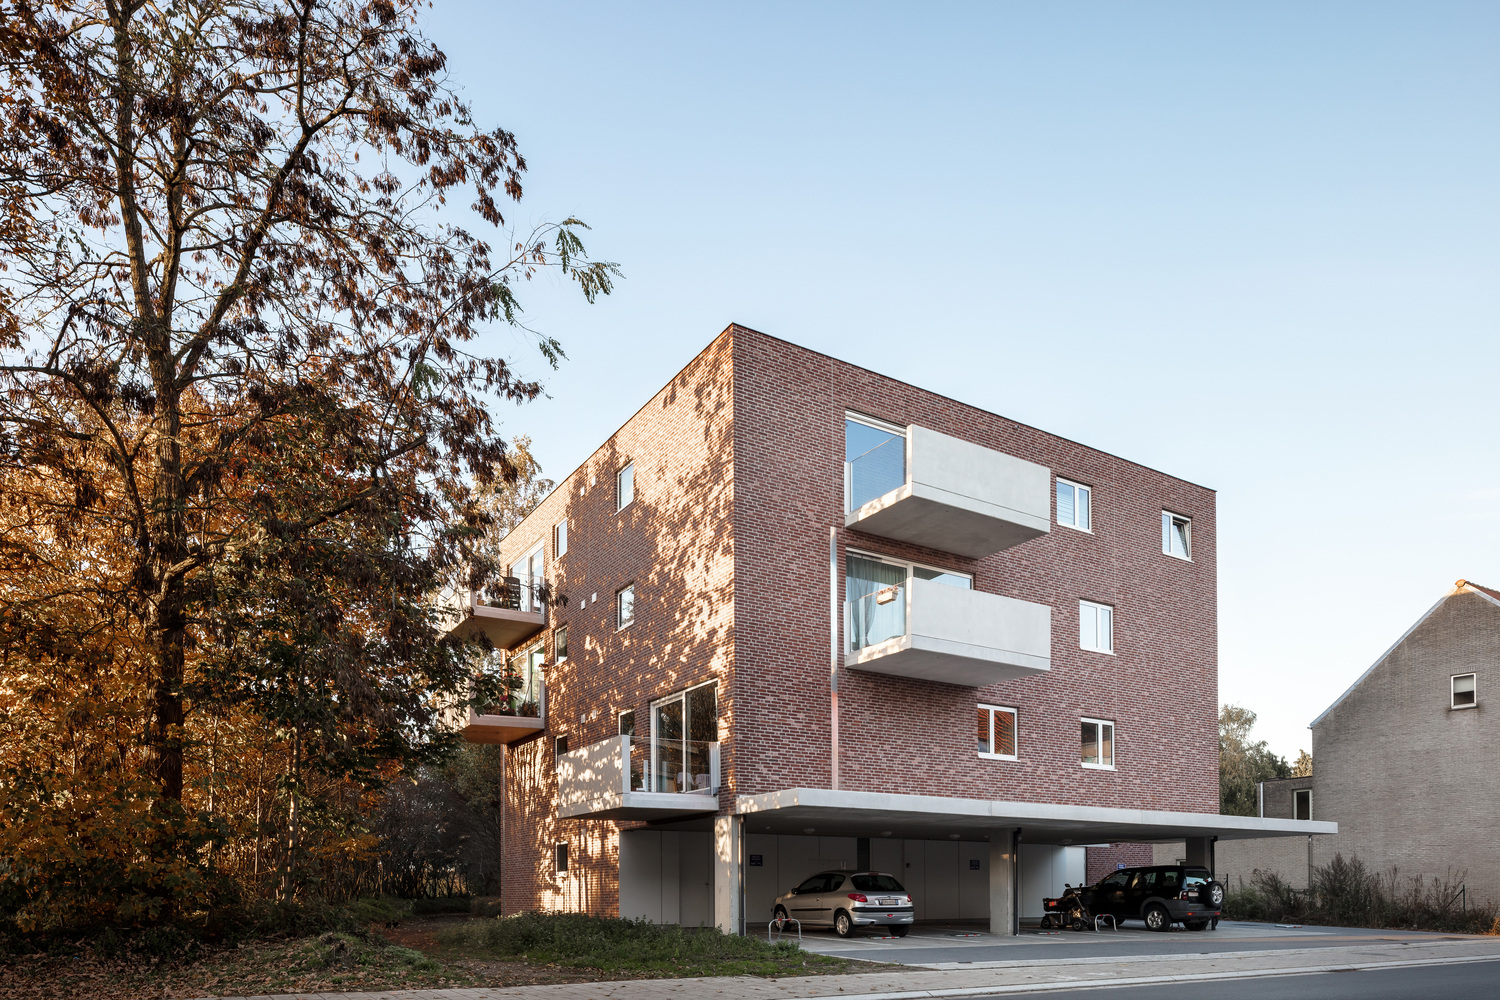
1. Find a suitable background photo
Often the idea is to place 3D objects on a ground plane. Make sure the ground plane is visible and the camera is looking down on the ground plane. I helps if the photo contains geometric objects placed oriented along an XY plane.
2. Camera matching using fSpy
- Visit website https://fspy.io/
- Download stand-alone program.
- Download Blender add-on *.zip file.
- Start stand-alone program.
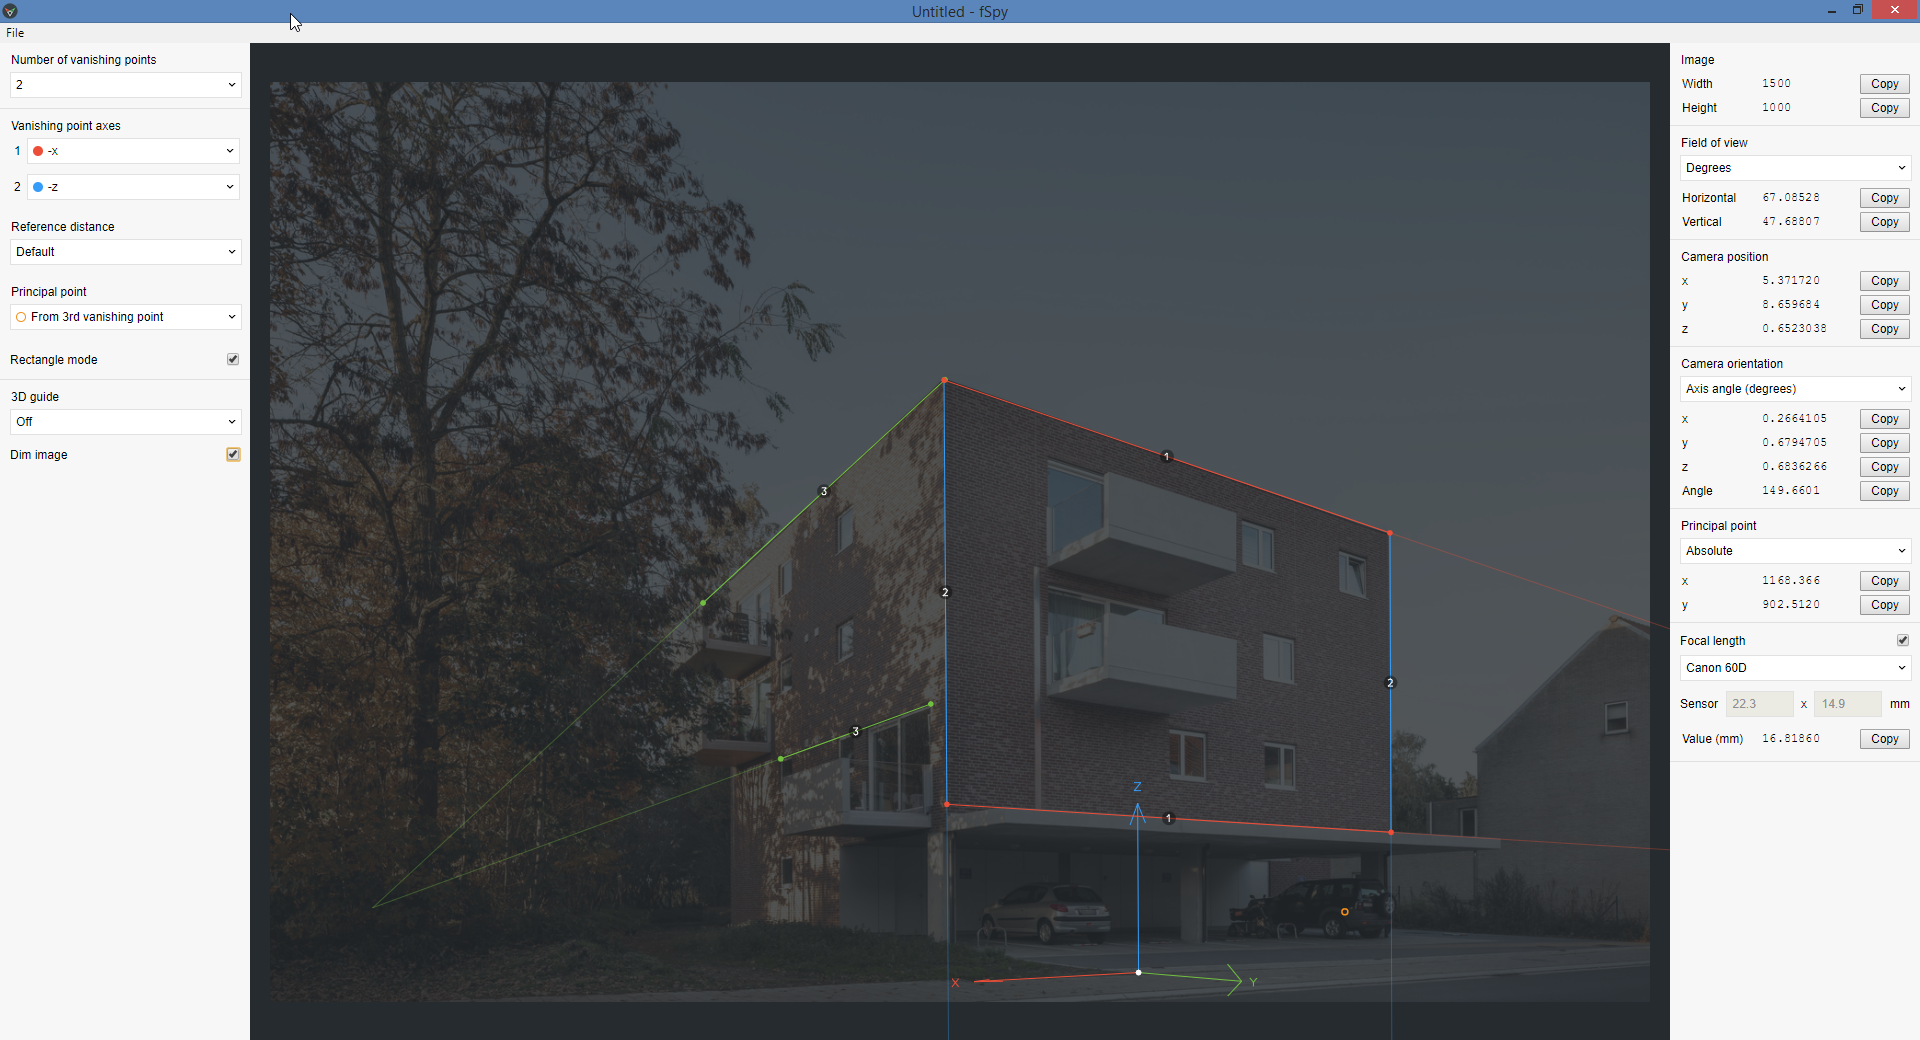
- Open a photo image.
- Select “From 3D vanishing point”
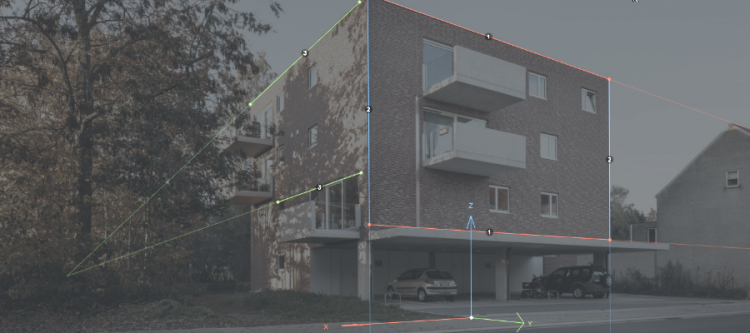
- Move perspective guides in place.
- Save as *.fspy file.
Note: The 3D origin will be placed where the 3D cursor is positioned.
Units / scale
If you want the units / scale of your 3D scene to match real life measurements, you need to adjust the length of one of the arrows of the 3D cursor (X, Y or Z) with an object in the photograph and tell fSpy the length of that object. You can skip this step if it you can eyeball your 3D objects placed in the scene, where it doesn’t matter if an object is 10cm or 1 meter to scale.
Here you see Chipp Walters adjusting the Z axis arrow to match a 900mm high kitchen bench.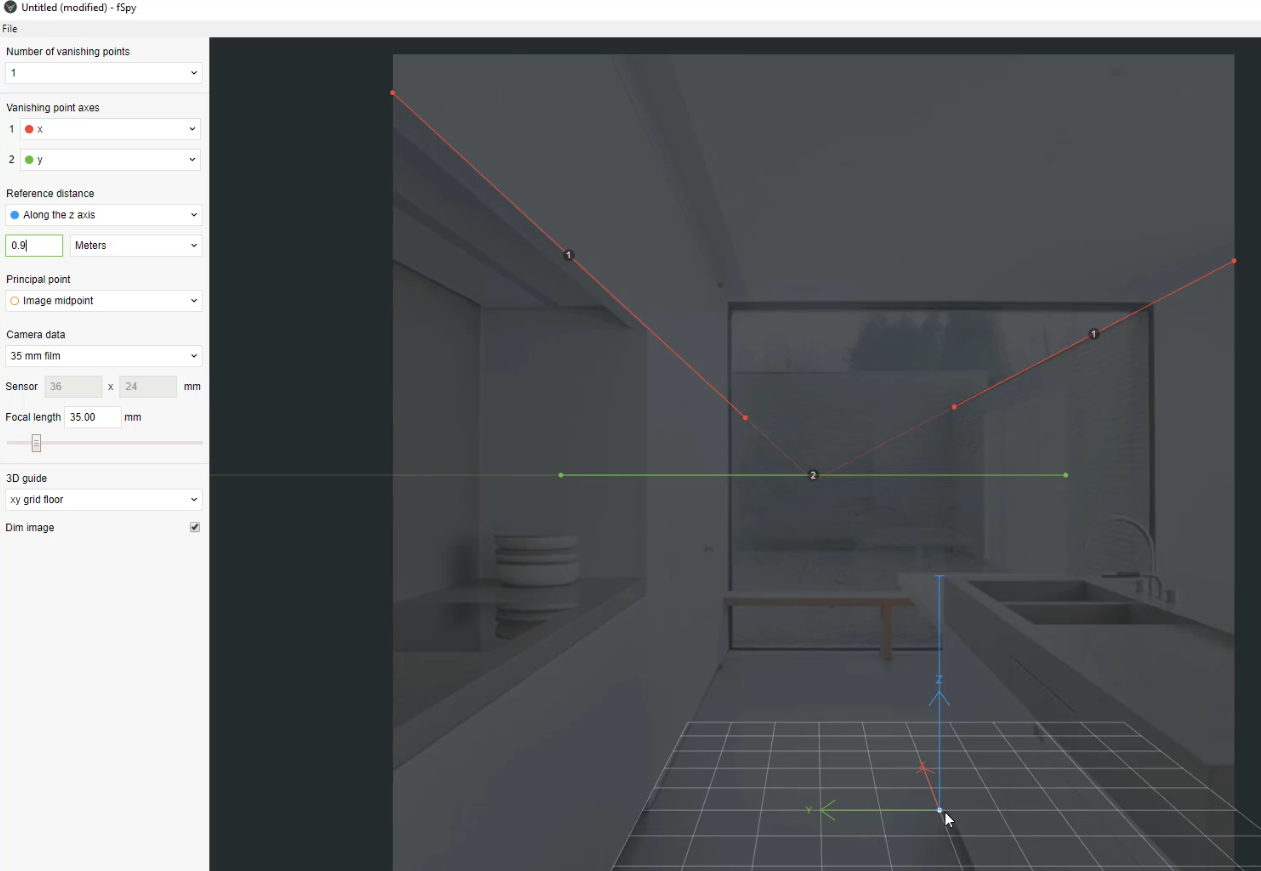
In my example I have skipped this step.
3. Blender
- Launch Blender.
- Install fSpy add-on.
- Import fSpy file.
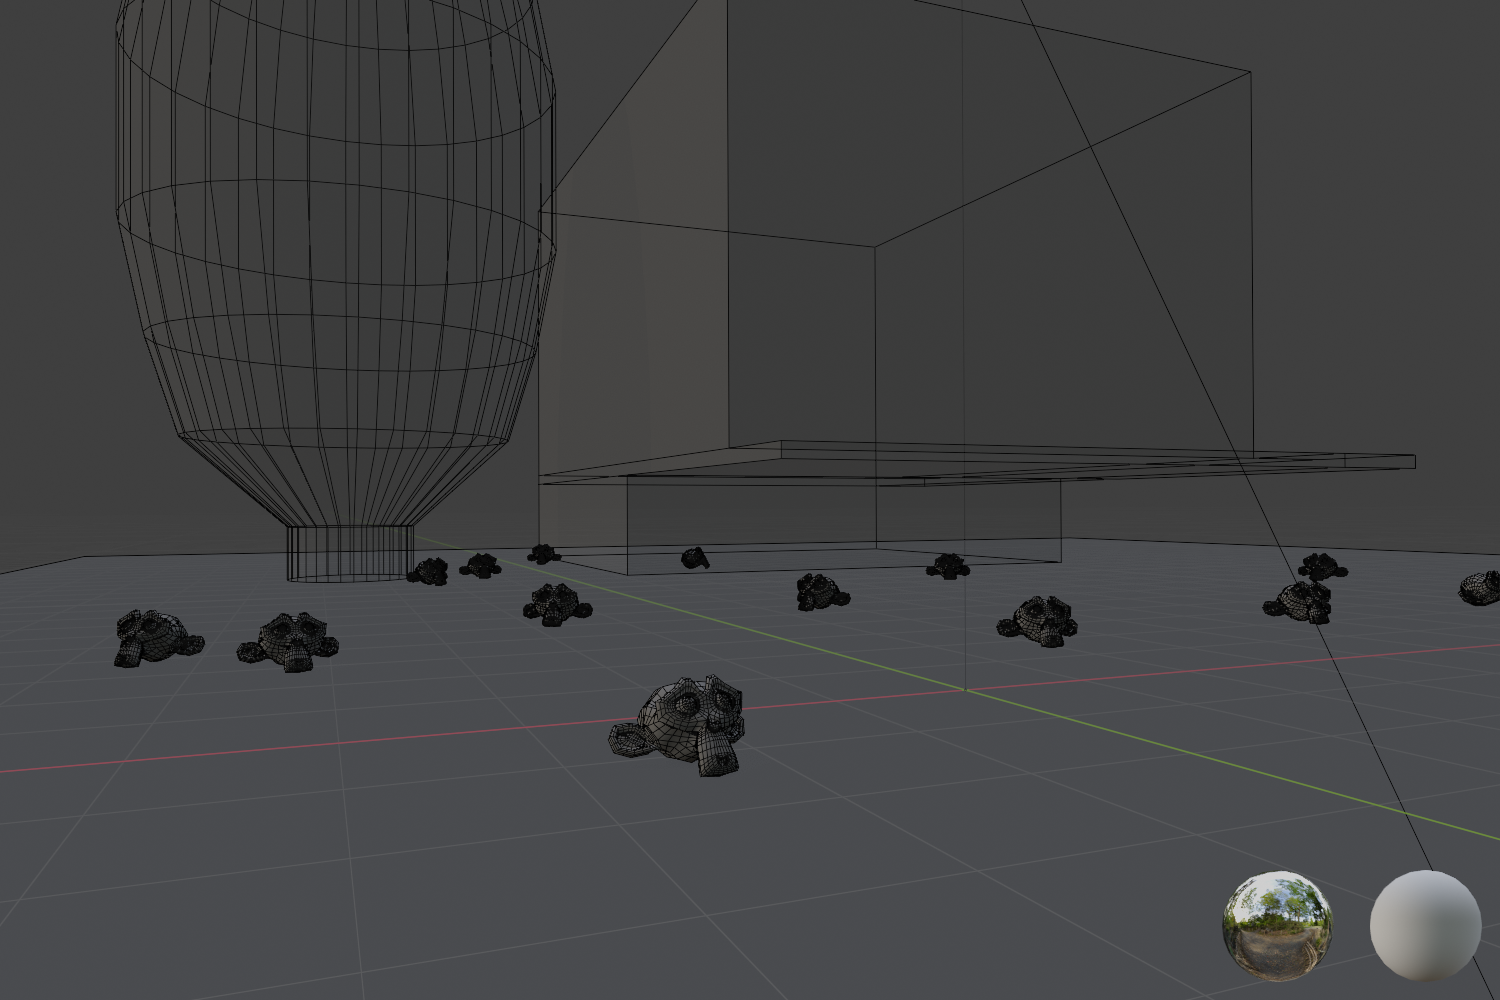
You now have a Blender scene containing a camera with a background image where the perspective matches the photo image perspective.
Add a plane to match the image photo ground level. Place objects (monkeys).
Note:
- Do not move the camera, silly.
- You cannot place 3D objects behind things in the photo;
for that to work you would need to model and texture in 3D.
4. Added realism
You will need to match:
- Object materials
- Casting shadows
- Receiving shadows
Shadows are dependent on:
- World shader (HDR reflections)
- Sun light strength and direction.
- Objects casting shadows on other object.
Receiving shadows (ground plane)
To render the ground plane as transparent yet preserve the received shadows, you can apply a ‘shadowcatcher’ material:
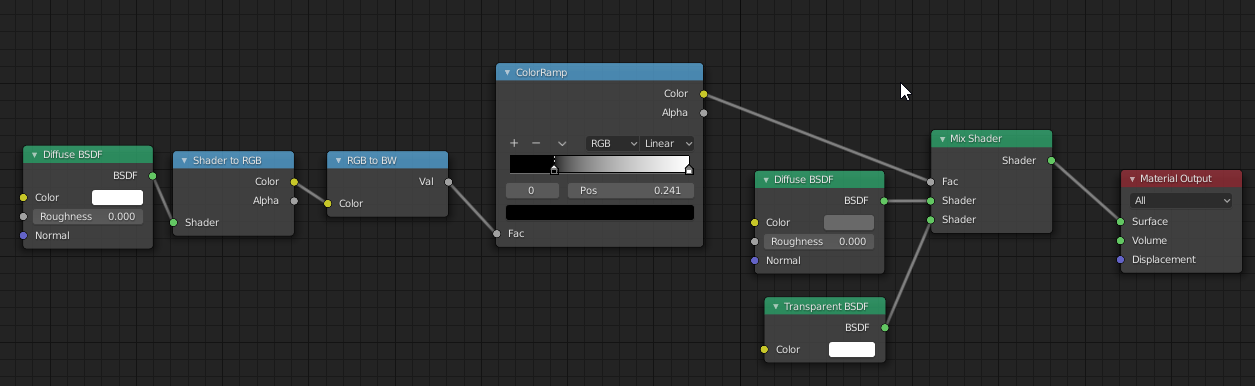
Note: You need to be in 3D Viewport Shading mode and play with HDR rotation, sun light strength and sun light direction. The color ramp controls the shadows’ gradient . The diffuse color controls the shadows’ intensity.
Casting shadows
Note the semi-transparent 3D building and tree being used to cast shadows on some of the monkeys. This has nothing to do with receiving shadows, like we did earlier with the transparent ‘shadowcatcher’ material ground plane.
Don’t forget for transparent materials you will need to set the material properties like so:
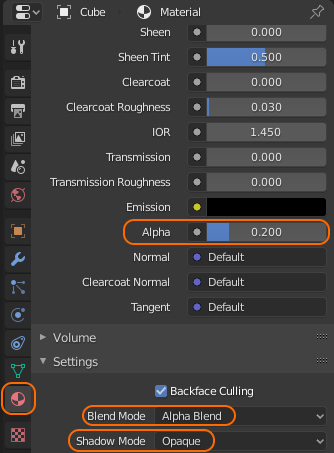
To make the 3D tree and building completely transparent simply change the Alpha value of the material to 0. Shadows will continue to be cast on monkeys. Note the tree will no longer cast shadows on the building as the building is 100% transparent.
5. Viewport render
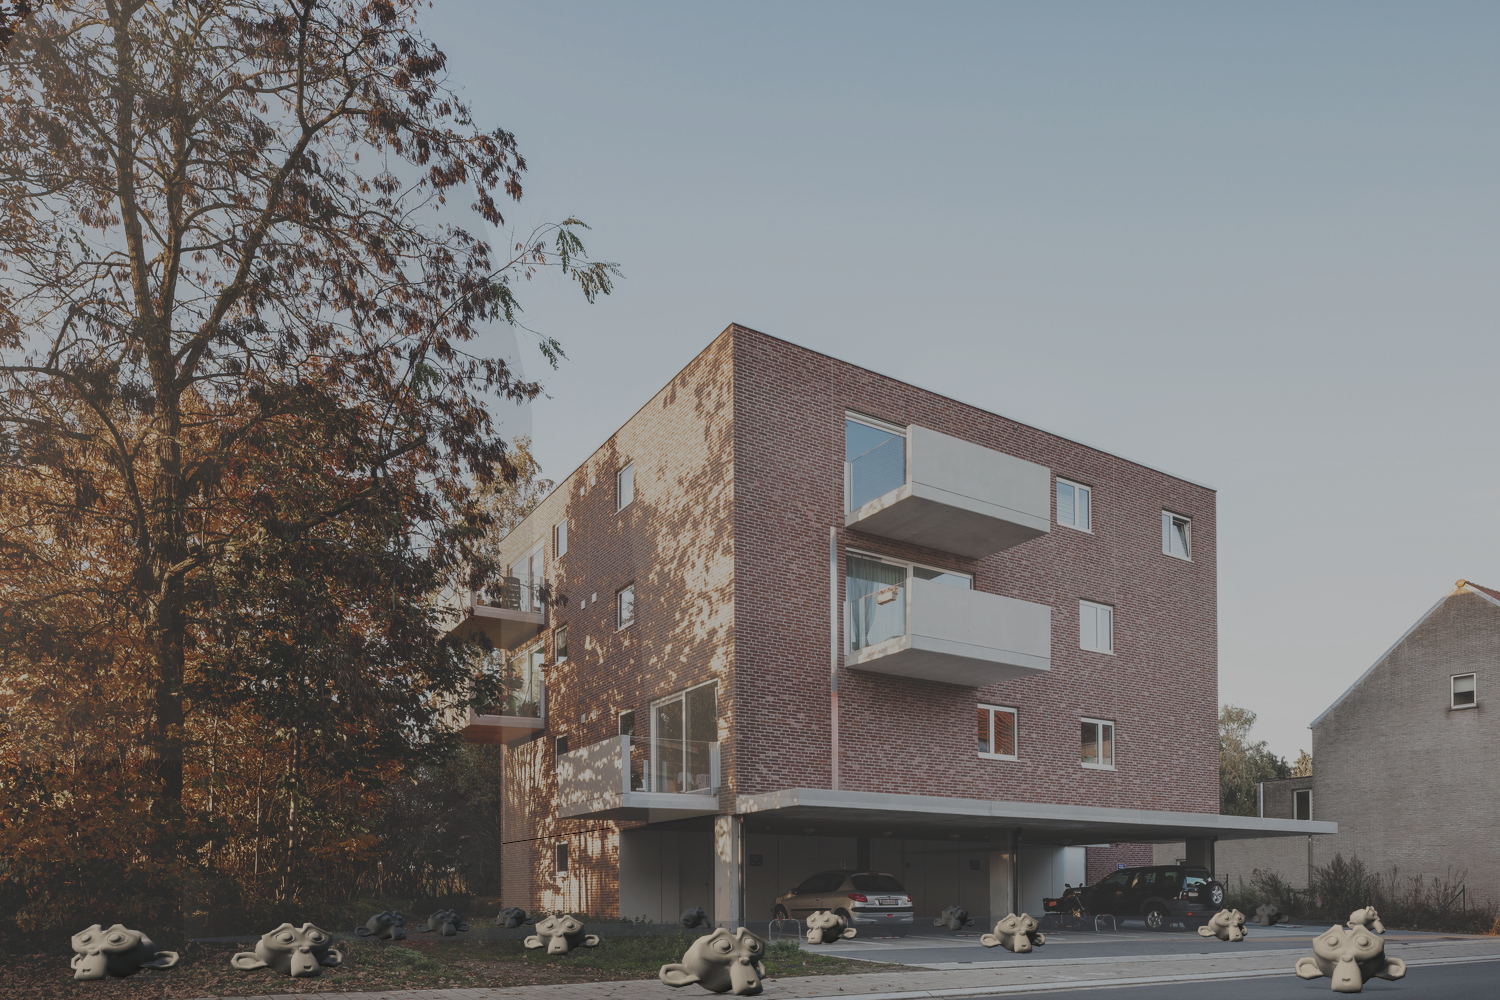
Note the monkeys are 100% identical; same size and same material.
6. Render
To render both the camera background and the 3D scene, you can use Composer:
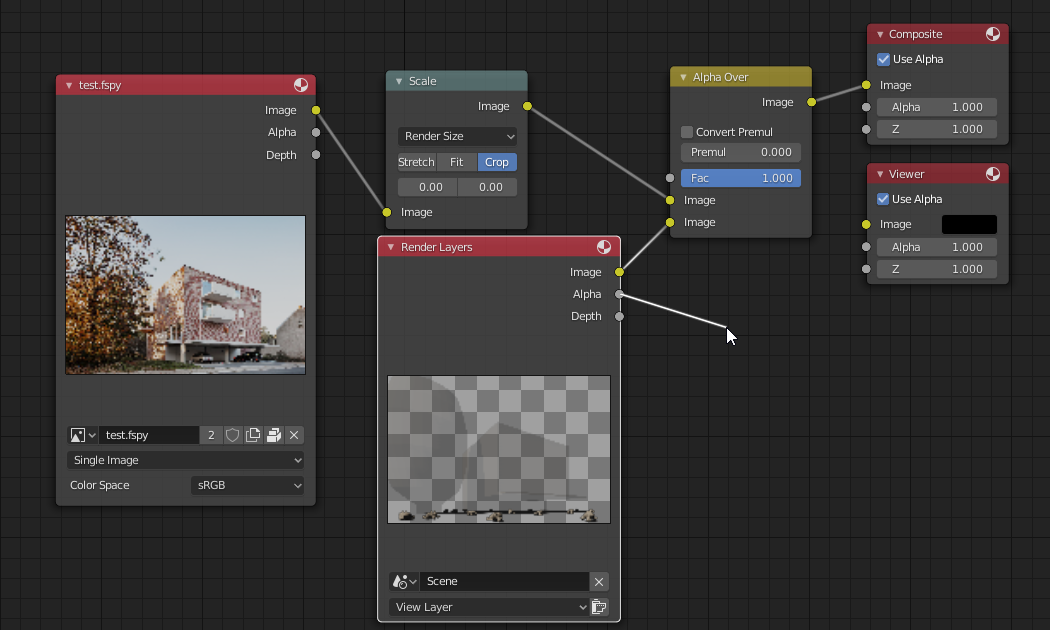
I wanted the 3D tree and the 3D building to cast shadows over the Monkeys onto the shadowcatcher plane so those monkeys look darker than the ones in direct sunlight. But I didn’t want the 3D tree and 3D building to leave a shadow over the shadowcatcher plane directly as those shadows were already in the photograph. I couldn’t get this right and instead kept using the viewport render which worked okay.
7. Challenges
- If you have an HDRI of the area the photo was shot in at the same time of day, you could use more reflective objects. The problem with reflective objects is that they would need to also reflect the ground plane (grass, concrete, etc.). So better not do that.
- Whether you use dull or reflective objects, you would need to model some ground cover to ‘anchor’ the objects (clump of grass, puddle, rock, small objects obscuring the connection with the ground plane basically).
- Using 3D objects that are easily recognisable, drawn at the correct scale and that fit the scene helps to trick the eye. Oversized monkey heads are not that.
- If you are able to partially obscure an object (place on balcony, place behind pillar) that would help.
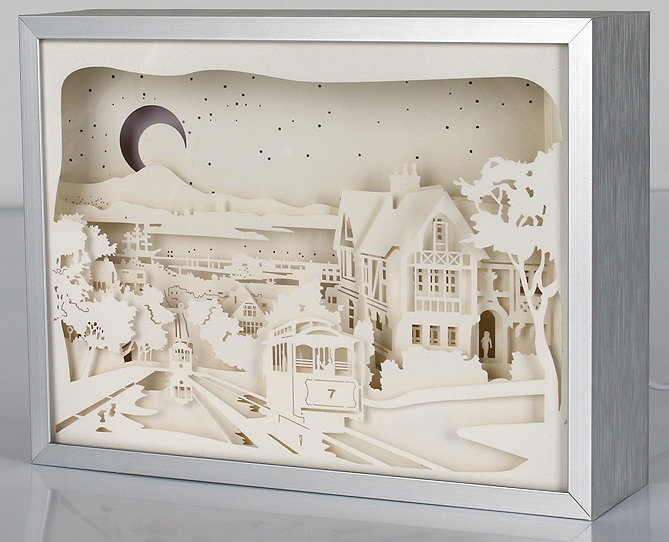
- You can probably cutout a bit of material from the photograph and slap it on a simple object (wall, pillar, car) to layer the photo. A bit like a paper shadow box:
Amazing lazy 3D environments
Do not confuse any of this with creating 3D environments using ‘images to planes’ where the camera can move around freely. Camera matching a still image is where you add 3D objects to a still image. The existing footage (still image, or even a video) is paramount.