Spherical equirectangular environment textures and HDRI
Skybox / Skydome
A skybox is a method of creating backgrounds to make a 3D environment in a video game level look bigger than it really is. When a skybox is used, the level is enclosed in a cuboid. The sky, distant mountains, distant buildings, and other unreachable objects are projected onto the cube’s faces thus creating the illusion of distant three-dimensional surroundings. A skydome employs the same concept but uses either a hemisphere (‘dome’) or a sphere instead of a cube.
Projection
There are three popular types of projecting an image onto a skybox / skydome:
- Equirectangular (2D representation of a sphere)
- Mirror ball (2D representation of a semisphere ‘dome’)
- Cube mapping (2D representation of a box)
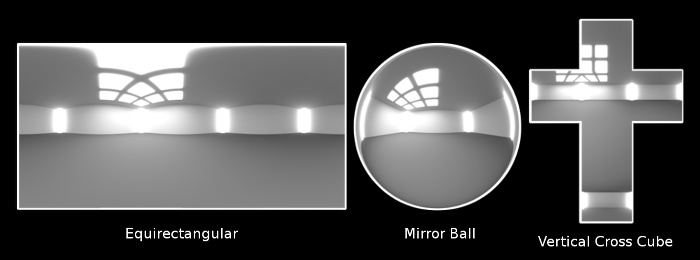
Mirror ball captures environments 180° horizontally by 180° vertically. Simply place a mirror ball in a real world environment and take a picture. It is similar to using a fisheye lens. Equirectangular and cube map capture the full 360 degrees: 360° horizontally and 180° vertically.
We will focus on equirectangular images for now and how to create them.
Equirectangular
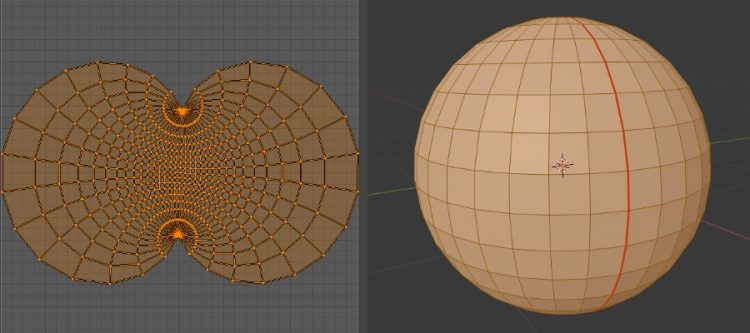
If we take a sphere, mark a seam and unwrap onto a 2D surface we get this:

If we stand in the middle of a crossroads with roads going North, South, East and West, we get these characteristic equirectangular images that are used for spherical projection:
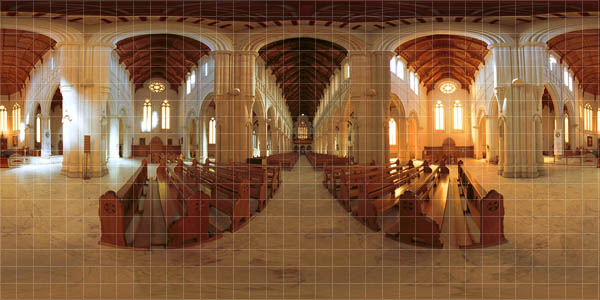
Equirectangular means the line segments of each cell of the grid in the above picture is equal in length horizontal and vertical i.e. squares. ‘Equirectangular’ simply means unwrapping a photograph (in this case of the inside of a sphere) onto a 2D grid.
How to create an equirectangular image
You cannot simply take a single picture of a mirror ball, as that only captures half a sphere. You would need to take a picture of both sides of a mirror ball and somehow stitch them together on a flat surface. You also cannot simply take a single picture using a wide angle or fisheye lens, as that does not capture ‘what is behind you’. There are cameras with 2 fisheye lenses for a full 360° view. The common approach is to take a wide angle lens, shoot lots of overlapping pictures and stitch them together into a seamless 360-
HDRI
HDRI images are typically equirectangular. But there is more to HDRI images than just that. It is also about exposure and combining over exposed and under exposed photographs into a single image. This is very useful for photorealistic reflections in 3D programs like Blender.
hdri007.pdf
Source: http://blog.gregzaal.com/2016/02/23/what-makes-good-hdri/
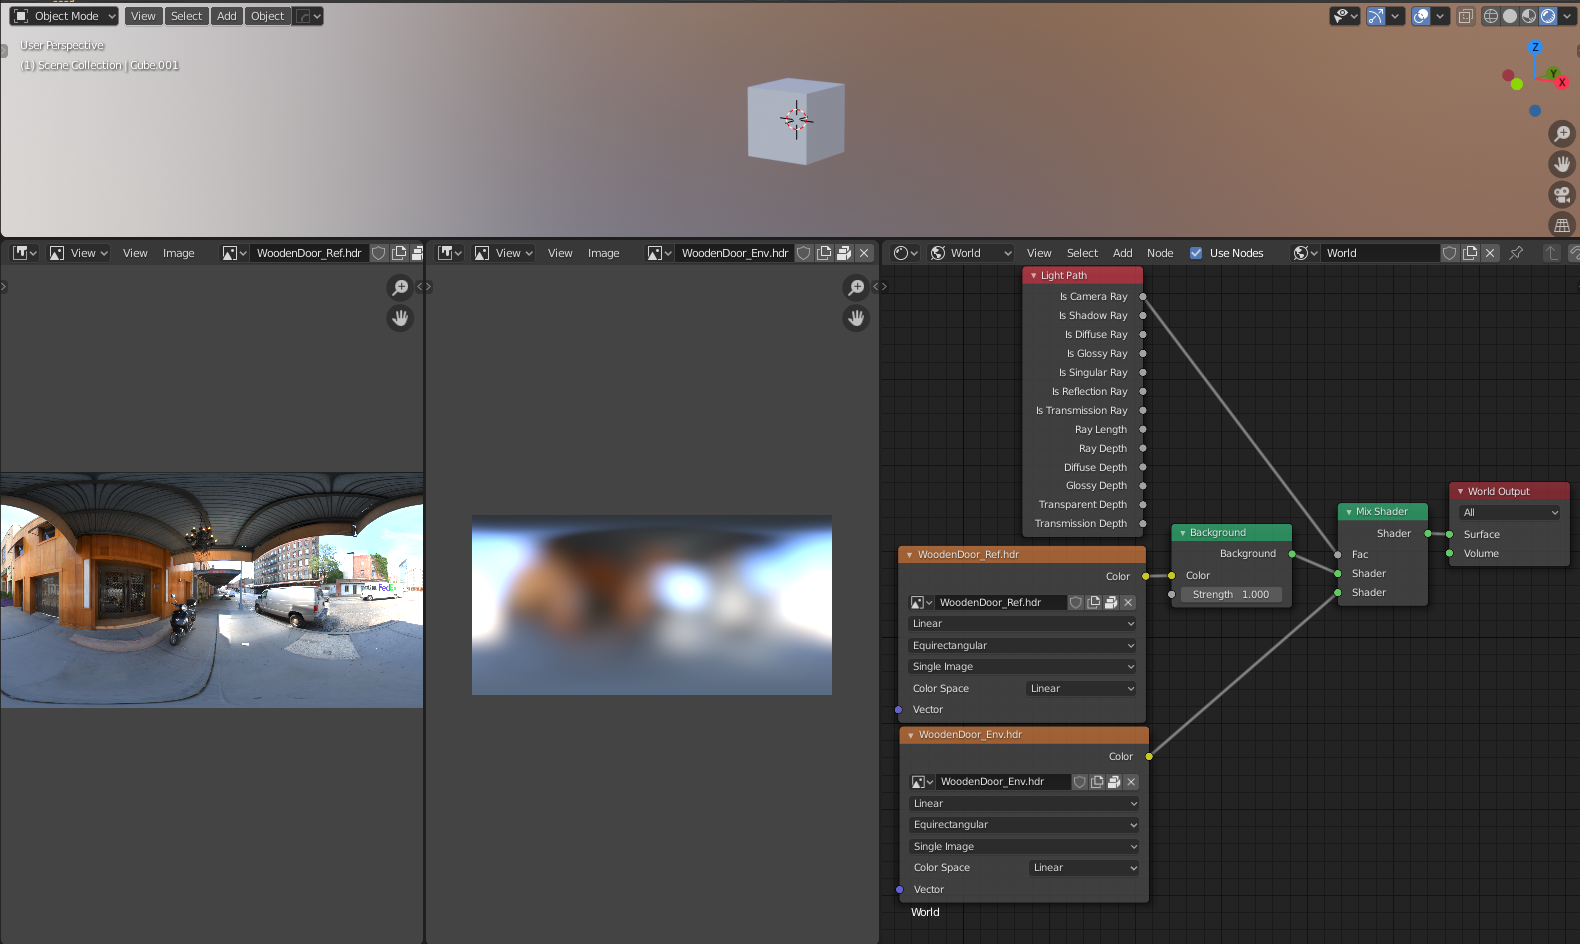
Environment Texture
In Blender, you can setup spherical projection using a HDRI equirectangular image as follows:
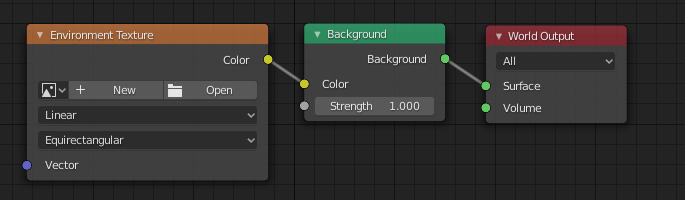
The Environment Texture node contain an image of the surrounding environment including lighting. Some HDRIs you can download come with a low res and hi res image. The low res image is used as a backdrop and the hi res image is used for reflections:
The low res image is sometimes a simple JPG or PNG image file.
One thing to keep in mind is that when you add files to an Environment Texture node:
– the color space for JPG or PNG images is sRGB.
– the color space for HDRI images is Linear.
Why are HDRI images in 1K, 2K, 4K, 8K ?
If you render at 1920×1080 (16:9 aspect ratio) it is recommended to use a similar aspect ratio for your image textures. But what dimensions should my image textures use.
1k = image or display resolution with a width of 1000 pixels.
2k = image or display resolution with a width of 2000 pixels.
3k = image or display resolution with a width of 3000 pixels.
4k = image or display resolution with a width of 4000 pixels.
If your HDRI image is 2k in 16:9 aspect ratio i.e. 1920×1080 pixels you will find the spherical projection appears blurry. As the spherical projection is typically visible as both sky and horizon, it needs to be far away from any objects in the scene. The size of the sphere is enormous. Scaling the image texture using a Mapping Node has little impact and is not recommended.
If your HDRI image is 5k or larger in 16:9 aspect ratio i.e. 2.5 * (1920×1080 pixels) = 4800×2700 pixels the spherical projection appears no longer blurred.
A good practise is to use high resolution 5k+ `ref`HDRI for materials reflections and a <1k ‘env’ HDRI for environment backdrop.
Creating a panoramic equirectangular image in Blender
You can construct a full scene in Blender and generate the hi-res (and lo-res) 360 degrees panoramic image artificially. 360 degrees panoramic images are also called spherical images or equirectangular projection mapped images.
How to create a spherical image
Thank you CGmasters for a simple tutorial!
Cycles render
Simply place camera in center and ignore camera view.
Camera
Lens: Panoramic
Type: Equirectangular
Render
Here is a quick test of what a simple scene and what it looks like as a spherical environment texture:
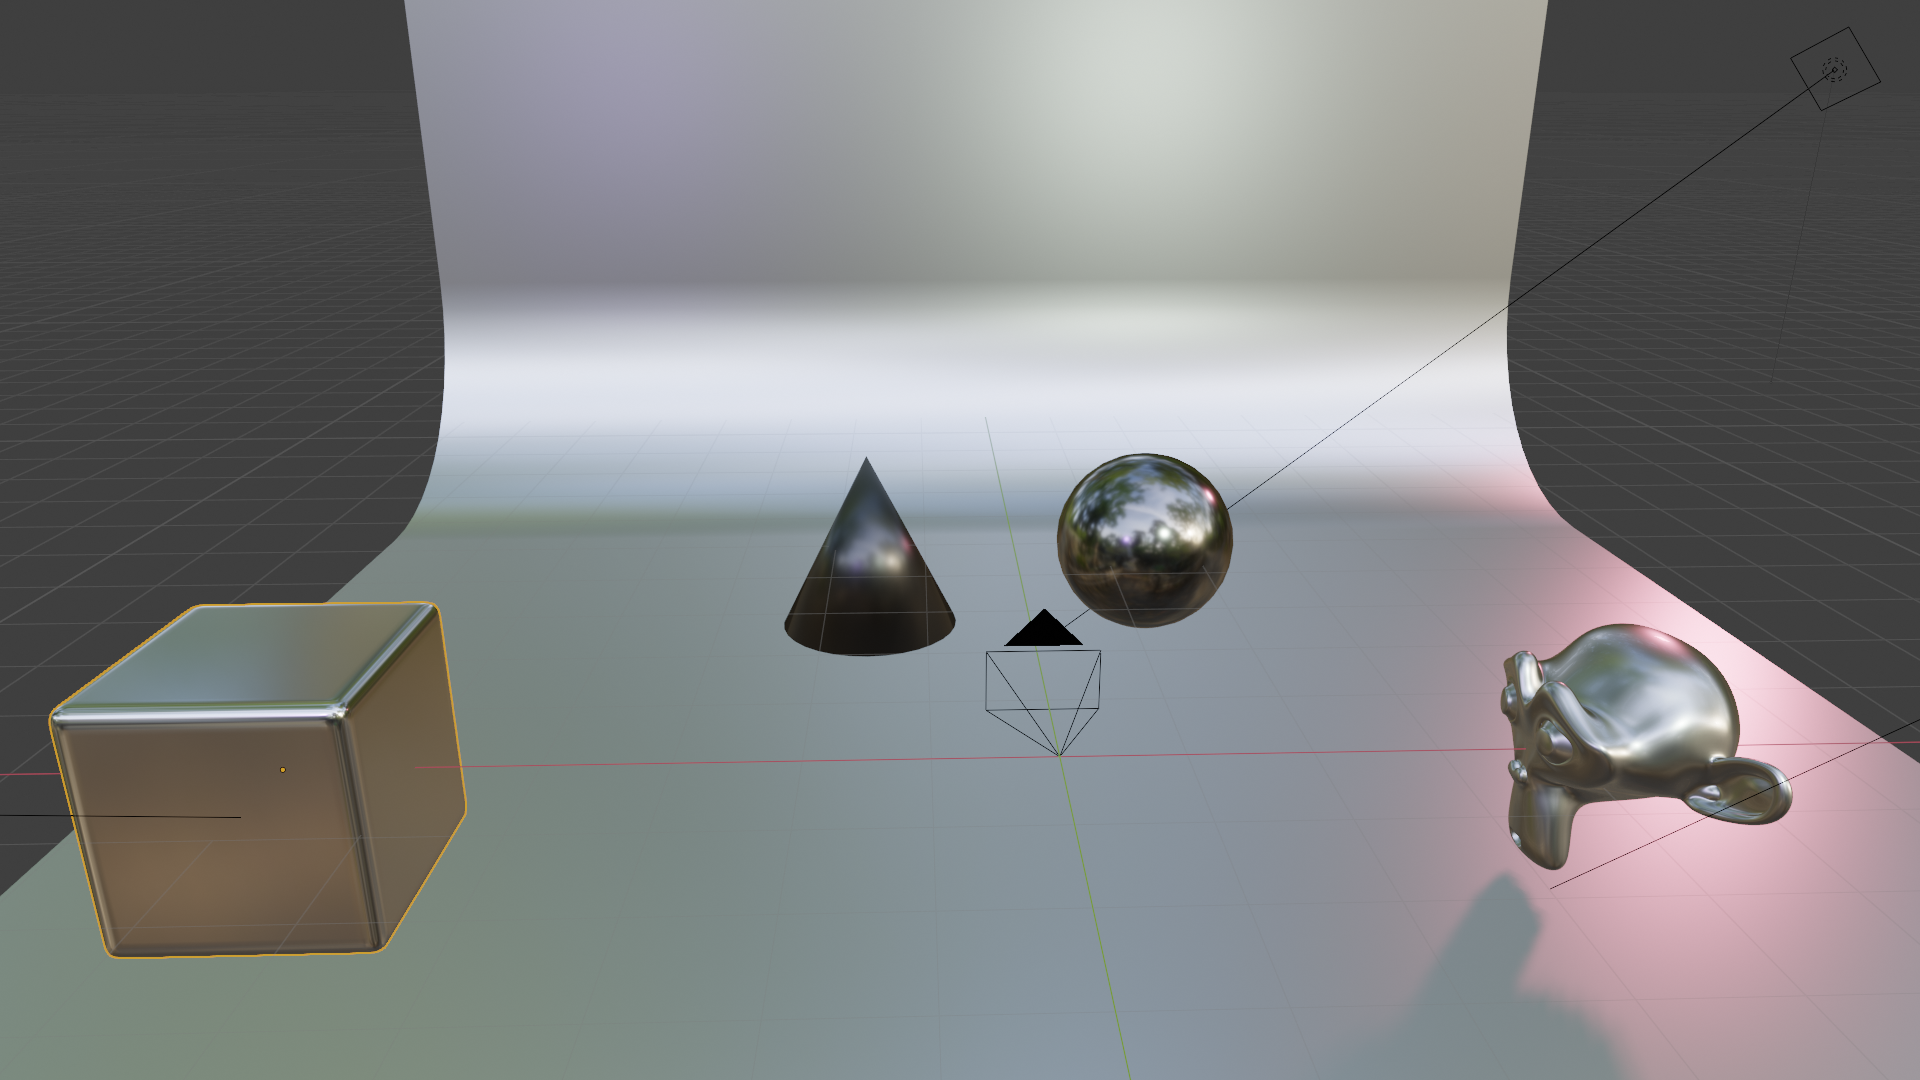

Source File: hdri001.blend
To understand what is happening, in the first picture showing the scene, imagine a huge imaginary sphere in the scene. Mark a seam located behind the camera in this imaginary sphere. Then, unwrap the imaginary sphere onto a flat surface to get the render result. The camera is positioned in the center of the imaginary sphere. The camera preview can be ignored as this is not a real world camera but more of a mathematical trick to produce an equirectangular image.
Experiment
For a non-photorealistic artistic render I wanted to create my own spherical projection using a custom material shader to texture the imaginary sphere. It will need it to be blurred as to not distract from the objects in the scene but for now it is easiest to create a 5k image just in case. We can always resize down but not up.
First, we need to select a suitable material and render it at 5k:
Source File: hdri008.blend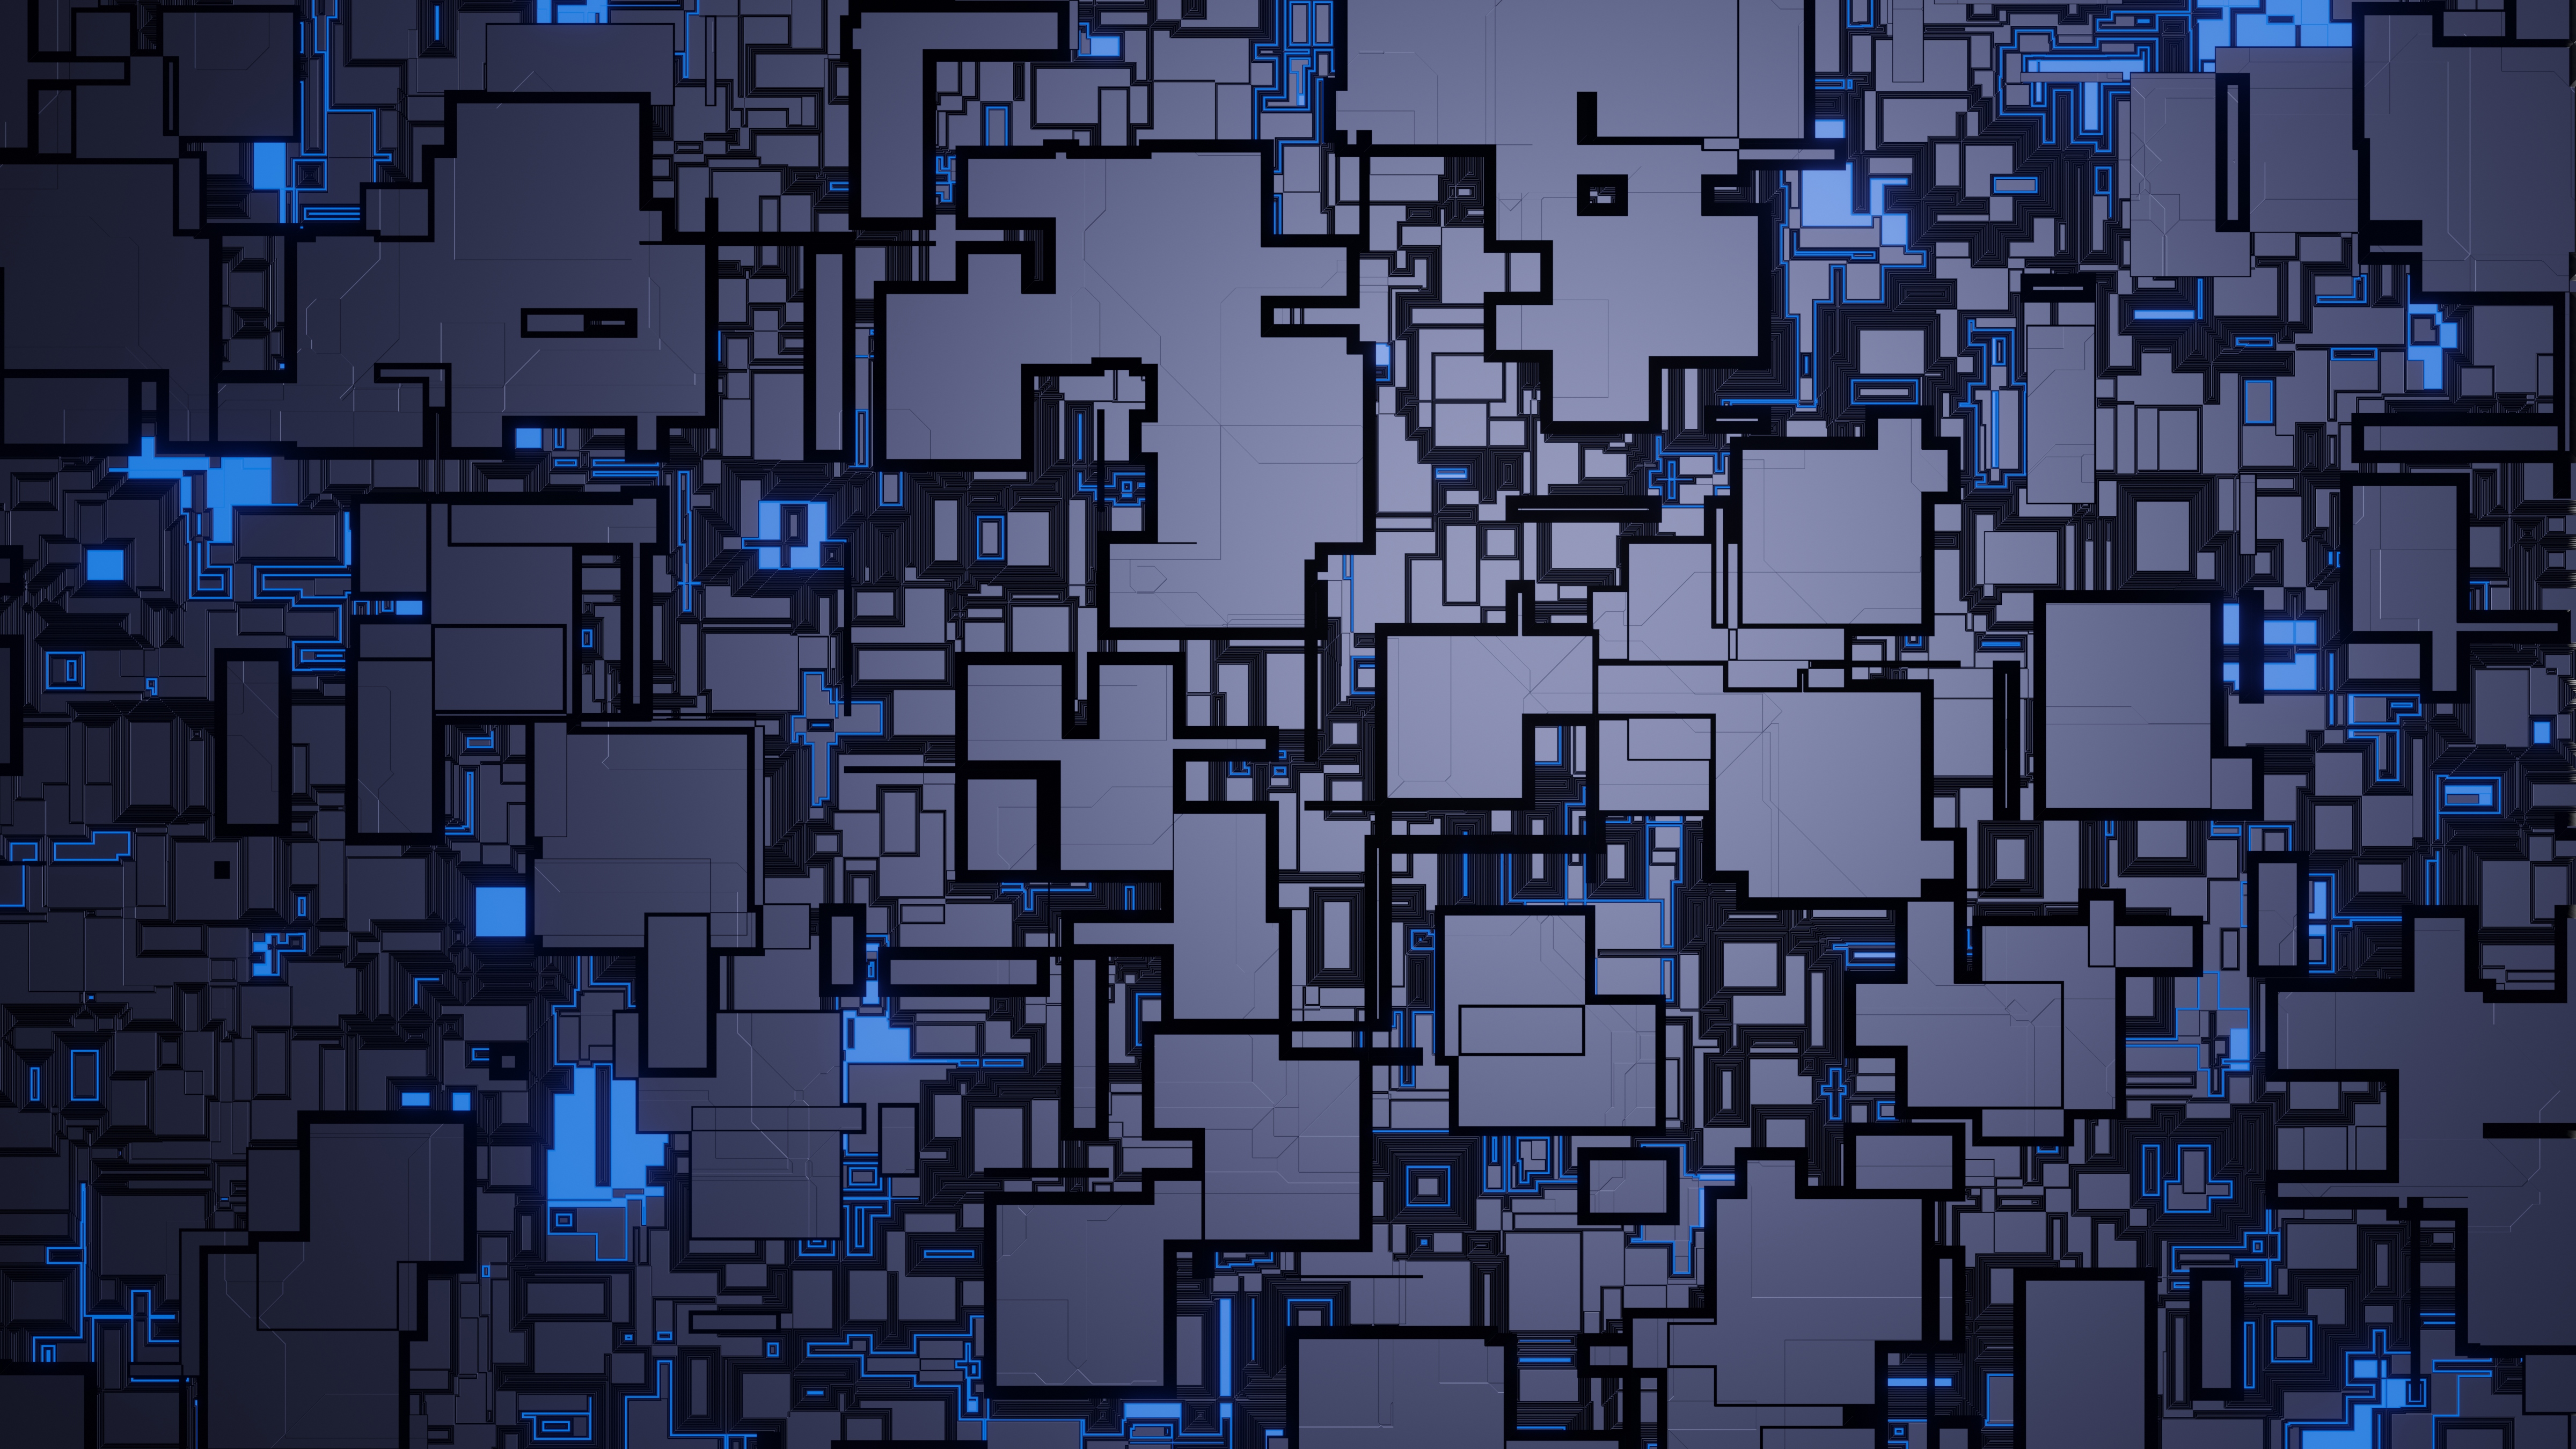
(4800×2700)
Next, we need to turn this into an equirectangular image. That is not going to work with the current image.
We will need to use the Blender scene posted earlier, remove all objects and put a large sphere in the scene. We can place our material on the inside of the sphere and add some lights. The lights should have low specularity as they need to gradually flood a larger area. The size of the sphere does not matter as we can scale the image texture to suit.
Source File: hdri009.blend

Note this image is seamless. The left and right hand side match perfectly.
Now we can use the resulting image file in an environment texture slot in a new scene:
And see what it looks like:
Here you see I made one mistake. I decided to blur the image using a photo editing program. This actually creates a seam as the Gaussian blur does not wrap around between left hand side and right hand side of the image. Depending on your editor there might be an easier way to do this:
- Double the size of the canvas while keeping the original image in the center (i.e. don’t scale it).
- Copy/tile the actual texture to fill the (still blank) space outside the original image.
- Apply the Gaussian blur filter.
- Crop the canvas again to the original size, keeping the image aligned to the center.
I found it is best to keep working at 5k resolution and not switch to 1k resolution. When you blur the image the file size goes down drastically. The added benefit is that all artwork remains projected at the same scale and is not upscaled from a lower resolution image file too much, so what you see is what you get.
The poles will always show some artefacts. The way to resolve this is to paint a horizontal strip along the top and bottom of the image so that when this area gets pinched it blends together nicely. Use layers, gradients, color picker and stamp tool to make corrections.
Seamless tiles
Somewhat unrelated, but here is how to create seamless tiling images by hand:
Creating Seamless Tileable and Spherical Maps.pdf
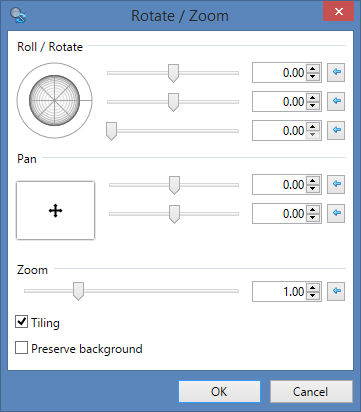
Tip: You can use Paint .NET > Layer > Rotate / Zoom feature to offset images using Pan with Tiling enabled: