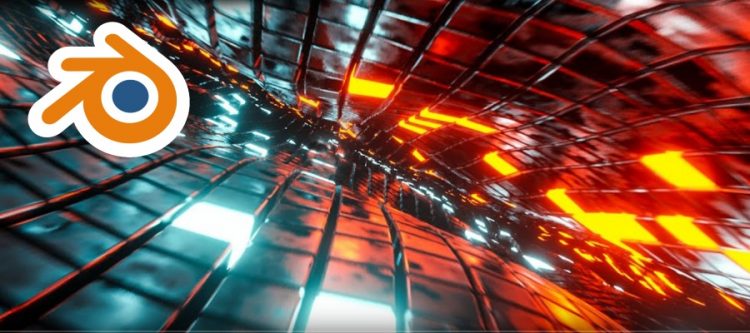
Blender infinite loop animation (Sci-Fi)
Many thanks to Nathan Duck (Ducky 3D) for a great tutorial!
Source file
Render
Quick tips
Add a plane
Scale 8x
Apple scale
[TAB]
[RMB] Subdivide: 30 cuts
[F3] Mesh: Edge Split
Leave edit mode [TAB]
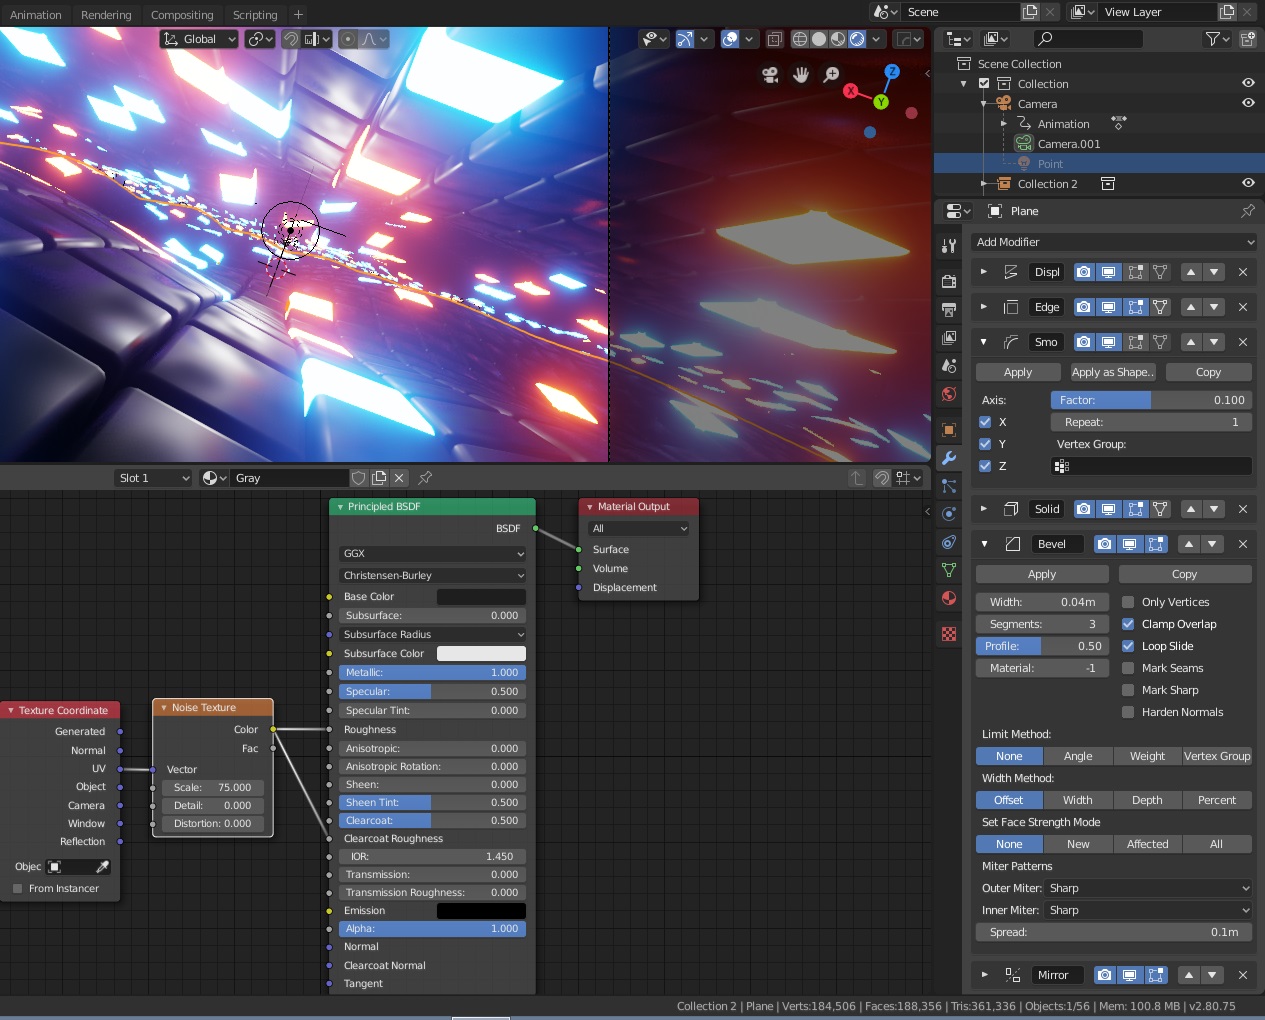
Add modifier > Smooth
Add modifier > Solidify
Thickness: 0.3m
Factor: 0.4
Add modifier > Bevel
Width: 0.02m
Segments: 3
Hide Bevel in viewport for now to reduce vertex count.
[RMB] Shade Flat (for now)
Add modifier > Displacement
Move to bottom of the stack (towards the top of the screen)
Strength: 1.6
Click Texture: New + small button on the right
Type: Clouds
Depth: 0
Size: 4
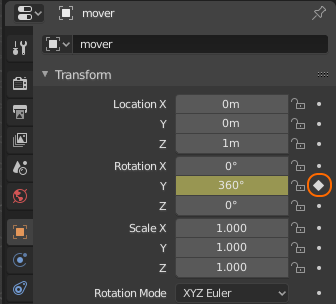
Add empty, name it Mover and move LocZ: 1m
Add empty, name it Mirror and move it LocY: -8m
Animate displacement:
Change Texture coordinates: Local > Object: Mover
Animation: 120 frames
Edit > Preferences > Animation > Default interpolation: Linear.
Move to frame 0
Select empty Mover
Keep value to 0 degrees and click on Set keyframe for Y rotation.
Move to frame 120
Set value to 360 degrees and click on Set keyframe for Y rotation.
Displacement wave should now play as an animation.
Add modifier > Mirror
Mirror Object: Mirror (empty)
Axis: Y
[M] Add to collection > Collection 2
[SHIFT-A] Add collection instance > Collection 2
LocY: -32m
[SHIFT-A] Add collection instance > Collection 2
LocY: -64m
[SHIFT-A] Camera
LocY: 8m
LocZ: 0.47m
RotX: 80deg
RotZ: -180deg
Frame 0 LocY: 8m Set keyframe
Frame 120 LocY: -24m Set keyframe
Camera > Focal length: 24mm
Add 3 more collection instances and move them in position. LocY: -32m, -64m LocZ: 1.63m
Duplicate center lane to left and right lane. It doesn’t have to be seamless, so no mirroring.
Camera > RotY: -20deg
Add 3 material:
gray: Principled BSDF (metal 100% roughness 0%)
blue: emission (strength 10)
orange: emission (strength 10).
[TAB]
[3]
Select a face
Select random (Percent: 9%, Seed: 1)
Assign blue
Select another face
Select random (Percent: 9%, Seed: 2)
Assign orange
Render settings > Enble Ambient Occlusion, Bloom > Intensity: 0.030, Screen Space Reflections, Motion Blur
World settings > Color: Black
Leave for last:
[RMB] Shade Smooth
Bevel > Show in viewport
Final
To make the final result better resemble the feature image we need to make a few more changes:
Edit modifier > Bevel > Width: 0.02m > 0.04m This will make the tiles appear more rounded.
Edit modifier > Smooth > Factor: 0.5 > 0.1 This will close the gap between the tiles.
Render context > Color Management > Look: Very High Contrast
Orange / Blue emission shader tiles > Strength: 200W
Bloom > Intensity: 0.01
Place a bright white point light in front of the camera that moves with the camera that will ambient light the dark tiles:
[SHIFT-A] Point Light (200W White)
Point Light > Object context > Y 4m Z 0.6m
Select point light, select camera, [CTRL-P] Set parent to Object
The point light will now move with the camera.
Gray material > Reduce base color to #1E1E1E and increase roughness. This will make the material darker and blur reflections.
Gray material> Add noise texture to control Roughness creating reflective / dull blobs on the surface of the dark tiles. Add Clearcoat and play with Clearcoat roughness:
Source file
Render
Using a Dots texture + emission.
Source File
infinite-loop-final-dots.blend